Product Documentation
Installation and User Manuals for the packaged solutions. Experiencing problems…? Try searching our Frequently Asked Questions for a solution.Manipulation Documentation 
-
1.MAN Installation
 admin
admin 22-07-2016
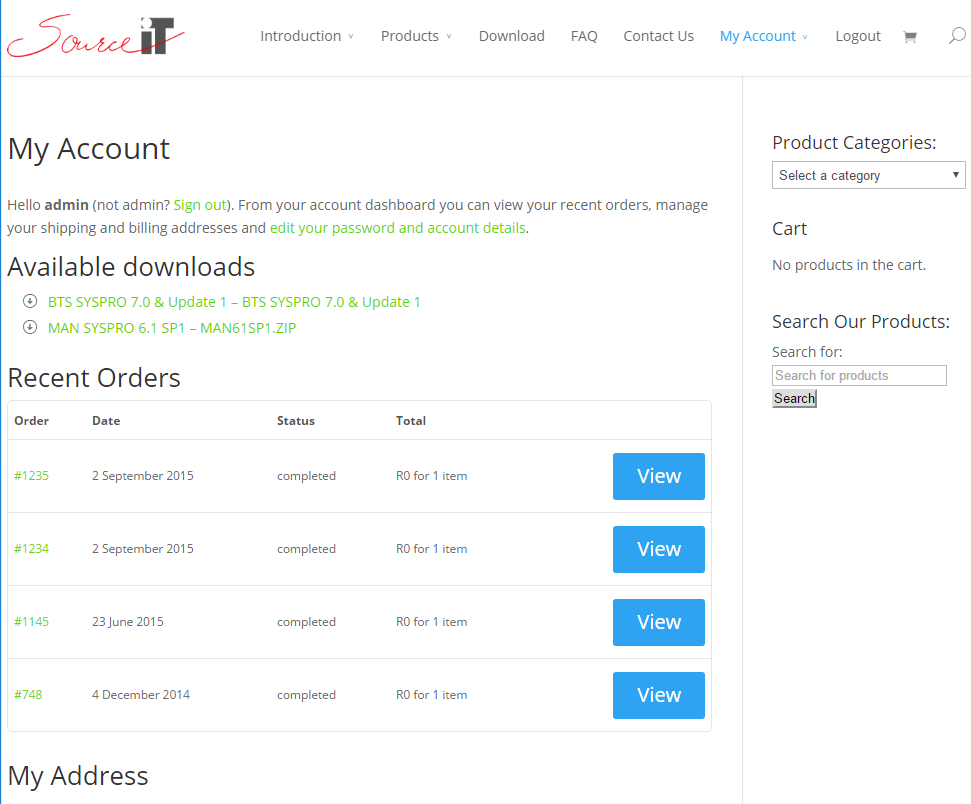
The MAN installation files are specific for each version of SYSPRO and are available for download from the Source IT website: http://www.source-it.co.za/product-category/software/man/
You will be required to login using your once-off registered user account to perform the download.
Simply add the required download file to the "cart" and follow the "checkout" process to complete the order.
An email will be sent to your email address containing hyperlinks that will facilitate the download.
Alternatively, these "orders" with the hyperlinks will also be available on "My Account" page once you are logged in.
 Was this helpful?
 0
0 0
0
Hits: 473- admin22-07-2016
1. Load Programs onto SYSPRO Server
To install the MAN product, follow the same process as per a SYSPRO port upgrade.
Simply unzip the downloaded file place the executable in the SYSPRO base upgrade directory on the Server.
Once that is done, logon on to SYSPRO as an administrator and the following message will be displayed as per Figure 1.1.1
Figure 1.1.1
Yes – a screen as per Figure 1.1.2 will be displayed.
No – the installation will abort.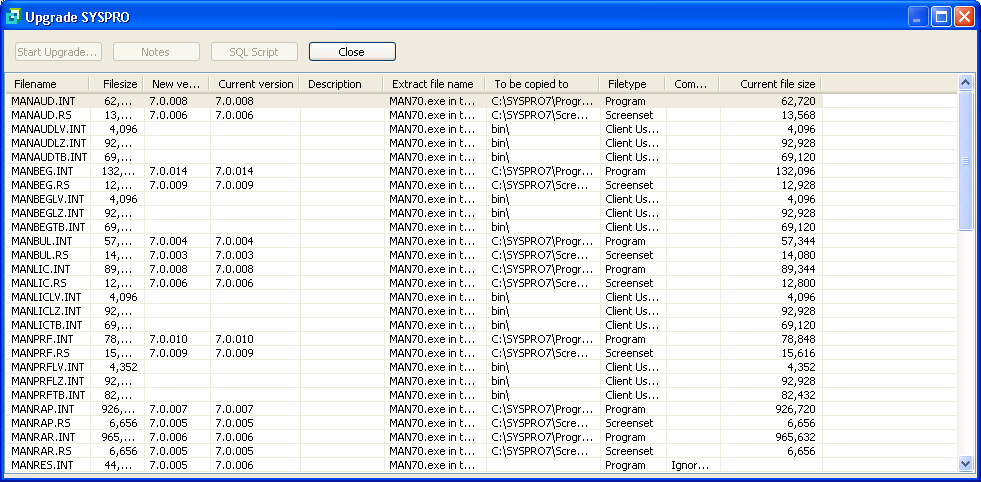
Figure 1.1.2
This screen will list all the MAN program files and will display the SYSPRO folder on the server into which they will be placed.
Select the “Start Upgrade” button and the message as per Figure 1.1.3 will be displayed.
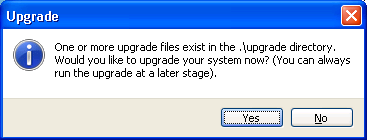
Figure 1.1.3
Yes – the associated MAN program files will be loaded into their relevant SYSPRO folders on the SYSPRO server.
No – the installation will abort.Once the installation has completed successfully, a message as per Figure 1.1.4 will be displayed and it will automatically log you out of SYSPRO.

Figure 1.1.4
Was this helpful?00
Hits: 386 - admin22-07-2016
1. Initialise the MAN System
The MAN programs now reside in the relevant SYSPRO directories and need to be initialised.
This program needs to be run straight after the MAN programs have been installed. It will set up the following:- MAN menu in SYSPRO
- MAN programs security options in SYSPRO
- MAN file re-indexing options in SYSPRO
To run the initialisation process the following needs to be done:
- Login into SYSPRO as an Administrator
- From the SYSPRO menu, select File / Run and a screen as per Figure 1.2.1 will be displayed.
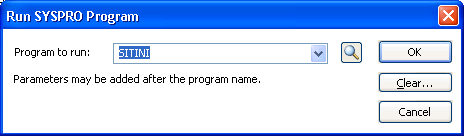
Figure 1.2.1
Next to ‘Program to run:’ type in SITINI and press the “OK” button
A screen as per Figure 1.2.2 will be displayed.
Figure 1.2.2
The following options need to be ticked for MAN to be initialised successfully:
- Create or remove menu
- Create or remove security access
- Create or remove re-indexing of files
If any of the menu, security access or re-indexing of files already exist in the relevant files, this process will remove them.
The Source IT initialisation process will always ascertain whether a custom programs directory has been set up and will use an existing one. If one has not been set up and the System administrator does not wish to manually create one, this program will automatically create one and update the relevant fields in SYSPRO. This directory will be created as a sub-directory within the main SYSPRO directory on the server and will be called ‘cusprog’. (See Figure 1.2.3)

Figure 1.2.3
Create or remove menu - this option will setup the MAN menu in SYSPRO as per Figure 1.2.4.

Figure 1.2.4
If the MAN menu already exists, a warning message will be displayed to the user as per Figure 1.2.5.

Figure 1.2.5
Create or remove security access - this option will setup the MAN programs into the SYSPRO security access menu. To deny/allow access to the various MAN programs the following steps need to be taken:
From the SYSPRO menu select “Setup” > “Groups…” then select a group that will be using the MAN system and select “Edit” and “Change…” and a screen as per Figure 1.2.6 will be displayed.

Figure 1.2.6
On the "Security Access" window, locate the "MAN Conversion System" module, tick the "Access Allowed" tickbox to give permissions to this Group.
Create or remove re-indexing files - this option will add the MAN data files to the SYSPRO Data Dictionary so that they may be re-indexed in the same manner as the SYSPRO ISAM data files. Please note that if you are running SQL, all MAN files will still be created as C-ISAM and will reside in the SYSPRO data directory.
If the MAN programs already exist in the SYSPRO security access files, a
warning message will be displayed to the user as per Figure 1.2.7
Figure 1.2.7
To re-index the MAN files the following needs to be done:
From the SYSPRO menu, select “File” > “Re-index data files” and a list of all SYSPRO data files will be displayed. Go to the end of the list and the MAN files should be listed as per Figure 1.2.8
Figure 1.2.8
If the MAN files already exist in the SYSPRO data dictionary, a warning message will be displayed to the user as per Figure 1.2.9
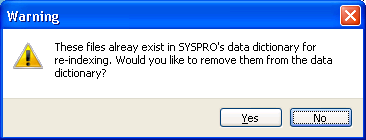
Figure 1.2.9
Once the Source IT initialisation program has successfully completed, the following message will be displayed as per Figure 1.2.10

Figure 1.2.10
OK – will automatically log the user out of the SYSPRO session.
NOTE:
When running SITINI, either to create or remove options from SYSPRO, please ensure that the correct version of SITPRG, SITMEN and SITFIL are sitting in SYSPRO’s programs directory. There are several Source IT packages using a generic installation, one overwrites the other.Was this helpful?00
Hits: 392 - admin22-07-2016
1. Licensing Process
Note that only the “Manipulation Conversion” process off the main menu will require a valid Source IT license code to proceed.
The rest of the MAN processes may be utilised without the need for a license.If the user wishes to license MAN or re-license MAN, the program is found under the "Source IT MAN Conversion System" menu as per Figure 2.4.5

Figure 2.4.5
This process will show all the license details relating to the SYSPRO company that the selected manipulation module is currently running from.
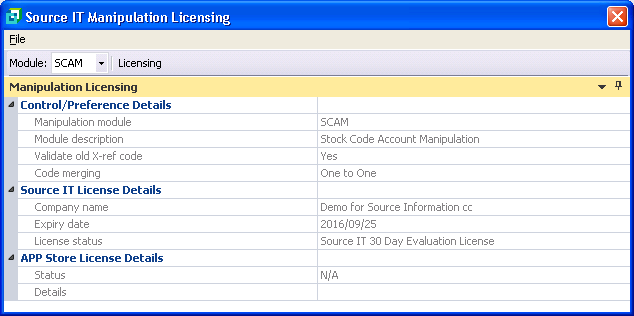
Figure 2.4.5.1
Module – select the associated module from the drop down will load any existing license information for the associated module.
Licensing – selecting this button will invoke the license entry screen (figure 2.4.5.3) where license details may be updated as supplied by the Source IT offices.If it’s the first time MAN is being run, Figure 2.4.5.2 will be displayed.
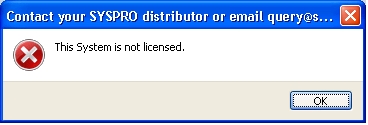
Figure 2.4.5.2
Contact your SYSPRO distributor or Source IT to obtain license codes.
To contact Source IT, you may email your request to cotact us via the Source IT Contact page or alternatively phone +27 11 781 4000.By clicking on OK, Figure 2.4.5.3 will be displayed.
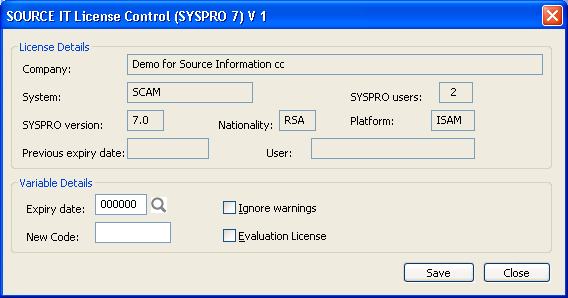
Figure 2.4.5.3
Expiry date – enter the license expiry date as. To ensure correct date format, make use of the date browser to select the expiry date.
New Code – enter the license code as issued by the Source IT offices.
Save – will validate the entered values and verify if the license code is valid for the expiry date based on specifics pertaining to the SYSPRO registered company currently logged into. If deemed valid, the information will be stored as entered.
Close – will exit the program without validating the information on the screen. If the “Ignore warnings” tickbox status was modified, the new setting will be applied to the license validation process in the future.The license process is written to provide a warning message each time it is run in the expiry month indicating the number of days until the license expires (see figure 2.4.5.4).
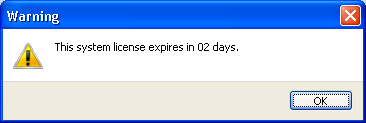
Figure 2.4.5.4
The following information needs to be relayed to the relevant person who will be obtaining your license codes with the exact spelling and case (upper/lower) as per the example in figure 1.3
- Company
- System
- SYSPRO users
- Platform (ISAM)
- SYSPRO version (7.0)
Ensure that both the “Ignore warnings” and “Evaluation License” tickboxes have been UNTICKED.
The relevant “Expiry date” and “New Code” values must be entered and the “Save” button selected.The MAN User Manual will explain the detailed functioning of the various MAN processes.
Was this helpful?00
Hits: 263 - admin16-07-2016
Available manipulation modules include:
- SCAM (Stock Code Account Manipulation)
- GLAM (General Ledger Account Manipulation)
- WHAM (WareHouse Account Manipulation)
- ARAM (Accounts Receivable Account Manipulation)
- APAM (Accounts Payable Account Manipulation)
- PCAM (Product Class Account Manipulation)
- SPAM (Product Class/Stock Code Account Manipulation)
Please note that although the Source IT Manipulation Utility ultimately exists as a single utility to cater for all the relevant SYSPRO modules, as aspects of this functionality have not yet been merged into a single unit, this document will refer to the Stock Code Account Manipulation (SCAM) utility for example purposes. Any other module specific rules will be specifically referred to.
1 System Description
This Source IT Manipulation (MAN) utility will replace selected OLD master codes across SYSPRO with selected NEW master codes based on a predefined cross reference matrix. From SYSPRO 7 onwards, the NEW description will also be maintainable. The user will be required to either:
- capture the OLD and NEW master codes as well as the NEW description (should this be required) using the maintenance program
- import a comma delimited file into the cross reference file using the Import program
The utility takes full cognisance of shared files without the user having to cope with the complexity of knowing which files are shared and which are not.
Please note:
If you have upgraded from an earlier version you may need to delete the Audit trail file. This can be done using the Audit Report “Delete Audit File” button (See "Audit Report" ).
2 System Overview
The user will first set up the preferences which will govern the manipulation of the master codes, such as:
- Option to validate the old X-ref code in the cross reference file
- Option to have an Audit Trail either in summary or detail
- Select the type of conversion i.e. whether to allow for merging of codes
- Set the monitor mode refresh rate
Once the preferences have been determined, the cross references file should be set up. The operator will capture the replacement data by entering OLD value and NEW value.
A utility has been provided to allow the user to import cross references from a Comma Separated Value (.CSV) file to avoid manual capture. (See "Maintain Cross References Codes")
Other facilities offered to the user from the MAN utility will be
- to clear all cross references entries
- to copy cross references from a different SYSPRO company on the same server to the current company
Once the user is satisfied that the preferences and cross references are set up correctly, the manipulation process may be started.
The manipulation program will step through all the associated SYSPRO tables, whether residing in the associated Microsoft SQL database or SYSPRO’s Data and Work folder on the server and will replace all the specified OLD codes with the NEW codes and where pertinent, the NEW description if entered.
If the table being altered has the Old Code as a key and the NEW code already exists in SYSPRO, the program will merge the records with the data of the existing master transaction along with quantities, balances, budgets etc. may need to be added together. If the file being updated has the OLD Code outside of the key, the program will replace the OLD Code with the NEW code.
Audit trail reports will be available for the user to print as required.
Was this helpful?00
Hits: 338 - admin16-07-2016
IMPORTANT: The user will be required to do an ENTIRE backup of the SYSPRO directories and if necessary the associated SQL database BEFORE running this manipulation utility. Source IT will NOT be responsible for damaged or missing data. (For C-ISAM platforms - After the user has run this Manipulation Utility, they will need to Re-index ALL SYSPRO files before continuing with SYSPRO.) The system must be thoroughly checked after this utility has been run, to ensure the data is correct, BEFORE continuing to use SYSPRO.
Snapshot directory - the files that reside in the Snapshot directory WILL NOT be converted. The system administrator will have to re-run the Requirements Calculation from the Requirements Planning to re-create these tables.
Balance function and re-index - it is vital that both a Balance function, and in the case of ISAM versions of SYSPRO, a Re-index of files be run before and after the MAN utility is run.
Temporary files - NO Temporary files will be converted
Shared companies - It is important to note that in the case of companies using shared files (Inventory OR General Ledger), if the user is logged into the main company only the main company’s data will be modified. To modify the sub-companies details, log into the sub-company and repeat the process for the sub-company. If the user is working in a sub-company, the shared files will be affected in the main company and not the sub-company. Only the sub-company’s data will be changed in the shared files.
Validations - If the preferences have been configured with the validation of the OLD X-ref Code set to “Yes”, then the OLD code captured in the XREF file MUST appear in SYSPRO
Validations - The FROM and TO code may not be the same in an XREF entry
Validations - The FROM code may not appear in any other record as the TO code and VISA-VERSA
Validations – An import CSV file with the cross reference information may not contain the same NEW code more than once.
Code merging - When replacing a FROM code with a TO code that already exists in SYSPRO, the static information of the FROM record will be lost and this same information of the TO code will remain in SYSPRO. Examples of these are: Dates, Addresses, Names, Rates, Prices, Credit Limits etc. Other than this static information, where at all possible, the information from both records will be merged. It is therefore assumed that when a merge manipulation occurs, the two records being merged have the same unit of measure, rate, price, currency, etc.
Other SYSPRO users - ensure that no other users are logged into any SYSPRO modules before commencing the manipulation phase of the MAN utility. During this phase, the utility could alter master tables shared by other SYSPRO companies and the Integration tables of other modules. It is therefore imperative that no users are allowed access during the running of this phase. It is quite safe, however, to capture Control/Preferences or cross references with other users busy in SYSPRO.
Incomplete manipulation - If the manipulation is incomplete or the Replacement Process gets cancelled by an operator, the associated temporary folders in both the Data and Work directories of SYSPRO, together with the copies of files within these directories will not be removed and will have to be removed by the administrator.
Note for SQL platforms - This process makes use of SYSPRO’s bulk copy routines to migrate specific SQL tables to temporary C-ISAM-based files for faster manipulation. It is therefore necessary that the associated SYSPRO configurations are in place to allow the bulk copy routines to function. Insure that the “Temporary folder:” entry (See figure 1) refers to a location that has adequate permissions and sufficient free space available.
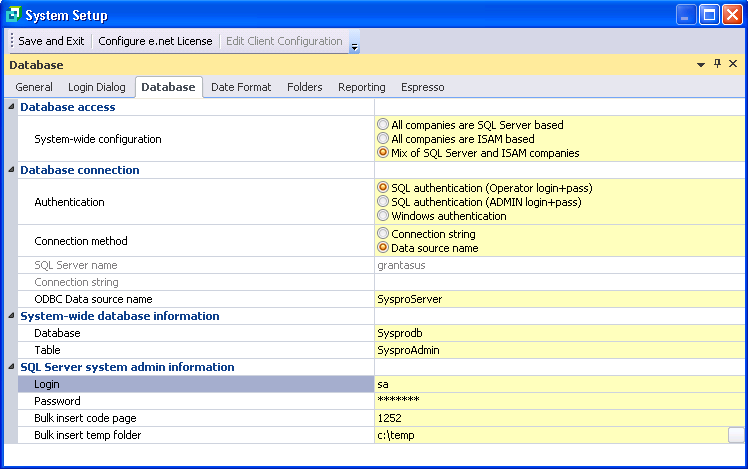
Figure 1
The following are the error messages returned by the test bulk copy routine utilised by the Manipulation Conversion process (See "Manipulation Conversion Execution") just prior to beginning the manipulation of the data. These messages indicate problems with the above configuration.
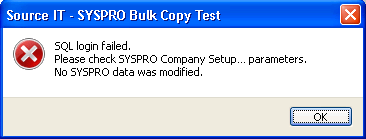
Figure 2

Figure 3

Figure 4

Figure 5
Was this helpful?00
Hits: 330 - admin16-07-2016
Stocked only - Only Stocked codes will be converted. Non-Stocked codes will be ignored.
No merging for LIFO or Last Cost - This manipulation does NOT support the merging functionality if the inventory costing setup is LIFO or Last Cost
Costing Methods in the Inventory Setup in SYSPRO in the case of two merged records will be handled as follows:
Average - The Quantities will be accumulated. The two costs will be accumulated. The Total Cost will be divided by the Total Quantities and the result will be the Cost in the New record.
Standard - The user must run the Inventory Valuation Report (See section 2.3.3) before and after the SCAM procedure. The Cost of the record will remain as the TO stock code. The manipulation will generate a variance report, showing any difference in the costing.
FIFO - There is no cost in the warehouse for this costing method. The INVIFO table will be re-sequenced as per standard SYSPRO based on the RECDAT field.
Last Cost - This costing method will NOT be supported in the SCAM Product. A many to one manipulation will be disallowed if the Inventory Costing is set to Last Cost.
LIFO - This costing method will NOT be supported in the SCAM Product. A many to one manipulation will be disallowed if the Inventory Costing is set to LIFO.
Was this helpful?00
Hits: 330 - admin16-07-2016
Complete normal G/L processing – ensure that the printing of Journals, Registers and Distribution reports are completed and fully posted in ALL SYSPRO modules. This is particularly important where integration with G/L from other modules is in place.
Group Entries - it is important to ensure that ALL Group entries have been successfully posted to the G/L. Failure to do this can result in G/L codes in such Group entries being invalid after manipulation.
Account types - the user must ensure that if merging accounts takes place, that the account types of merged accounts are the same.
GLAM addresses all SYSPRO tables that contains a field defined as a “GlCode” in the Data Dictionary. the SYSPRO Financial report writer does not store the General Ledger codes in this manner and is therefore NOT included in GLAM.
Was this helpful?10
Hits: 199 - admin16-07-2016
Recreate A/R Master/Sub Account File – The A/R Master/Sub-account Index (ARSSUB) will NOT be converted. The user will have to select CREATE MASTER/SUB ACCOUNT FILE on the Re-index Data file screen.
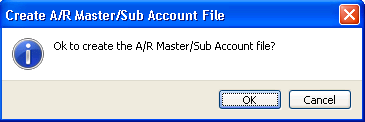
Figure 1.3.6
Was this helpful?00
Hits: 128 - admin16-07-2016
IMPORTANT
If the user sees a failure error while processing the manipulation, the SYSPRO tables will have been partially updated and the administrator will have to restore SYSPRO from the full backup done prior to the manipulation.
If the user cancelled the processing using the available system options, the manipulation process will be incomplete but the user may simply restart the process to complete the manipulation of the remainder of the incomplete tables.
Two temporary “MAN” directories will have been created by the manipulation program and will reside in the SYSPRO Data and Work directories. If the manipulation process is UNSUCCESSFUL, these directories together with the files within created by the manipulation will need to be manually removed by the Administrator.
If the manipulation program completes successfully, the files created by the program, as well as the associated “MAN” directories themselves will be deleted.
The user may have to remove this directory if a previous manipulation run was not successful.
If the user wishes to re-run any of the MAN products that have failed previously, and they receive a message as per Figure 1
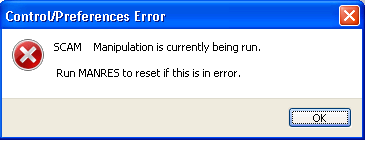
Figure 1
When maintaining the Control/Preferences of a MAN module that has previously failed and has not been reset, you should see a screen as per Figure 2

Figure 2
The "Reset Status" button on the toolbar will allow you to reset the module. Selecting this will bring up the message as per Figure 3
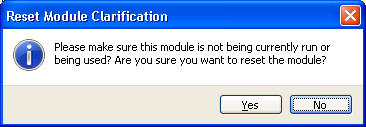
Figure 3
No – will return the focus back to the Manipulation Control/Preference screen as per Figure 2
Yes – will bring up the following Manipulation reset program as per Figure 4

Figure 4
Cancel – will return the focus back to the Manipulation Control/Preference screen as per Figure 2
Yes – will reset the module in question. Manipulation of this module can continue as per normal
The resetting of a module can also be done from the "Manipulation Conversion" program. If the user attempts to run this program and the module was previously attempted and failed, the user will see the screen as per Figure 5

Figure 5
No – will return the focus back to the Manipulation Conversion screen
Yes – will bring up the Manipulation reset program as per Figure 4
If the user is attempting to run a Manipulation module, but there are other Manipulation modules that are "In Progress", the user will not be able to continue with the MAN conversion until this module in question is either reset or allowed to finish.
Was this helpful?00
Hits: 169 - admin16-07-2016
SYSPRO App Store - The fact that our MAN products are now also available from the SYSPRO App Store means that some of the programs may make representation to the SYSPRO APP Store. The entire product has been altered to allow it to function seamlessly whether purchased and licensed from either the SYSPRO App Store or from Source IT directly.
Was this helpful?00
Hits: 121 - admin16-07-2016
From SYSPRO 6.1 SP1 onwards, an email notification function has been added. This will enable the user running the process to request that status notification emails are sent to predefined email addresses while the manipulation module is running. This allows the user to continue working on other tasks and will be notified of the manipulation run progress via emails.
This change has brought about a MAN file modification which is ONLY affected for clients using the MAN product prior to SYSPRO 6.1 SP1 and who are now upgrading to SYSPRO 6.1 SP1 or later.
A message as per figure 1.4.1 will be shown when some of the programs are run.

Figure 1.4.1
By simply selecting the ManipulationControl Preferences option off the main MAN Setup menu, the file will be automatically converted and this message will no longer be displayed.
Was this helpful?00
Hits: 119 - admin16-07-2016
Once the manipulation module has been installed using the procedure from the Installation Manual, the following menu (Figure 2.2.1) should have been added to the SYSPRO menu.

Figure 2.2.1
Was this helpful?10
Hits: 276 - admin16-07-2016
This report will read the records in the Cross Reference file that was captured using the Cross Reference Maintenance program.
This report will show the NEW as well as the OLD Codes for Manipulation and may be configured to print either the valid or invalid Cross Reference entry pages or both.

Figure 2.3.1.1
Module – select the associated module from the drop down.
Show invalid entries – if this option is set to “Yes”, the report will include the pages showing the invalid cross reference entries along with all their associated errors.
Show valid entries – if this option is set to “Yes”, the report will include the pages showing the valid cross reference entries
Was this helpful?00
Hits: 190 - admin16-07-2016
The initial Controls will have the defaults set as per the screen in figure 2.4.2.1 below.
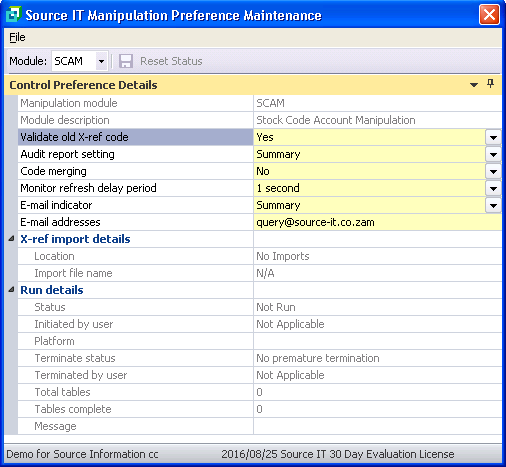
Figure 2.4.2.1
Validate old X-ref code - selecting “Yes” means that when the Cross Reference file is either maintained or imported, the OLD Code entered MUST appear in the SYSPRO Code Master file. Selecting “No” means that any Code may be entered, valid or invalid
Audit report setting - selecting “Summary” means that only the start and end of the different processes entered into while replacing records will be written to the Audit file to be reported on as required. Selecting “Detail” means that both the summary (above) and all details of each individual record changed will be written to the Audit file to be reported on as required. If there are going to be many changes, this option will create an extremely large file. Use this option only if necessary in this case.
Code merging - selecting “No” means that the NEW Code entered in the cross reference table may NOT already exist in SYSPRO. Selecting “Yes” means that the NEW Code entered in the cross reference table may already exist is SYSPRO in which case the Replacement Process will merge these two records.
Merging notes per module.
SCAM:
The Merging option will be unavailable if the Costing Method in the Inventory Setup has been set to LIFO or Last Cost
Monitor refresh delay period - this period specified is used by the manipulation process in determining how frequently to update the status information which is used by the Manipulation Status process (See section 2.2.2) for frequency refresh rate.
E-mail indicator – this indicator determines how many emails will be sent during the run. “Deactivated” will not attempt to send any emails. “Summary” will only send emails indicating that the run has begun and that is has completed as well as any controlled error conditions encountered. “Detail” will send emails as per “Summary” but will also send two emails per table converted, one indicating that the table conversion has started and the 2nd indicating that that table has been successfully converted.
E-mail addresses – the e-mail addresses that the associated run status’s are required to be sent to.
Was this helpful?00
Hits: 250 - admin16-07-2016
If it will be necessary to monitor the manipulation status on the same machine that the process will be running, then it is advisable to create a second SYSPRO session by either logging in again or alternatively using the “New SYSPRO Instance” option.
In this fashion, the one SYSPRO session is used to run the actual manipulation process while the second SYSPRO session is used to run the Source IT Manipulation Status program (See section 2.2.2) to monitor the progress of the application.

Figure 2.2.1.1
Module – select the associated module from the drop down.
Accept Disclaimer – the user will be required to accept the disclaimer by changing this value to “Yes” before the “Begin Replacement” button may become active.
Begin Replacement – selecting this button will begin the associated manipulation for the selected module.
Before the data manipulation begins, the associated Cross Reference file will be validated based on the configured preferences and should an error be encountered, a message as per figure 2.2.1.2 will be shown and the user may need to run the Cross Reference Details Report to determine and fix the errors.

Figure 2.2.1.2
OK - will exit the Manipulation Conversion process with no data having been modified and the user may investigate the errors with the associated cross reference.
Evaluation license – if the MAN module being run is only licensed for evaluation purposes, the run will not be allowed to proceed if there are more than one entry (two entries for “Many to One”) in the Cross Reference (See "Maintain Cross Reference Codes").
The following errors may be encountered causing the process to terminate when the “OK” prompt is selected:

Figure 2.2.1.3

Figure 2.2.1.4

Figure 2.2.1.5
If the user has the operator tickover set to less than 2 minutes, a message as per figure 2.2.1.6 will appear prompting the user to consider increasing the tickover to at least 2 minutes which has been tested as being optimal.

Figure 2.2.1.6
The tickover value may be modified against the user logged in to the current session as per figure 2.2.1.7.
OK - if the user chooses to proceed without modifying the tickover, the procedure will continue, albeit less efficiently and slower than necessary
Cancel - the manipulation process will terminate so the user can change the operator tickover to optimal.

Figure 2.2.1.7
For SQL platforms, a test routine is now performed which will attempt a dummy migration of a SYSPRO table (GENCTL for SYSPRO versions prior to 6.1 SP1 and SALDEP for SYSPRO versions from 6.1 SP1 onwards) into a C-ISAM format using the SYSPRO bulk copy routine. (See "MAN SYSPRO Manipulation Rules" for details on possible errors).
All being well, the user will see the display screen as per figure 2.2.1.8 which will refresh itself every 2 minutes.
Note that this display is not intended to clarify the status during the manipulation run and the Manipulation Status process (See "Monitoring Manipulation Status") should be used to get a detailed status update.

Figure 2.2.1.8
Cancel - Pressing this button will halt the manipulation processing after processing the current file being displayed, and bring up the screen as per figure 2.2.1.9, prompting the operator for a selection. Note that the process may also be halted by selecting the “Terminate” button in the Manipulation Status process (See "Monitoring Manipulation Status").
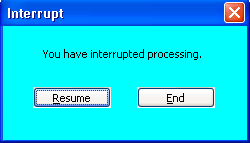
Figure 2.2.1.9
Resume - Will continue the Manipulation Processing as before
End - Will stop the processing and return the user to the Main menu.
PLEASE NOTE: Pressing this END button will cause the manipulation process to be INCOMPLETE.
This process will physically run through all the SYSPRO tables containing the associated master Codes, replacing all OLD codes in the Cross Reference Table with the NEW Codes captured as per the SYSPRO Manipulation Rules (See "MAN SYSPRO Manipulation Rules").
When the replacement process completes successfully, the screen as per figure 2.2.1.10 will appear.

Figure 2.2.1.10
If the replacement process does not complete successfully, the error trapped will be seen on the screen. The user will be able to see this error reflected on the Audit Report (See "Audit Report").
Finally, the user will see a message on the screen showing that the Manipulation was NOT SUCCESSFUL.
The user will be able to view the audit report (See "Audit Report") or view a query style summary of the run using the Manipulation Status utility (See "Monitoring Manipulation Status").
Was this helpful?00
Hits: 283 - admin16-07-2016
Selecting this option will open up a Manipulation Module Status screen as per figure 2.2.2.1 below. This process has two specific purposes:
Monitor live run:
Provides an improved mechanism for the user running the process to monitor the progress of the manipulation during the run which may last from minutes to hours. As any SYSPRO user will be aware, any batch process loses impetus if it spends too much time trying to communicate the details with the user at the same time. For this reason, the batch "crunching" process is separate from the status monitoring process. This requires that two instances of SYSPRO are utilised, one for the batch manipulation and one to monitor the details.
View results from completed run:
Interrogate the results of the last manipulation run in any of the available modules.

Figure 2.2.2.1
Module Information - displays status of a specific module's run along with the relevant settings
Table Details - lists all the tables being modified by the current module along with status icon flags
Table Information - displays the specifics of the records processed based on the highlighted table in the Table Details list.Button functionality:
Refresh - will refresh all active windows displaying revised information during an active run (dependent on the “Monitor refresh delay period” value recorded against the module – see section 2.4.2).
Monitor - will only be active should an instance of the selected module be running and will enter into an auto-refresh mode which will effectively refresh all active windows based on the “Monitor refresh delay period” value recorded against the module (See section 2.4.2).
Stop Monitor - will deactivate the monitor mode.
Terminate - will initiate a terminate request through to the module running in the second instance. The associated module will receive the termination instruction based on the “Monitor refresh delay period” value recorded against the module and proceed to terminate the run at the end of that functional point.
Preferences… - will invoke the Manipulation Preferences Maintenance screen (See section 2.4.2) allowing the user to view and modify relative preference criteria pertaining to the selected module.
Was this helpful?00
Hits: 167 - admin16-07-2016
A listview program as per figure 2.4.1.1 is available to maintain the OLD and NEW master code relationships.
From SYSPRO 7 onwards, MAN allows you to maintain the NEW Description should you wish to alter the description in SYSPRO. If you do not wish to alter the description, you should not enter a value in the New description field and the description in SYSPRO will remain as it currently is
This Cross Reference entry program allows for the entry or import of BOTH valid and invalid entries. Indicator flags are in place to quickly show any errors and along with the ability to use any of the standard SYSPRO listview functionality (sort, filter, group etc.), finding and resolving any issues has been simplified.

Figure 2.4.1.1
Module – select the associated module from the drop down.
– selecting this save button will save the associated transactions and the validation routine will run showing the user a summary of the recorded transactions Figure 2.4.1.2.
Should the user have deleted more than half of the transaction prior to saving, a warning Figure 2.4.1.3 will be shown to the user.
– will action the deletion of the highlighted entry in the Cross Reference Maintenance window.
Preferences – will invoke the Manipulation Control/Preferences program.
Re-validate – will force the revalidation routine which will refresh the various status flags accordingly.
Import File – selecting this button will present an Import File Details window Figure 2.4.1.5. This import option caters for importing from a Comma Seperated Value (CSV) file or alternatively the cross reference from another SYSPRO company.
Xref Report – selecting this button will invoke the Cross Reference Details Report
Clear Entries - will bring up confirmation prompt Figure 7 before removing all entries from the listview.
If the File/Exit option is selected to close the main window, a prompt as per figure 2.4.1.4 will be displayed.
Transaction rules:
- If in the preferences, the “Validate old X-ref code” parameter has been set to “Yes”, then the Old Code MUST already exist in SYSPRO.
- If the New Code already exists, then the manipulation will MERGE the two into the New Code and the Old Code will be deleted.
- If the New Code does not exist as a master entry, the Old Code will just be changed to the New Code.
- If in the Preferences, the Code Merge parameter has been set to “No”, then the New Code may NOT already exist in SYSPRO.
Status definitions:
- Duplicate – OLD Code already exists as an OLD Code on another record
- Circular – OLD Code already exists as an NEW Code on another record
- Invalid – OLD Code is not found on the SYSPRO master
- ManyToOne – NEW Code already exists on the SYSPRO master file OR more than once as a NEW Code and MERGES are not allowed (See “Validate old X-ref code” in section 2.4.2)
- Blank – an OLD or NEW Code value has not been entered
- Same – OLD Code and NEW Code contain the same value
- Size – OLD or NEW Code exceeds the number of characters for this SYSPRO field

Figure 2.4.1.2
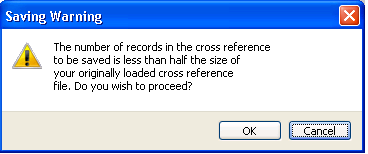
Figure 2.4.1.3
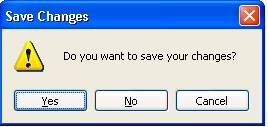
Figure 2.4.1.4
Yes – all lines will be saved and the process will exit
No – the process will exit without saving any of the modifications made to the lines
Cancel – the process will not exit and return the user to the entry process as per figure 2.4.1.1.
The OLD and NEW Codes as well as the NEW Description may be imported into the associated cross reference via an import process. This process allows for a Comma Separated Value (CSV) file containing the OLD and NEW codes as well as the NEW Description (should you require it) to be imported.
The user may either enter the FULL PATH of the file required for Import or they may use the browse for the file they require. If this path has been entered before and the “OK” button was pressed then that file name will appear when re-opening.
The user alternatively has the facility to copy the entries from a cross reference table previously captured for another SYSPRO company on the same server.
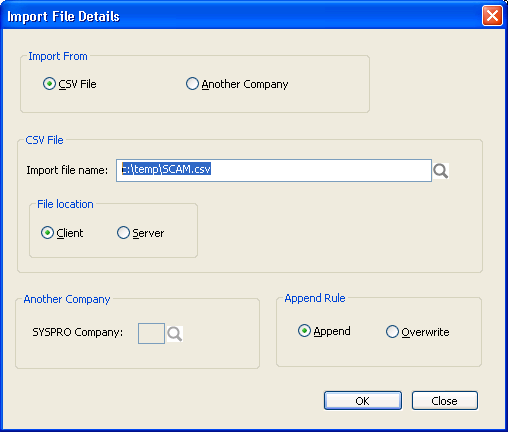
Figure 2.4.1.5
Import From – selecting “CSV File” will allow for the info in the “CSV File” box to be entered. Selecting “Another Company” will allow for the “SYSPRO Company” code to be entered. This selection alternates the availability of the relevant fields.
File location - If SYSPRO is being run on a stand-alone machine, the “Client” will be the only option available and the “Server” option will be disabled. If SYSPRO is being run as Client/Server, the user may select either the “Client” or the “Server” option depending on the location of the file.
SYSPRO Company – enter the SYSPRO company from which the associated Cross Refrence transactions are to be copied. The standard SYSPRO company browse is catered for.
Append Rule – selecting “Append” option will add the imported copied transactions onto the existing Cross Reference list. Selecting “Overwrite” will remove the existing list and replace it with the imported copied transactions.
OK - This will validate the file and path. If it does not exist, the screen in figure 6 will appear. If the file is found successfully, the records on the file will be validated, and if correct, will be inserted into the associated Cross Reference table. The Control file will also be updated with this file name.
Layout of the import file:
For all the MAN modules requiring the OLD Code, NEW Code and optionally the NEW description, using a product such as Microsoft Excel, place:
- the OLD Codes in the first column
- the associated NEW Codes in the second column
- the optional NEW Descriptions in the third column
and then save the spreadsheet as a CSV (Comma delimited) (*.csv) format which will be able to be imported into the required cross reference module.
The OLD Code must appear first and the NEW Code must appear second. Neither of these codes may exceed 30 characters. The optional NEW Description must appear third (should you wish to alter the description) and may not exceed 50 characters (please note, this only applies to SYSPRO 7 onwards). The file must be saved as a CSV (Comma delimited) (*.csv) format file. Once the file has been processed and validated, a confirmation prompt as per figure 2.4.1.8 will be shown to the user to make a final decision on whether to allow the import to proceed or not.
NOTE - SPAM Layout:
The StockCode ProductClass Account Manipulation (SPAM) module requires OLD Product Class, Stock Code and NEW Product Class and would therefore require three columns with the OLD Product Class in the first column, the Stock Code in the second column and the NEW Product Class in the third column.Close - Will close the Import screen, returning the focus to the main menu
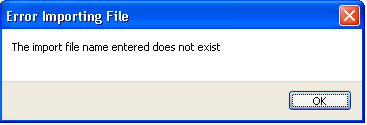
Figure 2.4.1.6
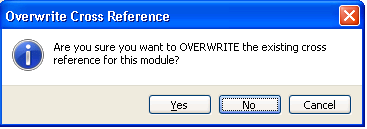
Figure 2.4.1.7
Yes - will delete all records that have been captured in the Cross Reference Table
Cancel - will ignore the delete and return the user to the entry process as per figure 2.4.1.1.

Figure 2.4.1.8
OK - will proceed with importing the validated cross reference entries into the Cross Reference Maintenance transaction list (Figure 2.4.1.1)
Cancel - will abort the import process and no transactions will have been updated.
Note that this procedure has an automatic version backup built into it.
Each time the user enters a module to maintain the associated cross reference list, the process automatically exports the existing list into a Comma Seperated Value file in a folder residing off of the SYSPRO data folder on the server.
The naming convention of these backup files is ??XR_YYMMDD_999.csv where:
- ?? denotes the module (SC = SCAM, AR = ARAM etc.)
- 999 denotes a sequence number beginning at 001
Example: SCXR_120118_001.csv
Location example: ..SYSPRO60DATAMANSCAM (for SCAM backup files).
NOTE for Evaluation license – if the MAN module being run is only licensed for evaluation purposes, the run will not be allowed to proceed if there are more than one entry (two entries for “Many to One”) in the Cross Reference. If the license is for evaluation, the following rules apply:
- If setup is “One to One”, only a single Cross Reference entry
- If setup is “Many to One”, two entries are permitted BUT the NEW Code for both Cross Reference entries must be the same.
Was this helpful?00
Hits: 231 - admin16-07-2016
Display hidden Stock Code column – by default the additional column required by the SPAM product is not visible. To make the Stock Code column visible, right-click the Cross Reference Maintenance column headings and an option list as per figure 2.4.1.9 will appear.

Figure 2.4.1.9
Select the “Field Chooser” option from the list and Field Chooser window will appear (figure 2.4.1.10) showing the additional fields that may be added to the list view.

Figure 2.4.1.10
Select and drag the Stock Code field into the Cross Reference Maintenance column headings, positioning the field as desired (Figure 2.4.1.11)
If required, the “Stock Description” field may also be added.

Figure 2.4.1.11
Was this helpful?00
Hits: 156 - admin16-07-2016
SPAM Reconstruct SALPRT/SALSLT
Only for the Stock Code Product Class Account Manipulation (SPAM) module.
Due to the fact that the SA Product Class Transaction Summary (SALPRT) and SA Salesperson Transaction Summary (SALSLT) tables only contain the SYSPRO Product Class and do not contain the SYSPRO Stock Code, they are not updated directly by the SPAM module.
This routine will correctly rebuild these Sales Analysis tables using the SA Sales History Master (SALSHM) accordingly.
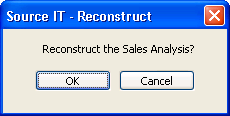
Figure 2.2.3.1
OK - Will proceed with the rebuild process
Cancel - Will exit this process and return back to the main menu.
Was this helpful?00
Hits: 142 - admin16-07-2016
This process will print all the audit records created by the associated manipulation runs and caters for date specification as well as reprinting. The user is also able to delete the audit file from within this process.
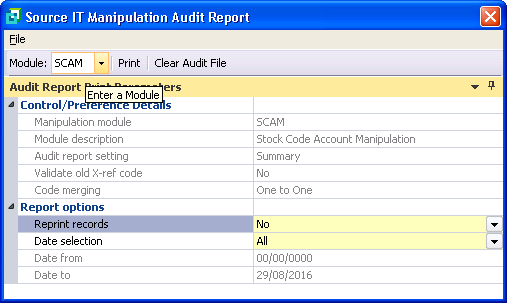
Figure 2.3.1.1
Clear Audit File - this button will delete ALL the Audit File records for the selected module.
Reprint records – if set to “Yes”, the report will be produced for all records in the selected date range whether previously printed or not.
Date selection – selecting “Single” will only allow entry of the “Date from” field. “Range” will allow entry of the “Date from” and “Date to” fields. If “All” is selected, all the unprinted audit records will print in date and time sequence.
Should the user have set the “Audit report setting” in the Manipulation Control/Preferences (Section 2.4.2) to “Detail”, then the Audit report will have one of four different types of Operations or Actions:
U = Update
The record being replaced does not have the NEW code as part of the key and the OLD code is replaced by the NEW code. The NEW record key on the report will NOT appear as the key is the same for both OLD and NEW.
I = Insert
The record being replaced has the NEW code as part of the key which does NOT already exist in SYSPRO. This NEW record is inserted.
D = Delete
The record being replaced has the NEW code as part of the key which already exists in SYSPRO. There are NO fields to accumulate so the OLD record is deleted.
A = Accumulate
The record being replaced has the NEW code as part of the key which already exists in SYSPRO. Where possible, fields of the OLD record are accumulated into the NEW record.
The Audit Report will also display highlight characters making it easy to pick up specific types of messages:
!! – denotes warning messages
** – denotes fatal error messages
ii – denotes information messages
It is advisable to run this report as Landscape, as Portrait may truncate some of the information
Was this helpful?00
Hits: 134 - admin31-01-2020
This report has been specifically developed for SYSPRO environments using STANDARD costing and the information on this report may be used to account for the variances when balancing the Inventory module.

Figure 2.3.3.1
If the Costing Method in the Inventory Setup has NOT been set to STANDARD, the user will see the following screen in figure 2.3.3.2 and they will be unable to run the report
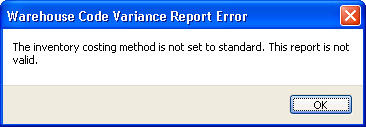
Figure 2.3.3.2
The parameters for the SYSPRO Inventory Valuation Report must appear as per figure 2.3.3.3.

Figure 2.3.3.3
Was this helpful?00
Hits: 49 - admin16-07-2016
This report has been specifically developed for SYSPRO environments using STANDARD costing and the information on this report may be used to account for the variances when balancing the Inventory module.

Figure 2.3.3.1
If the Costing Method in the Inventory Setup has NOT been set to STANDARD, the user will see the following screen in figure 2.3.3.2 and they will be unable to run the report
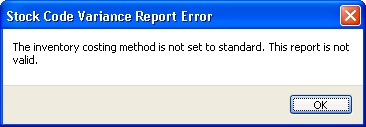
Figure 2.3.3.2
The parameters for the SYSPRO Inventory Valuation Report must appear as per figure 2.3.3.3.
Figure 2.3.3.3
Was this helpful?00
Hits: 149


Bank Translation System Documentation 
-
1.BTS Installation
- nikki31-08-2016
The BTS installation files are specific for each version of SYSPRO and are available for download from the Source IT website: http://www.source-it.co.za/product-category/software/bts/
You will be required to login using your once-off registered user account to perform the download.
Simply add the required download file to the "cart" and follow the "checkout" process to complete the order.
An email will be sent to your email address containing hyperlinks that will facilitate the download.
Alternatively, these "orders" with the hyperlinks will also be available on "My Account" page once you are logged in.
Was this helpful?00
Hits: 597 - nikki31-08-2016
Load Programs onto SYSPRO Server
To install the BTS product, follow the same process as per a SYSPRO port upgrade.
Simply unzip the downloaded file place the executable in the SYSPRO base upgrade directory on the Server.
Once that is done, logon on to SYSPRO as an administrator and the following message will be displayed as per Figure 1.1.1Figure 1.1.1
Yes – a screen as per Figure 1.1.2 will be displayed.
No – the installation will abort.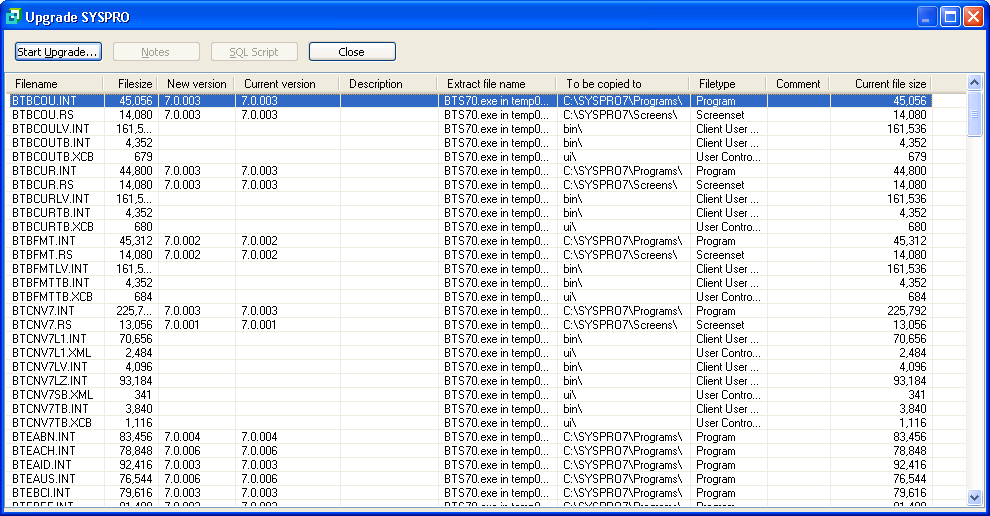
Figure 1.1.2
This screen will list all the BTS program files and will display the SYSPRO folder on the server into which they will be placed.
Select the “Start Upgrade” button and the message as per Figure 1.1.3 will be displayed.
Figure 1.1.3
Yes – the associated BTS program files will be loaded into their relevant SYSPRO folders on the SYSPRO server.
No – the installation will abort.Once the installation has completed successfully, a message as per Figure 1.1.4 will be displayed and it will automatically log you out of SYSPRO.
Figure 1.1.4
Was this helpful?00
Hits: 527 - nikki31-08-2016
Initialise the BTS System
The BTS programs now reside in the relevant SYSPRO directories and need to be initialised.
This program needs to be run straight after the BTS programs have been installed. It will set up the following:- BTS menu in SYSPRO
- BTS programs security options in SYSPRO
- BTS file re-indexing options in SYSPRO
- BTS trigger programs for EFT validation and creation of bank files after a batch has been extracted/re-extracted.
To run the initialisation process the following needs to be done:
- Login into SYSPRO as an Administrator
- From the SYSPRO menu, select File / Run and a screen as per Figure 1.2.1 will be displayed.
Figure 1.2.1
Next to ‘Program to run:’ type in SITINI and press the “OK” button
A screen as per Figure 1.2.2 will be displayed.
Figure 1.2.2
The following options need to be ticked for BTS to be initialised successfully:
- Create or remove menu
- Create or remove security access
- Create or remove re-indexing of files
- Setup trigger points(Current company)
If any of the menu, security access or re-indexing of files already exist in the relevant files, this process will remove them.
The Source IT initialisation process will always ascertain whether a custom programs directory has been set up and will use an existing one. If one has not been set up and the System administrator does not wish to manually create one, this program will automatically create one and update the relevant fields in SYSPRO. This directory will be created as a sub-directory within the main SYSPRO directory on the server and will be called ‘cusprog’. (See Figure 1.2.3)
Figure 1.2.3
Create or remove menu - this option will setup the BTS menu in SYSPRO as per Figure 1.2.4.
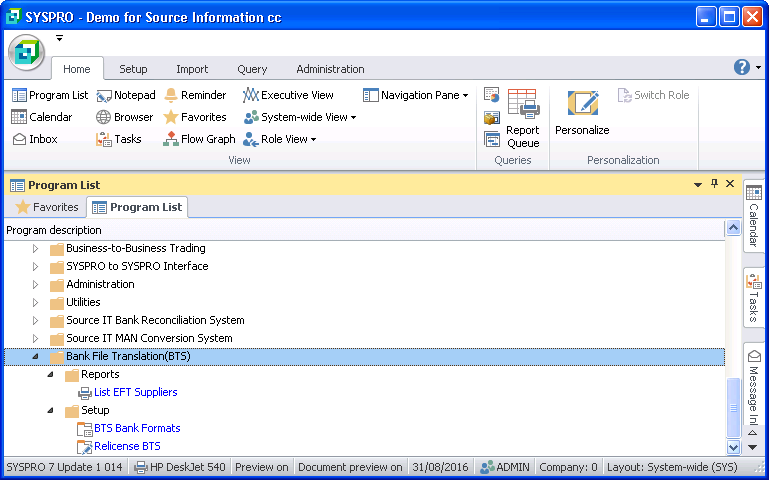
Figure 1.2.4
If the BTS menu already exists, a warning message will be displayed to the user as per Figure 1.2.5.
Figure 1.2.5
Create or remove security access - this option will setup the BTS programs into the SYSPRO security access menu. To deny/allow access to the various BTS programs the following steps need to be taken:
From the SYSPRO menu select “Setup” > “Groups…” then select a group that will be using the BTS system and select “Edit” and “Change…” and a screen as per Figure 1.2.6 will be displayed.
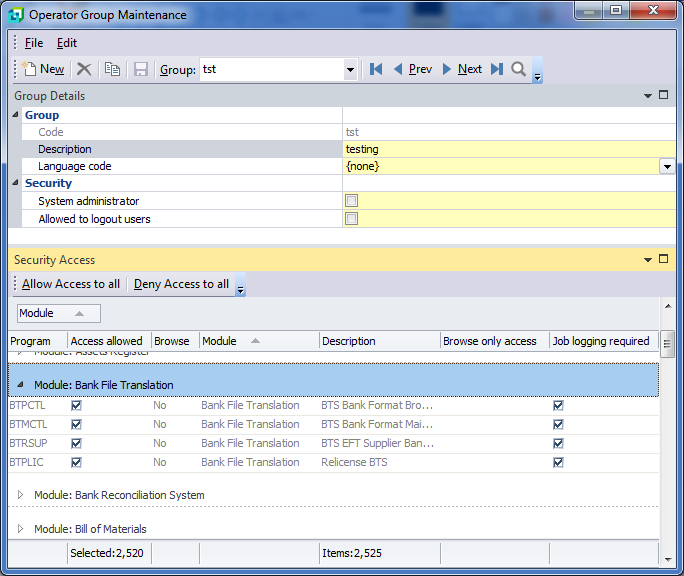
Figure 1.2.6
On the "Security Access" window, locate the "BTS Conversion System" module, tick the "Access Allowed" tickbox to give permissions to this Group.
It is important that the users that will be extracting the EFT payment in SYSPRO has access to the necessary BTS programs.
Create or remove re-indexing files - this option will add the BTS data files to the SYSPRO Data Dictionary so that they may be re-indexed in the same manner as the SYSPRO ISAM data files. Please note that if you are running SQL, all BTS files will still be created as C-ISAM and will reside in the SYSPRO data directory.
If the BTS programs already exist in the SYSPRO security access files, a
warning message will be displayed to the user as per Figure 1.2.7Figure 1.2.7
To re-index the BTS files the following needs to be done:
From the SYSPRO menu, select “File” > “Re-index data files” and a list of all SYSPRO data files will be displayed. Go to the end of the list and the BTS files should be listed as per Figure 1.2.8
Figure 1.2.8
If the BTS files already exist in the SYSPRO data dictionary, a warning message will be displayed to the user as per Figure 1.2.9
Figure 1.2.9
Once the Source IT initialisation program has successfully completed, the following message will be displayed as per Figure 1.2.10
Figure 1.2.10
OK – will automatically log the user out of the SYSPRO session.
NOTE:
When running SITINI, either to create or remove options from SYSPRO, please ensure that the correct version of SITPRG, SITMEN, SITFIL and SITTRG are sitting in SYSPRO’s programs directory. There are several Source IT packages using a generic installation, one overwrites the other.Setup trigger points (Current company)
This option is a very IMPORTANT step to run and failure to do so will result in no bank file being created during an EFT run.
This option will set up two BTS programs at various trigger points in SYSPRO that will validate banking details accordingly and automatically create a bank file during an EFT run.PLEASE NOTE: This option ONLY needs to be run for every SYSPRO company that will be utilizing EFT.
The following trigger points will be added to the SYSPRO trigger programs options as per Figure 1.2.11 and 1.2.12.

Figure 1.2.11

Figure 1.2.12
To ensure that the relevant trigger points were setup correctly, from the
SYSPRO menu, under the Administration tab, select on Trigger Programs. Locate the A/P Supplier Maintenance programs and the following tick boxes should be ticked:- After supplier added
- After supplier changed
- After supplier deleted
By highlighting each option and clicking on the ‘Maintain Trigger’ button, all three should be calling a program called “BTTSVL.int“ that resides in the SYSPRO programs directory.
Locate the EFT Beneficiary Maintenance program and the following tick boxes should be ticked:
- After beneficiary added
- After beneficiary changed
- After beneficiary deleted
By highlighting each option and clicking on the ‘Maintain Trigger’ button, all three should be calling a program called “BTTSVL.int” that resides in the SYSPRO programs directory.
Locate the EFT Payment Extract program and the following tick box should be ticked:
After EFT payment extract
By highlighting this option and clicking on the ‘Maintain Trigger’ button, it should call a program called “BTTCAL.int” that resides in the SYSPRO programs directory.
NOTE: THIS OPTION MUST BE RUN FOR EVERY COMPANY THAT UTILIZES EFT!Once the SOURCE IT initialization program has successfully completed, the following message will be displayed as per Figure 1.2.13
Figure 1.2.13
The process will automatically LOG OUT of SYSPRO. Log in again to ensure that the initialization installed everything successfully by following the steps outlined above.Was this helpful?00
Hits: 591 - nikki05-09-2016
Licensing Process
If the user wishes to license BTS or re-license BTS, the program is found under the "Bank File Translation(BTS)" menu as per Figure 2.4.5

Figure 2.4.5
If it’s the first time BTS is being run, Figure 2.4.5.2 will be displayed.
Figure 2.4.5.2
Contact your SYSPRO distributor or Source IT to obtain license codes.
To contact Source IT, you may email your request to cotact us via the Source IT Contact page or alternatively phone +27 11 781 4000.By clicking on OK, Figure 2.4.5.3 will be displayed.

Figure 2.4.5.3
Expiry date – enter the license expiry date as. To ensure correct date format, make use of the date browser to select the expiry date.
New Code – enter the license code as issued by the Source IT offices.
Save – will validate the entered values and verify if the license code is valid for the expiry date based on specifics pertaining to the SYSPRO registered company currently logged into. If deemed valid, the information will be stored as entered.
Close – will exit the program without validating the information on the screen. If the “Ignore warnings” tickbox status was modified, the new setting will be applied to the license validation process in the future.The license process is written to provide a warning message each time it is run in the expiry month indicating the number of days until the license expires (see figure 2.4.5.4).
Figure 2.4.5.4
The following information needs to be relayed to the relevant person who will be obtaining your license codes with the exact spelling and case (upper/lower) as per the example in figure 1.3
- Company
- System
- SYSPRO users
- Platform (ISAM)
- SYSPRO version (7.0)
Ensure that both the “Ignore warnings” and “Evaluation License” tickboxes have been UNTICKED.
The relevant “Expiry date” and “New Code” values must be entered and the “Save” button selected.The BTS User Manual will explain the detailed functioning of the various BTS processes.
Was this helpful?00
Hits: 235 - nikki05-09-2016
Conversion Process
This is only required when upgrading from SYSPRO 6.1 SP1 and earlier after having used BTS in any version of SYSPRO prior to SYSPRO 7. Due to the enlargement of fields in SYSPRO 7, a BTS conversion program is required to be run in order to enlarge the necessary field sizes in the BTS System.
If the data requires the conversion to be run, Figure 1 will be displayed

Figure 1
To run the conversion program, from the SYSPRO menu, select File / Run and enter BTCNV7. A screen as per Figure 2 will be displayed
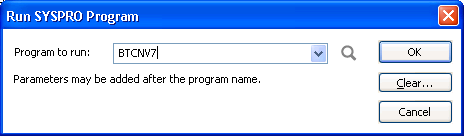
Figure 2
Selecting OK will show the screen as per Figure 3
 Figure 3
Start Processing will run the conversion of the data. Once this has been completed, summary detail will be seen as per Figure 4
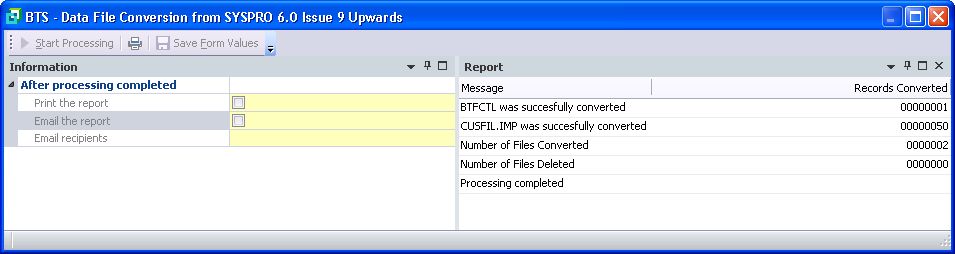
Figure 4
When closing the BTS conversion program after it has completed successfully, a message as per Figure 5 will be displayed and it will automatically log you out of SYSPRO.

Figure 5
Was this helpful?00
Hits: 235 - nikki06-09-2016
Nedbank have introduced a new format called “NetBank Business (Secure Format). This format has a very complex algorithm in the trailer record to prevent fraud on the bank file. In order for BTS to calculate this algorithm a Dynamic Link Library (DLL) process had to be written and the BTS process invokes this DLL file to do the final hash calculation. This process has to be performed on a client machine as it is only supported by a Windows Environment. This process has been called BTSNEDHash.dll. It will automatically register in the client machine registry on any user’s machine that is running BTS the first time that the program is invoked on that machine. When BTS is installed, this DLL file is automatically copied onto the server SYSPRO/BASE folder. When a user runs either the BTS Bank setup program for the NetBank Secure Format or performs an EFT extract, the program will automatically copy this DLL file onto that user’s client machine in a folder called BTSNED within the SYSPRO/BASE folder. The program will then check if this DLL has been registered on that client machine. If it has not, then the BTS program will automatically register this DLL. All this processing happens in seconds in the background without any user intervention required.However, due to security measures applied to client machines in various companies, the automatic registering of this DLL could fail. If this is the case, an administrator with full administrative rights might need to login to that client computer and invoke the relevant BTS program. This step will only need to be done once per client machine if there is tight security at that specific company.
If the DLL does not register when an administrator invokes the BTS process, then there is a manual procedure to follow as follows:- Please run an "elevated" dos session (right click on cmd and select 'Run as administrator') on the client machine
- Access the folder that contains the following command REGASM.EXE. It usually sits in the following folder:
c:windowsmicrosoft.netframeworkv2.0.50727
NOTE: Irrespective whether the client machine is running 64bit or not, the 32bit 'Framework' folder must be used. - Once in that folder, type in the following command (replacing the path below in quotes with your SYSPRO installation path on the client machine):
REGASM “c:syspro71basebtsnedBTSNEDHash.dll”
This will now register the DLL on the client machine.
If for some reason you wish to de-register the DLL off any client machine, then you will need to type in the following command (replacing the path below in quotes with your SYSPRO installation path on the client machine):
REGASM “c:syspro71basebtsnedBTSNEDHash.dll” /unregisterPrior to a successful import into the NetBank Software, the company needs to register a SEED NUMBER with Nedbank as follows.
- They will need to obtain a document called “Add Delete or Maintain profile options - MR5.doc” from Nedbank’s help desk.
- The user must fill in the relevant details and create their own 32 character seed number. Please note that this seed number HAS to be 32 characters long and the only characters allowed are: ABCDEF123456789. Please only use these characters in any sequence you desire and make sure that you have used 32 characters. If you by mistake use a character that is not allowed, Nedbank automatically changes it and sometimes neglects to inform you what substitute was
used. You will then receive a HASHCALC error when attempting to import the file - Once the relevant form has been completed, it must be faxed to the number provided on the form. It can take up to 2 working days for the bank to load this on the profile. The user must just follow up on this by calling the Nedbank help desk.
- When the bank confirms that the SEED NUMBER has been registered successfully on their profile a test run should done
- The BTS product will create a bank file with an extension of .CSV
- This is the file that needs to be uploaded into the NetBank software
When the NetBank Business Software is invoked, a screen as per Figure 4.1 will be displayed

Figure 4.1
The user must select the “NetBank Business (Secure Format)” option and where it says “File Name” they must put in the name of the BTS .CSV file or browse for it. Thereafter just follow the screen prompts and the file should import successfully.
If the file does not import, the most obvious problem is that the Seed Number captured in the BTS software does not correspond to the Seed Number that Nedbank added to the user’s profile. The user MUST contact Nedbank to verify the seed number and make sure it matches the one captured in BTS.Please ALWAYS run a test the first time to make sure there are no problems before attempting to load a Live Run.
Was this helpful?00
Hits: 355 - nikki06-09-2016
- Abbr Name (Abbreviated company name)
This name appears on the supplier’s bank statement for bank formats that do not cater for a long statement reference eg. PACS - ACB Service Type
This can either be 1 Day, 2 Day, 5 Day Sub-Service or SSV/CSSV Service. Refer to your bank’s documentation. - Account Name
Name of account with bank. - Account Number
This refers to the company bank account number. - Bank Code
The SYSPRO bank code linked to the suppliers/beneficiaries that require EFT payments. - Bank format
Contains information that specifies the type of fund transfer, e.g., PACS, Nedinform, CATS etc. - Branch Number
This refers to the company bank branch number. - Seed Number
A 32-character number allocated by the user. This number is used when calculating the batch totals for the Nedinform Payments System.
Was this helpful?00
Hits: 84 - Abbr Name (Abbreviated company name)
- admin16-07-2016
1 System Description
The Bank file Translation System (BTS) is an add-on facility to the SYSPRO EFT module. Designed to interact specifically with the Accounts payable(AP) supplier and Cash Book(CB) beneficiary electronic payments process, BTS provides the user with an interface between SYSPRO and the various electronic banking services offered by major banking institutions in South Africa, African counties, Australia and USA.
2 System Overview
A parameter file containing the user’s banking requirements is created by the user at installation time. BTS uses this file to determine in what format to supply the payment details to the given institution. (E.g. CAMS and PACS are just two of the facilities offered by First National Bank.)
A parameter file containing the user’s banking requirements is created by the user at installation time. BTS uses this file to determine in what format to supply the payment details to the given institution. (E.g. CAMS and PACS are just two of the facilities offered by First National Bank.)
Once the BTS system is installed and the initialisation program has been run, relevant trigger programs will be set up in SYSPRO as follows:
Validation of EFT supplier/beneficiary banking details
- After Accounts Payable supplier added
- After Accounts Payable supplier changed
- After Accounts Payable supplier deleted
- After Cashbook beneficiary added
- After Cashbook beneficiary changed
- After Cashbook beneficiary deleted
Creation of relevant bank file format
- After EFT batch extract/re-extract
The initialisation program will also setup the BTS menu, program security and BTS file re-index options. It will create the relevant entries in the files required by SYSPRO that reside in the custom programs directory. If this directory has not been set up yet, the program will create a directory called ‘CusProg’ under the SYSPRO directory automatically and create the relevant files there.
Suppliers from the AP module and beneficiaries from the CB module need to be captured in the SYSPRO master files with the relevant banking details for EFT payments. The SYSPRO EFT module allows the users to batch relevant payments together by bank for payment and allocates a batch number to them. At the time that the batch is created, a trigger program set up by the BTS system will translate all the relevant records into the specified bank format selected by the user in the BTS system.
The user will need to run the BTS setup program for each SYSPRO company that has been set up for EFT payments and capture the relevant bank formats.
The BTS program will automatically create the relevant bank files in the directory that the user has specified in the SYSPRO EFT bank control program. If the user is using BTS they do not need to tick the XML file creation option in the SYSPRO EFT bank control program.
Was this helpful?00
Hits: 183 - nikki06-09-2016
Troubleshooting BTS
When running BTS for the first time in a client/server environment and the following screen as per Figure 1.15 is displayed, it could be one of the following:
- The BTS programs have incorrect permissions
- The BTS programs are not in the correct directory
- The incorrect BTS programs are loaded for the current SYSPRO version running on this machine
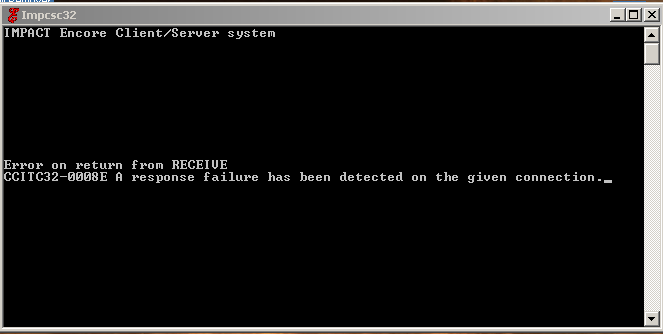
Figure 1.15
Please note that BTS looks at the SYSPRO nationality code. It only supports the following nationalities:
- AUS (Australia)
- BWP (Botswana)
- GH (Ghana)
- IND (India)
- KEN (Kenya)
- MZ (Mozambique)
- RSA (Republic of South Africa)
- TZ (Tanzania)
- UG (Uganda)
- USA (United States of America
- ZAM (Zambia)
If the nationality code does not match one of the above, an error screen as per Figure 1.16 will be displayed
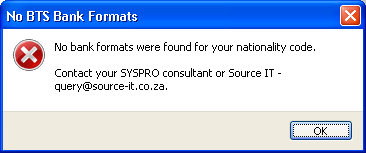
Figure 1.16
If any other Nationality has been entered in SYSPRO it needs to be changed to one of the above dependent on the country running the product in SYSPRO’S: Setup, System Setup, General TAB, Nationality field.
Was this helpful?00
Hits: 127 - nikki06-09-2016
Once BTS has been installed and the Source IT initialisation program has been run, the following menu in Figure 3.1.1 should have been added to the SYSPRO menu.

Figure 3.1.1
Was this helpful?00
Hits: 206 - admin16-01-2020
This is a report listing all EFT suppliers from the AP module and beneficiaries from the CB module with their banking details. A selection can be made by Bank as per figure 3.7.1

Figure 3.7.1
This report will only print banking details pertaining to the bank format for the supplier/beneficiary. Eg. If the bank format is pre-format then only the credit line numbers will be displayed.
Supplier Invalid Banking Details - A report is produced that displays any suppliers/beneficiaries with missing banking details that will be needed for the bank file
Detailed List of Payments – This report is automatically generated after an EFT Batch is
extracted/re-extracted. It contains a detailed list of all transactions to be paid by the bankThe report provides a listing of:
- totals per supplier per invoice
- a grand total
This report should be filed for future audit requirements.Was this helpful?00
Hits: 79 - nikki18-10-2016
Installation and initial licensing of BTS will be performed by your SYSPRO consultant.
An annual licence fee will be charged and once payment is received, the license code will be emailed to the client. It is the client’s responsibility to keep SOURCE IT updated with new email addresses and contact people.
BTS will run on platforms presently compatible with the SYSPRO and has been developed for C-ISAM and SQL.
There are many files that store the data relating to BTS, including the output file transmitted to the bank. The control files reside in the SYSPRO data directory and the bank output files will reside in a directory set up by the user in the EFT Bank maintenance program. It is the user’s responsibility to make sure that these files are backed-up on a regular basis.
ALL files will be prefixed with the SYSPRO company code.ALL files will be prefixed with the SYSPRO company code:
The file naming convention and details can be found under each bank layout in the BTS Bank Format Setup catagory.
If "same file" name is selected in bank parameters program, the bank output files will be prefixed with the SYSPRO company code and bank code that the format is attached to.
If "unique file" name is selected in bank parameters program (Will start at 001 and increment for each run)
Was this helpful?00
Hits: 155 - nikki18-10-2016
The following steps have to be completed in SYSPRO before BTS can be used:
Step one: All relevant banks that require EFT transactions need to be selected for EFT payments.
Step two: The Source IT initialisation program that sets up the Menu, Security, Files for reindexing and trigger programs needs to be run.
Step three: The BTS Bank setup program must be used to capture all the relevant bank formats for EFT banks.
Step four: Select all the relevant AP suppliers and CB beneficiaries that require EFT payments and capture the relevant banking details. The AP suppliers need to be ticked as ‘EFT payments required’.
Step five: Setup the security access in SYSPRO for all groups that will be using BTS.
Was this helpful?00
Hits: 220 - nikki07-09-2016
When BTS is installed and the initialisation program has been run, it will automatically set up a trigger "After EFT batch extract".
This program will automatically create a bank file in the format set up for that bank in the BTS Bank setup module. The bank file will be named as per the option selected by the user and will be placed in the directory that has been set up in the EFT
Bank control program for that bank as per Figure 1.
Figure 1
If no directory has been set up, a validation error will be displayed and no bank file will be created. The user will need to set up the relevant directory and re-extract the batch. Every time a new batch is extracted or an existing batch is re-extracted a bank file will be created. The re-extract may be used if a supplier/beneficiary bank details were incorrect. The user may correct them in the relevant maintenance program and re-extract that particular batch.
It is important that the users that will be extracting the EFT payment in SYSPRO has access to the necessary BTS programs (explained in detail in the "Initialise the BTS system" question)
Was this helpful?00
Hits: 209 - nikki07-09-2016
Accounts payable (AP) and Cashbook (CB) EFT payments are bank driven. AP suppliers and CB beneficiaries need to be linked to a bank that has been activated for EFT payments as per Figure 3.3.1.
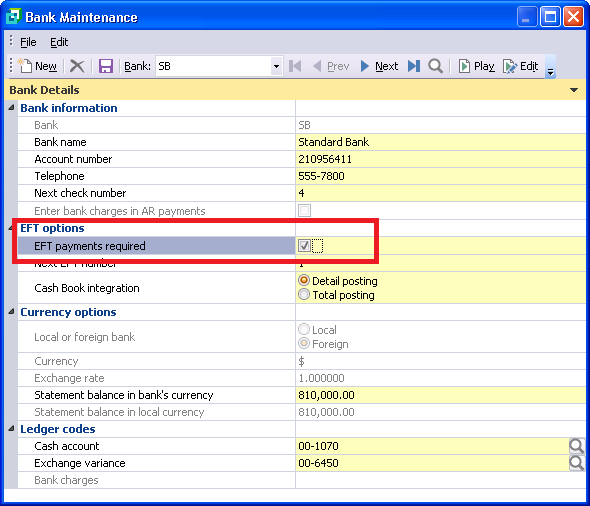
Figure 3.3.1
To enable EFT payments for a supplier the ‘EFT payments required’ option needs to be ticked. This option will only be enabled if the supplier is linked to an EFT enabled bank. When the user selects "save", the screen as per Figure 3.3.2 will be seen
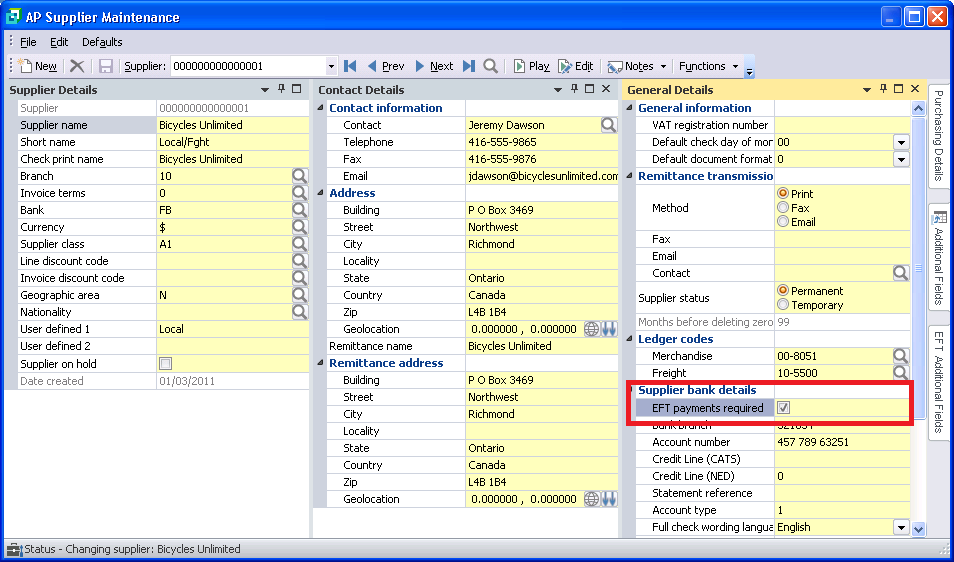
Figure 3.3.2
The SYSPRO Cashbook beneficiary maintenance program is purely for EFT payments out of the Cashbook. All beneficiaries with their relevant banking details will be used for Cashbook EFT payments. The relevant bank linked to these beneficiaries needs to be EFT activated and the captured beneficiaries will only be linked to that specific bank as per Figure 3.3.3.

Figure 3.3.3
In the AP Supplier maintenance and CB Beneficiary maintenance, the Account number, Bank branch and Account type are compulsory for bank formats that are not Pre-Format. The account types are a 1 digit field that depicts the account type as follows:
1- Current Account
2- Savings Account
3- Transmission Account
4- Bond Account
5- Subscription SharesThe above numbers are shared by all the banks. When using a Bond or Subscription Shares account, the account number is normally 18 digits long. The normal Account number field is only 15 characters long so the user may use the EFT USER 1 field to capture account numbers for these account types.
CATS PRE-FORMAT: This bank format does not require an Account number, Bank branch or Account type. An alphanumeric credit-line number is used against each supplier and this must be captured in the EFT USER 1 field ("Credit Line (CATS)" as per Figure 3.3.2).
NEDBANK PRE-FORMAT: This bank format does not require an Account number, Bank branch or Account type. A numeric credit-line number is used against each supplier and this must be captured in the EFT USER 2 field("Credit Line (NED)" as per Figure 3.3.2).The SYSPRO EFT system allows these fields to be renamed and the user may rename them to Credit-line for easier identification when capturing PRE-FORMAT credit-line numbers. Alternatively if the bank format is not pre-format and the account types are Bond or Subscription the user may rename the EFT USER 1 field to Alternate Account. When BTS is installed and the initialisation program is run, it automatically sets up a validation trigger program after an AP supplier is added, changed or deleted and after a CB beneficiary is added, changed or deleted. This program will warn a user if any relevant banking details are missing and will suggest that they be captured before an EFT run is performed. When an EFT batch is extracted the validation program will automatically run and will NOT create a bank file if any of the relevant banking details are missing. A report will automatically print out with a list of suppliers/beneficiaries whose banking details are missing. The user will need to rectify this and re-extract the batch through the SYSPRO EFT module.
Was this helpful?00
Hits: 203 - admin16-01-2020
This is an audit report listing all changes made to the EXTRA Supplier details if pertinent to the BTS bank format being used. Selections can be made as per figure 3.7.3

Figure 3.7.3
Clear Audit File - this button will delete ALL the Audit File records for the company the user is signed into.
Reprint records – if set to “Yes”, the report will be produced for all records in the selected date range whether previously printed or not.
Date selection – selecting “Single” will only allow entry of the “Date from” field. “Range” will allow entry of the “Date from” and “Date to” fields. If “All” is selected, the audit records will print in date and time sequence.Was this helpful?00
Hits: 46 - admin16-01-2020
This program is only used by the SWIFT BTS formats.
This is an audit report listing all transactions created when approving a BTS payment.
Selections can be made as per figure 3.7.2
Figure 3.7.2
Clear Audit File - this button will delete ALL the Audit File records for the company the user is signed into.
Reprint records – if set to “Yes”, the report will be produced for all records in the selected date range whether previously printed or not.
Date selection – selecting “Single” will only allow entry of the “Date from” field. “Range” will allow entry of the “Date from” and “Date to” fields. If “All” is selected, the audit records will print in date and time sequence.
Bank - if the Bank selection is "Single" or "Range", the bank code entered is validated. The available banks can be browsed and selected.
Batch - if the Batch selection is "Single" or "Range", the batch entered is validated. The available batches can be browsed and selected.Was this helpful?00
Hits: 46 - admin16-01-2020
This program is only used by the SWIFT BTS formats.
If the BTS bank format being used caters for authorisation levels for payment approval before creating the BTS payment file, this can be maintained using this program. The EFT payment extract or re-extract program uses these records to determine who has authority and permission to approve an EFT batch.
All the available authorisation levels already set up will be seen as per Figure 1
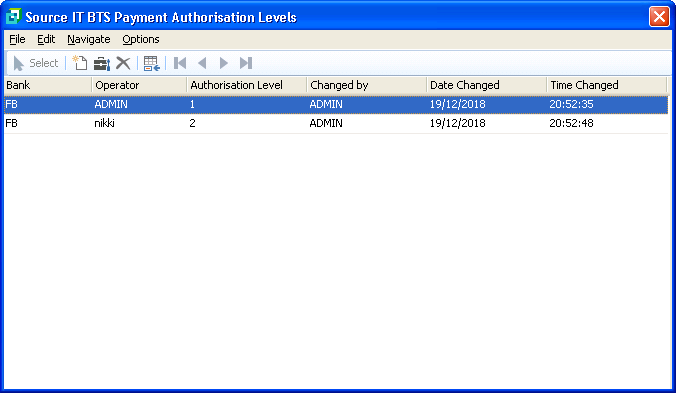
Figure 1
Selecting add or change will show the following screen as per Figure 2

Figure 2
Bank – a valid SYSPRO bank code will need to be entered. The available bank codes can be browsed and selected.
Operator - a valid SYSPRO operator code will need to be entered. The available operator codes can be browsed and selected.
Authorisation level - this needs to be entered. A drop down is available for selection to assign an authorisation level to this operator.This program is currently only supported by the following BTS bank formats:
- SWIFT(Standard Bank)
- SWIFT(Standard Chartered)
- SWIFT(Deutsche Bank)
Was this helpful?00
Hits: 53 - admin16-01-2020
This program is only available from SYSPRO 7 onwards and is used to "takeon" Supplier banking details into the pertinent BTS EXTRA Supplier details.
A CSV (Comma Separated Value) file - with a format that is determined by Source IT - is used to import the required extra Supplier banking details into BTS.
The following BTS bank formats cater for this facility:
- Local PayBulk(Barclays)
- Barclays.net UK(Barclays)
The screen of this program is as per Figure 1

Figure 1
Bank - a valid SYSPRO Bank will need to be entered on the toolbar and can be browsed and selected. If the bank entered does not have a BTS format that is handled by this program, an error will be seen
Import File – this must contain the full path as well as the name of the file being imported. This will be validated and can be browsed and selected.
Was this helpful?00
Hits: 63 - admin20-01-2020
This program is only used by the SWIFT BTS formats.
The files extracted by BTS SWIFT formats are XML files. The feedback files from SWIFT are also XML files. These feedback files need to be placed in the XML dashboard path as setup in the SWIFT Bank format setup
In order to process these feedback files, the BTS Dashboard on the BTS menu can be run. The screen will look as per figure 1

Figure 1
Selecting the Status Update button on the screen in figure 1 will process available files in the XML dashboard path and update the status of the corresponding records in the BTS SWIFT system
Selecting the Status Auto Update button on the screen in figure 5 will begin polling the XML dashboard path for available files to process and should update files be encountered, the process will update the status of the corresponding records in the BTS SWIFT system with all the updated Batches for Bank entries being highlighted in green text and the polling process will exit with the first updated (green) entry highlighted. The entries highlighted in green will revert back to black text when the dashboard program is exited.
The user will be unable to use any of the dashboard functionality until an update XML file is located when the Status Auto Update process will stop executing and the first updated (green) entry will be highlighted..
The user could exit the Status Auto Update process by selecting the Status Auto Update button.If the Payment approval switch has been set in the BTS control for SWIFT, when the BTS extract is run, the extract file will not be created and the user will see the screen as per figure 2
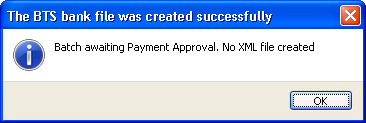
Figure 2
In order to release these payments, the BTS Payment Approval on the new BTS menu can be run. This program will look as per figure 3
 Figure 3
Selecting the Payment Approval button on the screen in figure 3 will release the selected batch and the BTS XML file will be created. The following message as per figure 4 will be seen that shows the user what the file name being extracted is

Figure 4
BTS Dynamic Link Library (DLL) and Windows Communication Foundation (WCF) Processing
Sending - DLL:
Should the BTS format being used make use of API’s to push the files through to the banking institution, BTS will make use of a Dynamic Link Library (DLL) process which will be called into by the BTS extract process and should the push process fail due to, amongst other things, communication failure, the associated Batches for Bank entries will be represented in red text and it will be required to re-extract the associated EFT batches once the cause for the failure has been resolved.
Receiving - WCF:
Should the BTS format being used make use of a Windows Communication Foundation (WCF) to receive the payment response files from the banking institution, BTS will make use of a WCF service which, once installed and activated, will accept the payment response files and present them to the BTS Dashboard for importing to update the Batched for Bank status entries.
Should the BTS Dashboard attempt to import payment status update files and identify that the WCF service is flagged as inactive, an error message will be generated as per Figure 5.
Figure 5
Was this helpful?00
Hits: 63 - admin20-01-2020
This program is only used by the SWIFT BTS formats.
This allows the batch to be approved by the user that is running the program. Only the users that have been setup in the "Payment Approval" program for the bank in question will be allowed to approve the payment. If a level 1 has been approved and a level 2 is required, then only level 2 operators will be able to approve this payment and visa versa.
The Payment Approval button on the toolbar of the screen as per figure 1 will be available if the user running the program is allowed to approve this batch (else this button on the toolbar will be greyed out and unavailable)

Figure 1
If there are still more approval's required for the batch in question, the Addition Status will be updated and the Payment Approval button will be greyed out.
If the batch has been successfully approved as all authorisation level users have approved the batch, selecting the Payment Approval button on the screen in figure 1 will release the selected batch and the BTS XML file will be created. The following message as per figure 2 will be seen that shows the user what the file name being extracted is
Figure 2
Was this helpful?00
Hits: 47 - admin20-01-2020
This program is only used by the SWIFT BTS formats.
The files extracted by BTS SWIFT formats are XML files. The feedback files from SWIFT are also XML files. These feedback files need to be placed in the XML dashboard path as setup in the SWIFT Bank format setup
In order to process these feedback files, the BTS Dashboard on the BTS menu can be run. The screen will look as per figure 1

Figure 1
This list view is not maintainable. This is just used to check who has authorised the BTS batch. There are 2 options available in the toolbar:
Current - This will show you the current authorisation for the BTS batch in question. If the payment file has already been created (as the file was properly authorised), the current information will be cleared out, so you will need to use the "History" selection
History - This will show you all the history of the audthorisation details for the the BTS batch in question.
Was this helpful?00
Hits: 44 - admin16-07-2016
This process will allow the user to capture bank format details or alter an existing banking facility for BTS. One bank format per bank may be captured.
It only supports the following SYSPRO Nationality codes:
- AUS (Australia)
- BWP (Botswana)
- GH (Ghana)
- IND (India)
- KEN (Kenya)
- MZ (Mozambique)
- RSA (Republic of South Africa)
- TZ (Tanzania)
- UG (Uganda)
- USA (United States of America
- ZAM (Zambia)
On the BTS Menu, opening the "BTS Bank Formats" program show a list view as per figure 1 containing all bank codes that have been captured with their associated bank formats will be displayed. The user may then either, add a new bank format, amend an existing bank format or delete a bank format. Please note that if there are pending EFT transactions for a bank the delete will be prohibited.
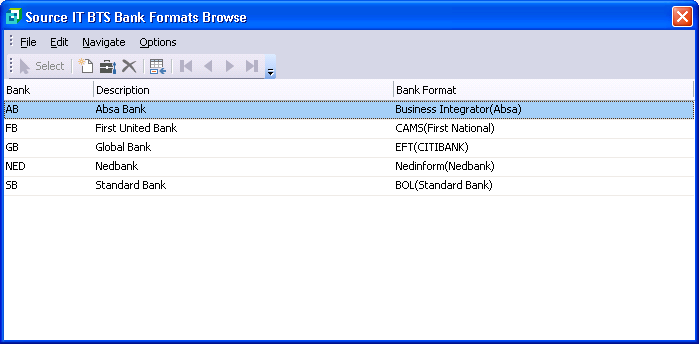
Figure 1
When you select a bank to maintain, the maintenance screen will be seen as per Figure 2

Figure 2
Bank code - a valid SYSPRO bank code that is linked to EFT suppliers/beneficiaries.
Bank format - a list box will display the payment options available to the user. The user must select the banking facility that they are currently with. The following types are available:SOUTH AFRICA (and in the African countries catered for):
- ABSA (Focus, CashFocus and Business Integrator)
- Nedbank (Nedinform, NedExec, NetBank Secure and CPS)
- Standard Bank (CATS, EFTS, CFC/ZAR, BEFT, BOL, nBOL and NetPlus)
- First National Bank (CAMS, PACS, BANKit, CSV and AiDPS Swazi)
- CITIBANK (EFT, PAYLINK, CITIDIRECT and CITI Preformat)
- Bank Windhoek (Bureau)
- Mercantile (BANK@bility)
- BOE (BOE)
- JP Morgan (Global ACH GDFF and FTI GMT)
- Stanbic (SFI, CSV NBOL and PAY ALERT)
- Barclays (SFI, Local Payment and Barclays.net)
- Standard Chartered (STS, iPAYMENTS, SAB-iPAY, ePAYMENTS and Straight2B)
- HSBC (iFILE)
- Kenya Commercial (KCB Quickpay)
- CBA (Trade Payments CSV)
- ABN AMRO (BSI VDB)
- Fihrst Management (FIHRST)
- BANCO Comercial (BCI)
- SWIFT(Standard Bank, Standard Chartered, Barclays Bank and Deutsche Bank)
AUSTRALIA
- All banks (Direct Entry Payments)
USA
- Wachovia (NACHA)
Account name - the Name of Account with the bank.
Account no - this is the Company’s Bank account number.(Not required for USA)
Branch number - this is the Company’s Bank branch number. (Not required for CitiBank, Australia or USA)
Bank output file - can be Unique, Same or User-defined- Unique file name - this will allocated a unique bank file name for each EFT run. The file name will be prefixed with the SYSPRO company code at run time
- Same file name - this will allocate the same file name for each EFT run. The file name will be prefixed with the SYSPRO company code at run time
- User-defined file name - this allows the user to allocate a name for the bank file. It will always allocate the name entered here for each EFT run. The file name will be prefixed with the SYSPRO company code at run time.
Certain institutions require additional information. Depending on which institution is chosen an extra screen appears for the capturing of the additional information.
Was this helpful?00
Hits: 180 - admin22-03-2018
SWIFT (Standard Bank)

Figure 1
User defined customer reference - This decides what will appear on the Customer statement reference on the file that is sent to the bank: "Supplier name", "EFT number/Supplier code" or "EFT number/Supplier name".
XML dashboard path - This is the physical path where all the "feedback" return files from the bank will reside. This path needs to be accessible from SYSPRO itself and must have the correct permissions. The BTS Dashboard program (found on the new SYSPRO 7 BTS menu in SYSPRO under Transaction Processing as per Figure 2)
File name prefix - This is a maximum of 6 characters and is mandatory. This is the 1st 6 characters of the physical file name extracted by this bank format
Group header ID - This is a maximum of 20 characters and is mandatory. This is the tag to identify the company profile
BIC number - This is a maximum of 11 characters and is mandatory. This is bank BIC code for the company
Large account number - This is a maximum of 16 characters and is mandatory. BTS bank account number only stores 11 characters. As SWIFT banks require a larger account number, this field is used instead
Payment approval - If this switch is ticked, this prevents the BTS from extracting the physical XML payment file until the EFT batch is approved by authorised users - as per Figure 2
Number of level 1 authorisers - If the Payment approval is ticked, the user may enter how many level 1 authorisers are required. This is drop down that allows between 0 and 9
Number of level 2 authorisers - If the Payment approval is ticked, the user may enter how many level 2 authorisers are required. This is drop down that allows between 0 and 9
Sub-level authority allowed - If the Payment approval is ticked, the user may tick this entry allowing level 2 authorisers to function as level 1 authorisers.
Bank address line 1 - This field is optional and may contain 40 characters of the bank address line 1
Bank address line 2 - This field is optional and may contain 40 characters of the bank address line 2
Bank address line 3 - This field is optional and may contain 40 characters of the bank address line 3
Bank address line 4 - This field is optional and may contain 40 characters of the bank address line 4Country
Maputo Instrid – this option will include the vendor code in the “InstrId” tag along with the EFT number
Select to include the vendor code in the “InstrId” tag along with the EFT number.
This process will also remove leading zero’s from the beginning of the EFT number itself.
An example would be as follows: “84-BYTMZM001” where “BYTMZM001” would represent the vendor code and “84” the EFT batch number without the leading zerosMauritius Payment Instruction – this option is to be selected for all Mauritius SWIFT Standard Bank and Standard Chartered formats.
Select to include the extra <ChrgBr> element in the payment XML extracted file. If this option is selected, the <BtchBookg> in the extract is always TRUE. These are requirements needed for Mauritius
If this option is selected, a Mauritius Charge Bearer code needs to be selected from the dropdown available when maintaining the Supplier extra details in Figure 3.Mulesoft Web Service
This set of parameters caters for the automatic pushing of the BTS payment XML files into the Mulesoft API solution.
This process makes use of the BTS SourceIT_ServiceIntegration.dll
Flowid – Inclusion of this Flowid will serve to activate this service and the validation of the rest of the associated parameters.
Path – Location that the XML files will be pushed by the SourceIT_ServiceIntegration.dll process
Port – Port number. If the port number is included in the "Path" parameter, then do not enter the port number.
Username – User ID for login
Password – Login passwordMulesoft WCF Service
This set of parameters is passed to a WCF service installed separately which handles the receiving of the return XML files as sent by the Mulesoft API solution.
BTS will automatically import these files into the BTS SWIFT dashboard.
Host – Local host setup
Port number – Local port number
Username – User ID for login
Password – Login password
Active – the WCF Service will check this parameter each time the service or the server is restarted and it will only start if this parameter is ticked
Figure 2
If your BTS menu does not like the menu above (with this Transaction Processing menu options), please follow the instructions on our website for the BTS Installation - Initialise the BTS system (File --> Run SITINI and enter the 3 options. You will be asked if you wish to remove each in SYSPRO. Select No and the BTS installed products will be amended. Then you should see the Transaction Processing option under the BTS menu. Without these 2 functions, the SWIFT Dashboard and Payment Approval processes cannot be controlled on site)
This BTS Bank format is available for all African Nationalities:
- RSA (Republic of South Africa)
- BWP (Botswana)
- ZAM (Zambia)
- UG (Uganda)
- KEN (Kenya)
- GH (Ghana)
- MZ (Mozambique)
- TZ (Tanzania)
There are extra details required when using this BTS bank format. When maintaining the Supplier and/or Cash Book beneficiary in SYSPRO, the following screen as per Figure 3 will be seen:


Figure 3
Payment type - May be selected from the available drop down list as per Figure 4
BIC number - This is a maximum of 11 characters and is mandatory. This is the BIC code for the Supplier
Country code - This is a maximum of 2 character country code and is mandatory. There is no validation
Reference - This is a maximum of 35 characters and is mandatory. This is a free-format supplier reference
Additional reporting - This is a maximum of 140 characters and is optional. Selecting the browse button will show a list of available currencies as per Figure 2
Account number - This is a maximum of 35 characters, is free-format and is optional.
Payment reason - This is a maximum of 35 characters, is free-format and is optional.
Sup currency - This is a maximum of 3 characters and is optional. This gets used in the payment extract file as the Supplier currency code
Additional remit info 1 - This is a maximum of 35 characters, is free-format and is optional
Additional remit info 2 - This is a maximum of 35 characters, is free-format and is optional
Additional remit info 3 - This is a maximum of 35 characters, is free-format and is optional
Additional remit info 4 - This is a maximum of 35 characters, is free-format and is optional
Bank id - This is a maximum of 3 characters, is free-format and is optional
Branch id - This is a maximum of 3 characters, is free-format and is optional
Figure 4
If the Payment approval switch has been set in the BTS control for SWIFT, when the BTS extract is run, the extract file will not be created and the user will see the screen as per figure 5
Figure 5
In order to release these payments, the BTS Payment Approval on the BTS menu can be run. This program will look as per figure 6

Figure 6
Selecting the Payment Approval button on the screen in figure 6 will release the selected batch and the BTS XML file will be created. The following message as per figure 7 will be seen that shows the user what the file name being extracted is
Figure 7
Selecting the Check Authorisation button on the screen in figure 7 will show what authorisation has already been done against this batch. Refer to the Check Authorisation tab under BTS Process
Once payment has been extracted and sent to the bank in question, the bank will supply in return "feedback" files with details as to their processing of the batches. For more information regarding this step, refer to the BTS Dashboard tab under BTS Process
Was this helpful?00
Hits: 139 - admin16-07-2016
CATS (Standard Bank)
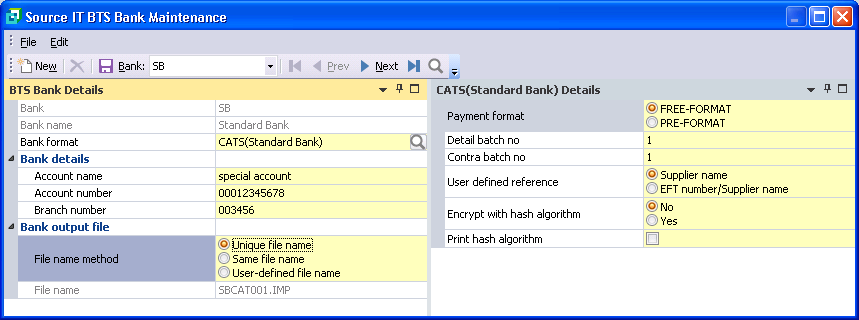
Figure 1
Payment format - Identify the type of payment used. May either be "FREE-FORMAT" or "PRE-FORMAT". This is determined by the contract made with the bank.
Detail batch no - Must always be 1.
Contra batch no - Must always be 1.
User defined reference - Identify what must appear in the reference field for the bank, either just the "Supplier name" or the "EFT number/ Supplier name"
Encrypt with hash algorithm - No/Yes. This new encryption was an enhancement done for SYSPRO 7 onwards
Print hash algorithm - Yes (if this check box is ticked)/No (if the check box is not ticked) if the hash algorithm must appear on the payment reportThis BTS Bank format is available for the following SYSPRO Nationalities:
- RSA (Republic of South Africa)
There is one extra detail required when using this BTS bank format and the "PRE-FORMAT" option in Figure 1 has been selected. When maintaining the Supplier and/or Cash Book beneficiary in SYSPRO, if the "Credit Line (CATS)" (EFT user 1) has not been captured, as per highlighted field in Figure 2:

Figure 2
The following error as per Figure 3 will be seen:

Figure 3
Was this helpful?00
Hits: 184 - nikki08-09-2016
EFTS (Standard Bank)

Figure 1
Abbreviated name - An abbreviated name for your company. May not exceed 10 characters and is mandatory
Bank company code - This is a 4 character word supplied by the bank identifying your site and is mandatory
Batch number - Should always be 1
Language - May either be set t0 "ENGLISH" or "AFRIKAANS"
Credit/Debit - Identifies the type of payments to be made. May be "CREDIT", "DEBIT" or "SALARY"
Run type - This field identifies the type of run. "TEST" for a test run, and "LIVE" for a live run. The bank will treat the file accordingly
Modify bank company code at runtime - May be either "No" or "Yes". If this is set to Yes, when the BTS extract is run, the user will see the screen as per Figure 2. The EFT company code entered here will be used in the extract rather than the SYSPRO company signed into at time of BTS extract
Encrypt with hash algorithm - May be either "No" or "Yes". This new encryption was an enhancement done for SYSPRO 7 onwards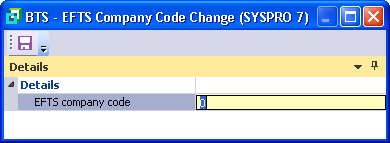
Figure 2
This BTS Bank format is available for the following SYSPRO Nationalities:
- RSA (Republic of South Africa)
Was this helpful?00
Hits: 137 - nikki08-09-2016
CFC/ZAR (Standard Bank)
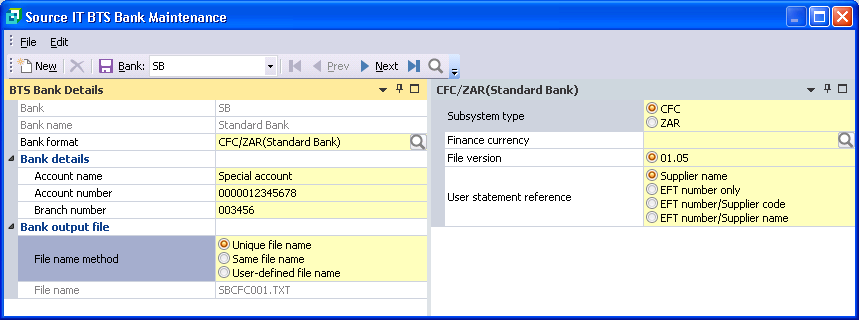
Figure 1
Subsystem type - May be either "CFC" or "ZAR"
Finance currency - The currency that must appear on the bank file must be entered here. It cannot exceed 3 characters and is mandatory. Selecting the browse button will show a list of BTS available currencies as per Figure 2
File version - Will always be 0.05
User statement reference - This decides what will appear on the Customer statement reference on the file that is sent to the bank: "Supplier name", "EFT number/Supplier code" or "EFT number/Supplier name".
Figure 2
This BTS Bank format is available for the following SYSPRO Nationalities:
- RSA (Republic of South Africa)
There are extra details required when using this BTS bank format. When maintaining the Supplier and/or Cash Book beneficiary in SYSPRO, the following screen as per Figure 3 will be seen:

Figure 3
Beneficiary code - This is a maximum of 16 characters and is mandatory
Beneficiary type - This button option man either be "Entity" or "Individual"
Beneficiary name - This is only entereable when the the Beneficiary type is set to "Individual" and is then mandatory
Beneficiary surname - This is only entereable when the the Beneficiary type is set to "Individual" and is then mandatory
Beneficiary currency - This is a maximum of 16 characters and is mandatory. Selecting the browse button will show a list of available currencies as per Figure 2
Cover type - May be selected from the available drop down list as per Figure 4
Spot type - This is a maximum of 10 numerics and is mandatory and enterable only if Cover type is set to "Spot cover"
Forward exchange contract - This is a maximum of 10 numerics and is mandatory and enterable only if Cover type is set to "FEC cover"
Free format cover info - This is a maximum of 75 characters and is mandatory and enterable only if Cover type is set to "FEC info"
Statement reference - This is a maximum of 75 characters and is optional
Preferred IBC - This is a maximum of 8 numerics and is optional
Compliance type - May be selected from the available drop down list as per Figure 5
Excon approval number - This is a maximum of 8 characters and is optional
Authorised dealer code - This is a maximum of 3 characters and is optional
Excon application date - This must be a valid date if entered with a maximum of 8 numerics YYYMMDD and is optional
Figure 4

Figure 5

Figure 6

Figure 7
The details for either/or BOP1 or BOP4 details are needed. If neither are entered("Not required"), an error will be seen as per Figure 6. If both are entered, an error will be seen as per Figure 7
BOP1 Details (if set to anything but "Not required")
BOP1 Category - May be selected from the available drop down list as per Figure 8
BOP1 Country - This is a maximum of 2 characters and is mandatory. Selecting the browse button will show a list of available country codes
BOP1 Import control format - This may be set to "Not required", "BOE-Bill of entry" or "INV-Offshore invoice". Selecting the browse button will show a list of available country codes
BOP1 Import control no. BOE date - Only available for entry and mandatory if BOP1 Import control format is set to "BOE-Bill of entry". This must be a valid date if entered with a maximum of 8 numerics YYYMMDD and is mandatory
BOP1 Import control no. BOE alpha - Only available for entry and mandatory if BOP1 Import control format is set to "BOE-Bill of entry". This is a maximum of 3 characters and is mandatory
BOP1 Import control no. BOE numeric - Only available for entry and mandatory if BOP1 Import control format is set to "BOE-Bill of entry". This is a maximum of 7 numerics and is mandatory
BOP1 Import control no. INV number - Only available for entry and mandatory if BOP1 Import control format is set to "INV-Offshore invoice". This is a maximum of 32 characters and is mandatory
BOP1 Reason information - This is a maximum of 50 characters and is optional
BOP1 Exchange control reference - This is a maximum of 8 characters and is optional
BOP1 Authorised dealer code - This is a maximum of 3 characters and is optional
BOP1 Reference authorised date - This must be a valid date if entered with a maximum of 8 numerics YYYMMDD and is optional
Figure 8
BOP4 Details (if set to anything but "Not required")
All the rules behind the BOP4 Details are the same as those from BOP1 Details above.
Was this helpful?00
Hits: 91 - nikki08-09-2016
BEFT (Standard Bank)
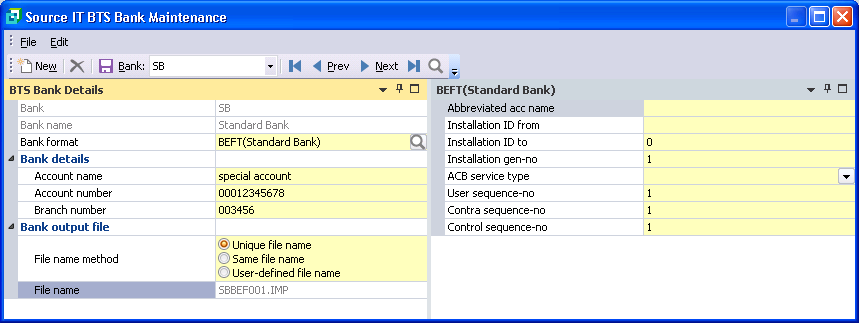
Figure 1
Abbreviated acc name - An abbreviated acc name for your company. May not exceed 10 characters and is mandatory. This field appears on the extracted bank file as the user reference
Installation ID from - This is a 4 character field and is mandatory
Installation ID to - This is a 4 character numeric field and is mandatory
Installation gen-no - This is a 4 character numeric field and is mandatory
ACB service type - This is a 10 character field that must be selected from an available drop-down list (as per Figure 2) and is mandatory
User sequence-no - This is a 6 character numeric field and is mandatory
Contra sequence-no - This is a 6 character numeric field and is mandatory
Control sequence-no - This is a 6 character numeric field and is mandatory
Figure 2
This BTS Bank format is available for the following SYSPRO Nationalities:
- RSA (Republic of South Africa)
Was this helpful?00
Hits: 95 - nikki13-09-2016
BOL (Standard Bank)

Figure 1
There are no extra parameters required for this bank format
This BTS Bank format is available for the following SYSPRO Nationalities:
- RSA (Republic of South Africa)
Was this helpful?00
Hits: 99 - nikki13-09-2016
nBOL (Standard Bank)
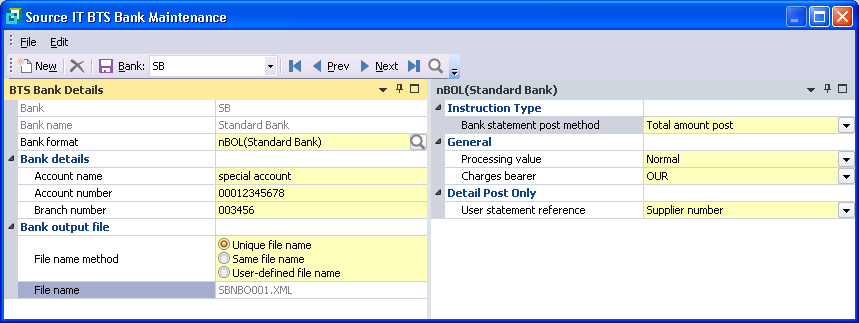
Figure 1
Bank statement post method - This determines the post method: whether the transactions must be either "Total amount post" or "Post in detail" (selected from the available drop down list)
Processing value - This determines the processing value: whether the transactions must be either "Normal" or "Urgent" (selected from the available drop down list)
Charges bearer - This may be "OUR" - if the charges are the companies, "BEN" - if the changes belong to the Beneficiaries or "SHA" - if the charges are shared between the two (selected from the available drop down list)
User statement reference - This determines what the user would like to see as the statement reference: may be "Supplier number", "Supplier name", "EFT number", "EFT number/supplier code" or "EFT number/supplier name" (selected from the available drop down list)
This BTS Bank format is available for the following SYSPRO Nationalities:- RSA (Republic of South Africa)
There are extra details required when using this BTS bank format. When maintaining the Supplier and/or Cash Book beneficiary in SYSPRO, the following screen as per Figure 2 will be seen:

Figure 2
Country from - This field must be selected from an available drop-down list (as per Figure 3) and is mandatory
Payment type - Button selection that may either be "Local payment" or "Cross border payment". If Cross border payment is selected, then the Payment reason (maximum of 35 characters) is mandatory.
Charges bearer - Button selection that may be "OUR", "SHA" or "BEN".
The following fields are only available if the Pre-defined beneficiary is not selected
Account number - May not exceed 35 characters and is mandatory
IBAN account number - May not exceed 35 characters and is optional
Bank BIC - May not exceed 35 characters and is optional
Branch code - May not exceed 10 characters and is mandatory
The Non-predefined Beneficiary information is optional
Figure 3
If Pre-defined beneficiary is selected, the screen will look as per Figure 4:

Figure 4
Identification code - May not exceed 35 characters and is mandatory
Was this helpful?00
Hits: 114 - nikki13-09-2016
NetPlus (Standard Bank)

Figure 1
There are no extra parameters required for this bank format
This BTS Bank format is available for the following SYSPRO Nationalities:- RSA (Republic of South Africa)
There are extra details required when using this BTS bank format. When maintaining the Supplier and/or Cash Book beneficiary in SYSPRO, the following screen as per Figure 2 will be seen:

Figure 2
Sort code - May not exceed 8 characters and is mandatory
Account number - May not exceed 13 character numerics and is mandatory
Currency - May not exceed 3 characters and is mandatory. A browse facility has been made available should you wish to search SYSPRO for available currency codes
Email address - May not exceed 50 characters and is optionalWas this helpful?00
Hits: 86 - nikki13-09-2016
Focus (Absa)
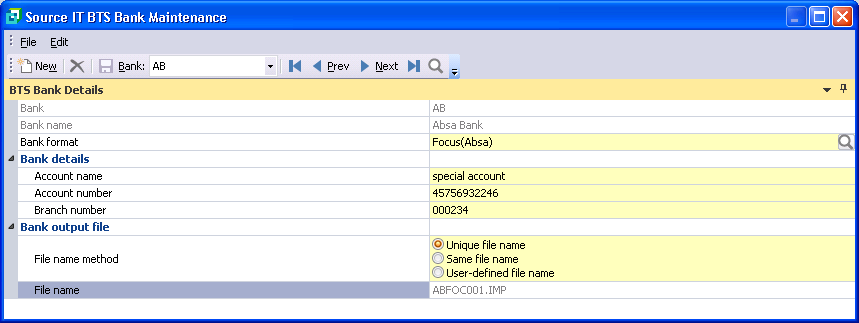
Figure 1
There are no extra parameters required for this bank format
This BTS Bank format is available for the following SYSPRO Nationalities:
- RSA (Republic of South Africa)
Was this helpful?00
Hits: 70 - nikki13-09-2016
CashFocus (Absa)

Figure 1
There are no extra parameters required for this bank format
This BTS Bank format is available for the following SYSPRO Nationalities:
- RSA (Republic of South Africa)
Was this helpful?00
Hits: 56 - nikki13-09-2016
Business Inttegrator (Absa)
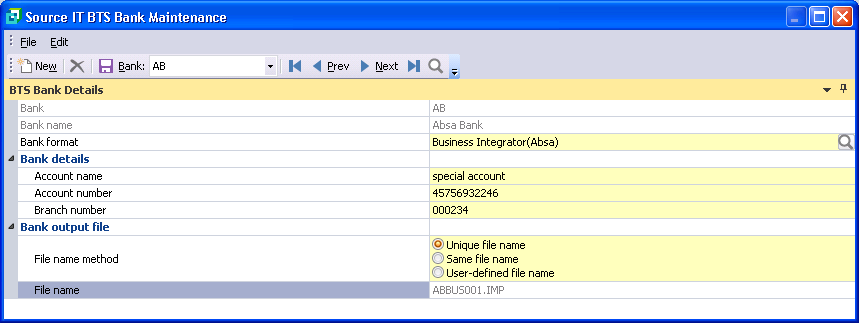
Figure 1
There are no extra parameters required for this bank format
This BTS Bank format is available for the following SYSPRO Nationalities:
- RSA (Republic of South Africa)
Was this helpful?00
Hits: 89 - nikki13-09-2016
Nedinform (Nedbank)

Figure 1
EFT type - Identify the type of payment used. May either be "FREE-FORMAT" or "PRE-FORMAT". This is determined by the contract made with the bank.
Transaction type - Identify the type of transactions. May either be "SUPPLIERS" or "SALARIES/PENSION".
Debit line no - This is a 10 character numeric field and may not be zero.
Seed number - This is a free format 32 character field and is optional (may be left blank).
Flexible description - May be "Blank", Yes" or "No".
One-to-many transactions - May be "Blank", Yes" or "No".
Many-to-one transactions - May be "Blank", Yes" or "No".
Single transaction - May be "Blank", Yes" or "No".
Variable length bank file - Yes (if this check box is ticked)/No (if the check box is not ticked). This will affect the length of the records in the file that is extracted and sent to the bank.
Swaziland (.TXT) - If this is ticked, the file that is extracted by BTS is a .TXT file (not a .IMP file). There are also slight changes to the records as requested by Swaziland only.This BTS Bank format is available for the following SYSPRO Nationalities:
- RSA (Republic of South Africa)
There is one extra detail required when using this BTS bank format and the "PRE-FORMAT" option in Figure 1 has been selected. When maintaining the Supplier and/or Cash Book beneficiary in SYSPRO, if the "Credit Line (NED)" has not been captured, as per highlighted field in Figure 2:
Capture the Nedbank BENEFICIARY REFERENCE number in EFT USER-DEFINED FIELD 1 for the relevant suppliers. In the Setup/Financial/Electronic Funds Transfer "User Defined" tap setup (See Figure 3 below), you may rename this field to for example "Credit Line (NED)" as per the example in Figure 2 below.
This beneficiary reference number MUST match the number captured in the Nedbank software.
Figure 2

Figure 3
The following error as per Figure 4 will be seen if this EFT USER-DEFINED field 1 has no entered value:

Figure 4
Was this helpful?00
Hits: 137 - nikki13-09-2016
NedExec (Nedbank)
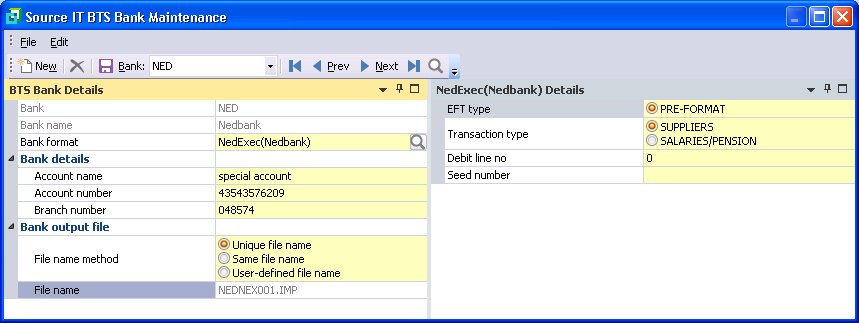
Figure 1
EFT type - Identify the type of payment used. May only be "PRE-FORMAT". This is determined by the contract made with the bank.
Transaction type - Identify the type of transactions. May either be "SUPPLIERS" or "SALARIES/PENSION".
Debit line no - This is a ten character numeric field and may not be zero.
Seed number - This is a free format 32 character field and is mandatory (may not be left blank).This BTS Bank format is available for the following SYSPRO Nationalities:
- RSA (Republic of South Africa)
Was this helpful?00
Hits: 84 - nikki13-09-2016
NetBank Secure (Nedbank)

Figure 1
Seed string - This is a 32 character field that may only contain characters ABCDEF123456789 and is mandatory (may not be left blank).
Payment format - Identify the type of payment used. May either be "FREE-FORMAT" or "PRE-FORMAT". This is determined by the contract made with the bank.
This BTS Bank format is available for the following SYSPRO Nationalities:- RSA (Republic of South Africa)
NOTE
This format requires that an associated DLL is registered on the PC that is physically running the EFT extract.
This is handled automatically by the BTS process but should the DLL registration fail due to permission issues, please see the "NetBank Secure Format Procedure" tab under "BTS Installation".Was this helpful?01
Hits: 203 - nikki13-09-2016
CPS (Nedbank)
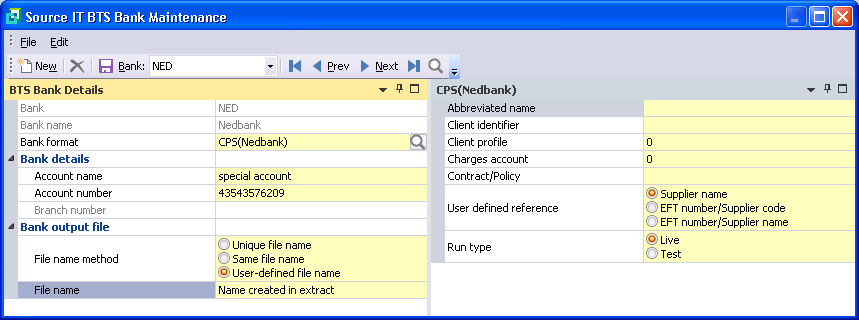
Figure 1
Abbreviated name - May not exceed 10 characters and is mandatory. This field appears on the extracted bank file as part of the supplier reference
Client identifier - This is a 2 character field and is mandatory
Client profile - This is a 10 character numeric field and is mandatory
Charges account - This is a 16 character numeric field and is optional (may be left as a zero)
Contract/Policy - This is a 14 character field and is mandatory. This field appears on the extracted bank file as part of the supplier reference
User defined reference - Identify what must appear in the reference field for the bank, the "Supplier name", "EFT number/Supplier code" or "EFT number/ Supplier name"
Run type - This field identifies the type of run. "Test" for a test run, and "Live" for a live run. The bank will treat the file accordinglyThis BTS Bank format is available for the following SYSPRO Nationalities:
- RSA (Republic of South Africa)
There are extra details required when using this BTS bank format. When maintaining the Supplier and/or Cash Book beneficiary in SYSPRO, the following screen as per Figure 2 will be seen:
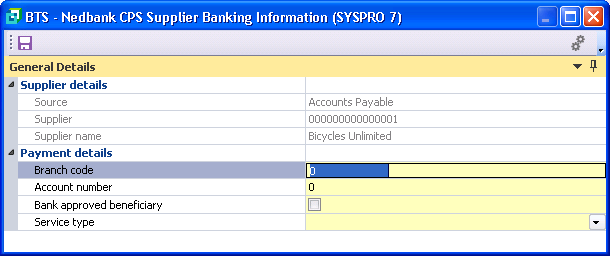
Figure 2
Branch code - May not exceed 9 character numerics and is mandatory
Account number - May not exceed 16 character numerics and is mandatory
Service type - This field must be selected from an available drop-down list (as per Figure 3) and is mandatory
Figure 3
Was this helpful?00
Hits: 86 - nikki13-09-2016
CAMS (First National)
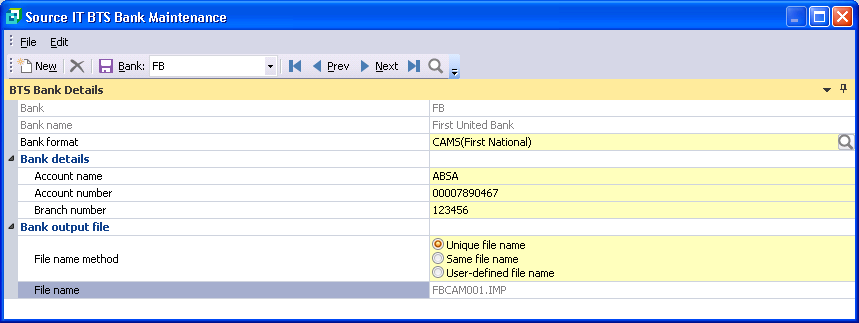
Figure 1
There are no extra parameters required for this bank format
This BTS Bank format is available for the following SYSPRO Nationalities:
- RSA (Republic of South Africa)
Was this helpful?01
Hits: 85 - nikki13-09-2016
PACS (First National)
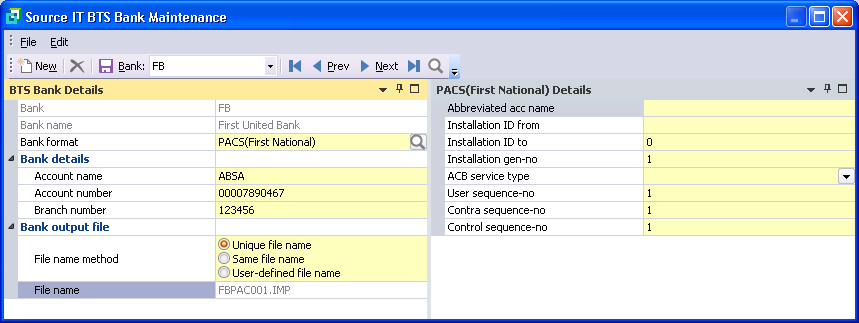
Figure 1
Abbreviated acc name - An abbreviated acc name for your company. May not exceed 10 characters and is mandatory. This field appears on the extracted bank file as the user reference
Installation ID from - This is a 4 character field and is mandatory
Installation ID to - This is a 4 character numeric field and is mandatory
Installation gen-no - This is a 4 character numeric field and is mandatory
ACB service type - This is a 10 character field that must be selected from an available drop-down list (as per Figure 2) and is mandatory
User sequence-no - This is a 6 character numeric field and is mandatory
Contra sequence-no - This is a 6 character numeric field and is mandatory
Control sequence-no - This is a 6 character numeric field and is mandatory
Figure 2
This BTS Bank format is available for the following SYSPRO Nationalities:
- RSA (Republic of South Africa)
Was this helpful?00
Hits: 79 - nikki14-09-2016
BANKit (First National)
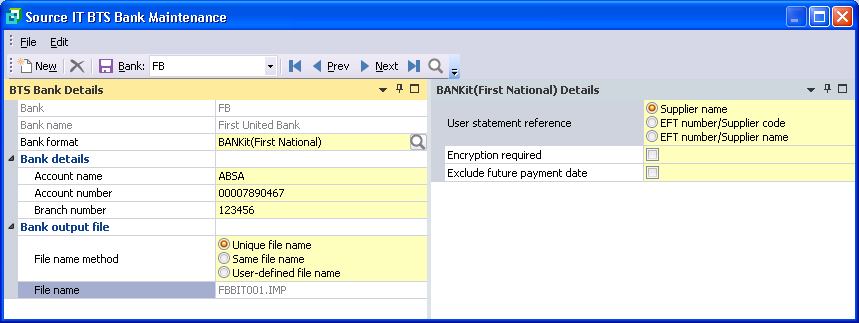
Figure 1
User statement reference - This decides what will appear on the Customer statement reference on the file that is sent to the bank: "Supplier name", "EFT number/Supplier code" or "EFT number/Supplier name".
Encryption required - Yes (if this check box is ticked)/No (if the check box is not ticked). If selected, a calculated encryption will be included in the BTS file extracted for the bank.
Exclude future payment date - Yes (if this check box is ticked)/No (if the check box is not ticked). If not selected,the date will populate the control record of the BTS file extracted for the bank.
This BTS Bank format is available for the following SYSPRO Nationalities:
- RSA (Republic of South Africa)
Was this helpful?00
Hits: 82 - nikki14-09-2016
CSV (First National)

Figure 1
User statement reference - This decides what will appear on the Customer statement reference on the file that is sent to the bank: "Supplier name", "EFT number/Supplier code" or "EFT number/Supplier name".
Encryption required - Yes (if this check box is ticked)/No (if the check box is not ticked). If selected, a calculated encryption will be included in the BTS file extracted for the bank.
Namibia - Yes (if this check box is ticked)/No (if the check box is not ticked). If selected, there are 2 fields on the Supplier Maintenance that are needed to be populated and these two fields appear on the payment extract file. If this fields is unticked (set to No, these fields are not used). Please note this feature is only available from SYSPRO 8 onwards.
This BTS Bank format is available for the following SYSPRO Nationalities:
- RSA (Republic of South Africa)
There are extra details required when using this BTS bank format. When maintaining the Supplier and/or Cash Book beneficiary in SYSPRO, the following screen as per Figure 2 will be seen:

Figure 2
It is possible to send a payment notification to a maximum of 5 email addresses, 2 SMSs and 2 faxes. The notify fields above are used to action the details entered.
All the fields in Figure 2 are optional and are generally explained below:
- notify fields - if entered to be used must contain Yes. The 2 fields following each notify field will be ignored by the bank if this field does not contain Yes
- email address fields - if entered to be used may not exceed 200 characters and must contain the email address to send the payment notification to
- subject fields - if entered to be used may not exceed 50 characters. These will be seen on the email to be sent as proof of payment
- code fields - if entered to be used must contain the first 3 digits of the cellphone or fax in question
- number fields - if entered to be used must contain the remaining 7 digits of the cellphone or fax number in question
SWIFT BIC code - This field is mandatory if the Namibia switch in the control has been selected for this format and optional if not selected. This field will replace the supplier's bank branch in the extracted file for Namibia. Please note this feature is only available from SYSPRO 8 onwards. Available options to select from as per Figure 3
Reason code - This field is mandatory if the Namibia switch in the control has been selected for this format and optional if not selected. This field is added to the end of the payment file only if Namibia in the control has been selected. Please note this feature is only available from SYSPRO 8 onwards. Available options to select from as per Figure 4

Figure 3

Figure 4
Was this helpful?00
Hits: 114 - nikki14-09-2016
AiDPS Swazi (First National)

Figure 1
Customer ID - This is a 4 character numeric field. If not entered or left as zero, will default to "9999". n abbreviated name for your company. May not exceed 10 characters and is mandatory
Transaction code - This may be either "40-Direct Debits" or "71-Salaries".
Run type - This field identifies the type of run. "TEST" for a test run, and "LIVE" for a live run. The bank will treat the file accordingly
Next run number - This is a display field only. It is not enterable or updateable and shows the next run number. This will increment with each BTS run
Last date run - This is a display field only. It is not enterable or updateable and shows the next run number. This field will be blank if BTS has not been run before, else it will show the date the last run occurred
This BTS Bank format is available for the following SYSPRO Nationalities:
- RSA (Republic of South Africa)
Was this helpful?00
Hits: 42 - nikki14-09-2016
EFT (CITIBANK)

Figure 1
Decimal point - This may be either "Fullstop" or "Comma" and whichever is chosen will appear as the decimal point in the value fields that are extracted by the BTS program
Encryption required - Yes (if this check box is ticked)/No (if the check box is not ticked). If selected, a calculated encryption will be included in the BTS file extracted for the bank.
Encryption tool directory - This is a 70 character field that may contain the full path of the encryption directory and is only needed if the "encryption required" field has the check box ticked. A browse is available to allow the user to find the path. If the path entered is invalid or the user has no permissions to the folder entered, the error as per Figure 2 will be seen. If the path entered does not contain the file "CreateSMime.class", the error as per Figure 3 will be seen.
Java runtime path - This is a 100 character field and is optional. This field is not validated and if entered is used to populate extract information on the BTS file that is extracted for the bank.
Bank details from ApMaster - This is a display field only. It is not enterable or updateable.
Default to ACH payment type - This is a display field only. It is not enterable or updateable.
Default country code - This is a display field only. It is not enterable or updateable.
Default ACH entry class - This is a display field only. It is not enterable or updateable.

Figure 2
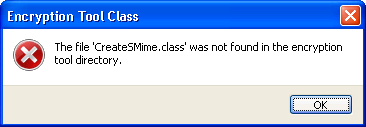
Figure 3
This BTS Bank format is available for the following SYSPRO Nationalities:
- RSA (Republic of South Africa)
Was this helpful?00
Hits: 60 - nikki14-09-2016
PAYLINK (CITIBANK)

Figure 1
Decimal point - This may be either "Fullstop" or "Comma" and whichever is chosen will appear as the decimal point in the value fields that are extracted by the BTS program
Encryption required - Yes (if this check box is ticked)/No (if the check box is not ticked). If selected, a calculated encryption will be included in the BTS file extracted for the bank.
Encryption tool directory - This is a 70 character field that may contain the full path of the encryption directory and is only needed if the "encryption required" field has the check box ticked. A browse is available to allow the user to find the path. If the path entered is invalid or the user has no permissions to the folder entered, the error as per Figure 2 will be seen. If the path entered does not contain the file "CreateSMime.class", the error as per Figure 3 will be seen.
Java runtime path - This is a 100 character field and is optional. This field is not validated and if enterd is used to populate extract information on the BTS file that is extracted for the bank.
Bank details from ApMaster - This is a display field only. It is not enterable or updateable.
Default to ACH payment type - This is a display field only. It is not enterable or updateable.
Default country code - This is a display field only. It is not enterable or updateable.
Default ACH entry class - This is a display field only. It is not enterable or updateable.
Figure 2
Figure 3
This BTS Bank format is available for the following SYSPRO Nationalities:
- RSA (Republic of South Africa)
Was this helpful?00
Hits: 50 - nikki14-09-2016
CITIDIRECT (CITIBANK)
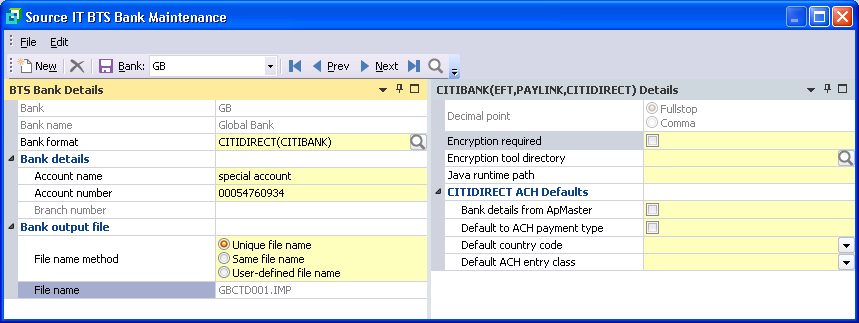
Figure 1
Decimal point - This may be either "Fullstop" or "Comma" and whichever is chosen will appear as the decimal point in the value fields that are extracted by the BTS program
Encryption required - Yes (if this check box is ticked)/No (if the check box is not ticked). If selected, a calculated encryption will be included in the BTS file extracted for the bank.
Encryption tool directory - This is a 70 character field that may contain the full path of the encryption directory and is only needed if the "encryption required" field has the check box ticked. A browse is available to allow the user to find the path. If the path entered is invalid or the user has no permissions to the folder entered, the error as per Figure 2 will be seen. If the path entered does not contain the file "CreateSMime.class", the error as per Figure 3 will be seen.
Java runtime path - This is a 100 character field and is optional. This field is not validated and if enterd is used to populate extract information on the BTS file that is extracted for the bank.
Bank details from ApMaster - Yes (if this check box is ticked)/No (if the check box is not ticked).
Default to ACH payment type - Yes (if this check box is ticked)/No (if the check box is not ticked).
Default country code - This field is optional. A dropdown list is available as per Figure 4 for selection.
Default ACH entry class - This field is optional. A dropdown list is available as per Figure 5 for selection.
Figure 2
Figure 3

Figure 4
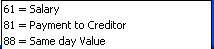
Figure 5
This BTS Bank format is available for the following SYSPRO Nationalities:
- RSA (Republic of South Africa)
There are extra details required when using this BTS bank format. When maintaining the Supplier and/or Cash Book beneficiary in SYSPRO, the following screen as per Figure 6 will be seen:

Figure 6
Country - This field must be selected from an available drop-down list (as per Figure 4) and is mandatory
Payment method - This field must be selected from an available drop-down list (as per Figure 7) and is mandatory
Supplier narration 1 - May not exceed 35 characters and is optional
Supplier narration 2 - May not exceed 35 characters and is optional
BKT Information (only if Payment method is set to "BKT")
Destination branch - May not exceed 3 numerics and is optional
DFT Information (only if Payment method is set to "DFT")
DFT Bank route code - May not exceed 11 characters and is mandatory
RCH Information (only if Payment method is set to "RCH")
RCH Delivery method - This field must be selected from an available drop-down list (as per Figure 8) and is mandatory
ACH Information (only if Payment method is set to "ACH")
Entry class - This field must be selected from an available drop-down list (as per Figure 5) and is mandatory
Account type - This field must be selected from an available drop-down list (as per Figure 9) and is mandatory
ACH Beneficiary account - May not exceed 13 characters and is mandatory
ACH Bank route code - May not exceed 6 numerics and is mandatory
EFT Information (only if Payment method is set to "EFT")
Beneficiary account - May not exceed 34 characters and is mandatory
Beneficiary bank name - May not exceed 35 characters and is mandatory
Beneficiary bank addr1 - May not exceed 35 characters and is mandatory
Beneficiary bank addr2 - May not exceed 35 characters and is optional
Beneficiary bank addr3 - May not exceed 35 characters and is optional
Other instruction - This field must be selected from an available drop-down list (as per Figure 10) and is mandatory
Bank route method - This field must be selected from an available drop-down list and may only be "IS - SWIFT" and is mandatory
Charge indicator - This field must be selected from an available drop-down list (as per Figure 11) and is mandatory
Bank route code - May not exceed 11 characters and is mandatory
Beneficiary is - This field must be selected from an available drop-down list (as per Figure 12) and is mandatory

Figure 7

Figure 8

Figure 9

Figure 10

Figure 11

Figure 12
Was this helpful?00
Hits: 83 - nikki14-09-2016
CITI Preformat (CITIBANK)

Figure 1
There are no extra parameters required for this bank format
This BTS Bank format is available for the following SYSPRO Nationalities:
- RSA (Republic of South Africa)
Was this helpful?00
Hits: 53 - nikki14-09-2016
Bureau (Bank Windhoek)
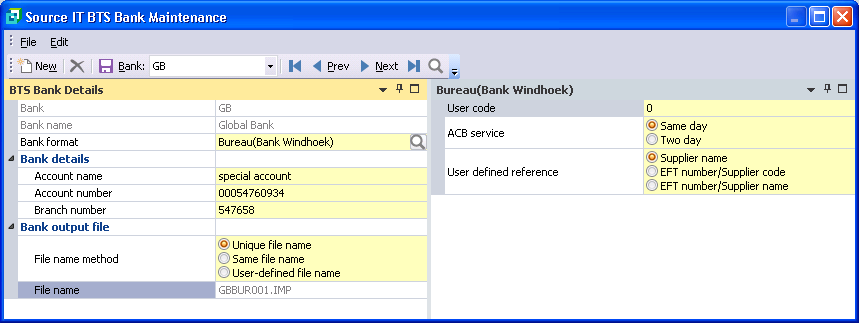
Figure 1
User code - This is a 4 character number field that is allocated by the bank and is mandatory.
ACB service - This may be either "Same day" or "Two day".
User statement reference - This decides what will appear on the Customer statement reference on the file that is sent to the bank: "Supplier name", "EFT number/Supplier code" or "EFT number/Supplier name".
This BTS Bank format is available for the following SYSPRO Nationalities:
- RSA (Republic of South Africa)
Was this helpful?00
Hits: 51 - nikki14-09-2016
BANK@bility (Mercantile)

Figure 1
There are no extra parameters required for this bank format
This BTS Bank format is available for the following SYSPRO Nationalities:
- RSA (Republic of South Africa)
Was this helpful?00
Hits: 45 - nikki14-09-2016
BOE (BOE Bank)

Figure 1
Abbreviated acc name - An abbreviated acc name for your company. May not exceed 10 characters and is mandatory. This field appears on the extracted bank file as the user reference
User code - This is a 4 character number field that is allocated by the bank and is mandatory.
ACB service - This is a 1 character field that must be selected from an available drop-down list (as per Figure 2) and is mandatory.
User statement reference - This decides what will appear on the Customer statement reference on the file that is sent to the bank: "Supplier name", "EFT number/Supplier code" or "EFT number/Supplier name".
BOE version no - This is a display field only and will always be "03". It is not enterable or updateable.
Figure 2
This BTS Bank format is available for the following SYSPRO Nationalities:
- RSA (Republic of South Africa)
Was this helpful?00
Hits: 42 - nikki14-09-2016
Global ACH GDFF (JP Morgan)

Figure 1
Client ID - This is a 10 character field and is mandatory. This field should be allocated by the bank.
User defined reference - This decides what will appear on the Customer statement reference on the file that is sent to the bank: "Supplier name", "EFT number/Supplier code" or "EFT number/Supplier name".
This BTS Bank format is available for the following SYSPRO Nationalities:
- RSA (Republic of South Africa)
There are extra details required when using this BTS bank format. When maintaining the Supplier and/or Cash Book beneficiary in SYSPRO, the following screen as per Figure 2 will be seen:

Figure 2
Destination country - This may only be ZA and is mandatory
Branch code - May not exceed 6 character numerics and is mandatory
Account number - May not exceed 13 character numerics and is mandatory
Supplier currency - May not exceed 3 characters and is mandatory. A browse facility has been made available should you wish to search SYSPRO for available currency codes
Transaction category - This field must be selected from an available drop-down list (as per Figure 3) and is mandatory
Statement reference - May not exceed 20 characters and is optional

Figure 3
Was this helpful?00
Hits: 51 - nikki14-09-2016
FTI GMT (JP Morgan)

Figure 1
Client ID - This is a 8 character field and is mandatory. This field should be allocated by the bank.
User defined reference - This decides what will appear on the Customer statement reference on the file that is sent to the bank: "Supplier name", "EFT number/Supplier code" or "EFT number/Supplier name".
Last batch number - This is a display field only. It is not enterable or updateable and shows the last batch number used. This will increment with each BTS run.
This BTS Bank format is available for the following SYSPRO Nationalities:
- RSA (Republic of South Africa)
There are extra details required when using this BTS bank format. When maintaining the Supplier and/or Cash Book beneficiary in SYSPRO, the following screen as per Figure 2 will be seen:

Figure 2
Payment method - This field must be selected from an available drop-down list (as per Figure 3) and is mandatory
Payment location - This must be "JPJ-JHB held payments" and is mandatory
Country - May not exceed 2 characters and is mandatory. A browse facility has been made available should you wish to search SYSPRO for available country codes
Currency code - May not exceed 3 characters and is mandatory. A browse facility has been made available should you wish to search SYSPRO for available currency codes
Bank name - May not exceed 35 characters and is mandatory
Bank country - May not exceed 2 characters and is mandatory. A browse facility has been made available should you wish to search SYSPRO for available country codes
Account or IBAN number - May not exceed 34 characters and is mandatory
Bank swift ID - May not exceed 35 characters and is optional
SARB BOP code(TLX only) - May not exceed 35 characters and is optional
Correspondent charges - This field will default to "B-Beneficiary". the drop down selection will allow you select "R-Remitter" should you wish to change it
Debit bank charges - This field will default to "R-Remitter". the drop down selection will allow you select "B-Beneficiary" should you wish to change it
Beneficiary type - This field will default to "N-Beneficiary is not a bank". the drop down selection will allow you select "B-Beneficiary is a bank" should you wish to change it
Statement reference - May not exceed 16 characters and is optional
All the Intermediary details fields are optional
Identifier, Name, Address 1, Address 2 and Address 3 - May not exceed 35 characters
Swift ID - May not exceed 11 characters
Intermediary country - May not exceed 2 characters. A browse facility has been made available should you wish to search SYSPRO for available country codes

Figure 3
Was this helpful?00
Hits: 55 - nikki14-09-2016
SFI (Stanbic)
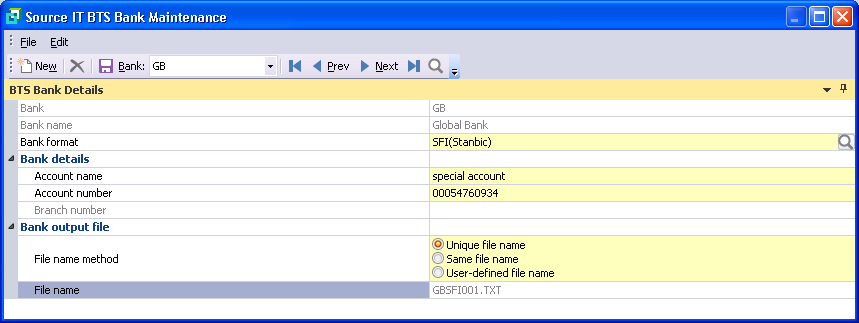
Figure 1
There are no extra parameters required for this bank format
This BTS Bank format is available for the following SYSPRO Nationalities:
- RSA (Republic of South Africa)
Was this helpful?00
Hits: 50 - nikki14-09-2016
CSV NBOL (Stanbic)

Figure 1
User statement reference - This determines what the user would like to see as the statement reference: may be "Supplier number", "EFT number/supplier code" or "EFT number/supplier name"
Charges bearer - This may be "OUR" - if the charges are the companies, "BEN" - if the changes belong to the Beneficiaries or "SHA" - if the charges are shared between the two
This BTS Bank format is available for the following SYSPRO Nationalities:
- RSA (Republic of South Africa)
There are extra details required when using this BTS bank format. When maintaining the Supplier and/or Cash Book beneficiary in SYSPRO, the following screen as per Figure 2 will be seen:

Figure 2
Instruction service level - May be "Normal", "Urgent" or "UrgentSA"
Account type - May be "Current", "Savings", "Transmission", "Bond" or "Subscription"
Account number - May not exceed 35 characters and is mandatory
IBAN account number - May not exceed 35 characters and is optional
Supplier currency - May not exceed 3 characters and is mandatory. A browse facility has been made available should you wish to search SYSPRO for available currency codes
BOP code - May not exceed 10 characters and is optional
Beneficiary code - May not exceed 16 characters and is optional
Country code - May not exceed 3 characters and is optional. A browse facility has been made available should you wish to search SYSPRO for available country codes
All the Financial Details fields are optional
Agent bank name and Intermediary bank name - May not exceed 70 characters
Agent bank address, Agent sort code, Intermediary bank address and Intermediary bank town - May not exceed 35 characters
Agent BIC code and Intermediary bank BIC - May not exceed 11 characters
Agent bank country - May not exceed 2 characters. A browse facility has been made available should you wish to search SYSPRO for available country codes
Was this helpful?00
Hits: 57 - nikki14-09-2016
PAY ALERT (Stanbic)
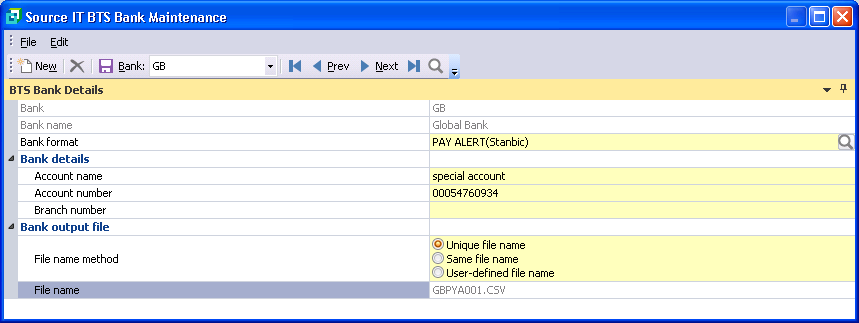
Figure 1
There are no extra parameters required for this bank format
This BTS Bank format is available for the following SYSPRO Nationalities:
- RSA (Republic of South Africa)
There are extra details required when using this BTS bank format. When maintaining the Supplier and/or Cash Book beneficiary in SYSPRO, the following screen as per Figure 2 will be seen:

Figure 2
Account number - May not exceed 35 characters and is mandatory
Bank sort code - May not exceed 6 characters and is optional
Bank swiftcode - May not exceed 11 characters and is optional
IBAN code - May not exceed 35 characters and is optional
Statement reference - May not exceed 35 characters and is optional
Country code - May not exceed 2 characters and is mandatory. A browse facility has been made available should you wish to search SYSPRO for available country codes
Address line 1 - May not exceed 35 characters and is optional
Bank country code - May not exceed 2 characters and is mandatory. A browse facility has been made available should you wish to search SYSPRO for available country codes
Bank address line 1 - May not exceed 35 characters and is optional
Payment reason/BOP code and Payment reason/BOP code - May not exceed 50 characters and are optional
Intermediary bank details and Correspondence bank details - May not exceed 11 characters and are optional
Was this helpful?00
Hits: 54 - nikki19-09-2016
SFI (Barclays)

Figure 1
There are no extra parameters required for this bank format
This BTS Bank format is available for the following SYSPRO Nationalities:
- RSA (Republic of South Africa)
Was this helpful?00
Hits: 49 - nikki19-09-2016
Local Payment (Barclays)

Figure 1
Bank code - This is a 3 character numeric field and may not be zero.
Branch code - This is a 3 character numeric field and may not be zero.
Exclude EFT number from bank file - Yes (if this check box is ticked)/No (if the check box is not ticked).
Supplier branch from EFT-USER1 field - Yes (if this check box is ticked) will extract the Branch from EFT-USER-DEFINE1 field/No (if the check box is not ticked) will extract the Supplier Branch.
BTC variations - This has a drop down selection that is available and would look like Figure 2

Figure 2
This BTS Bank format is available for the following SYSPRO Nationalities:
- RSA (Republic of South Africa)
Was this helpful?00
Hits: 62 - nikki19-09-2016
Barclays.net (Barclays)

Figure 1
Remittance type - This determines what must be extracted as the remittance. Options are: "Use SYSPRO" (which will use the information as entered and selected in SYSPRO), "E-mail address", "Fax number" or "SMS number" . If anything other than "Use SYSPRO" is selected, the user will need to enter the User defined remittance below
User defined remittance - This field is only applicable if the previous Remittance type field has not been set to "Use SYSPRO". The rules behind this entered field is:
- "E-mail address" - 100 characters for e-mail address to be used as the remittance. This is not validated
- Fax/SMS number - Must start with '+' and be followed by at least 11 numbers that do not start with zero. A valid example is +27117814000. If the Fax or SMS number is invalid, the user will see the message as per Figure 2
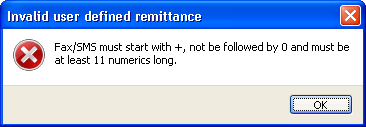
Figure 2
Debtor BIC code - This caters for 8 characters and is used in the extracted payment file
Extract currency - This caters for 3 characters and is used in the extracted payment file
This BTS Bank format is available for the following SYSPRO Nationalities:
- RSA (Republic of South Africa)
Was this helpful?00
Hits: 67 - nikki19-09-2016
STS (Standard Chartered)
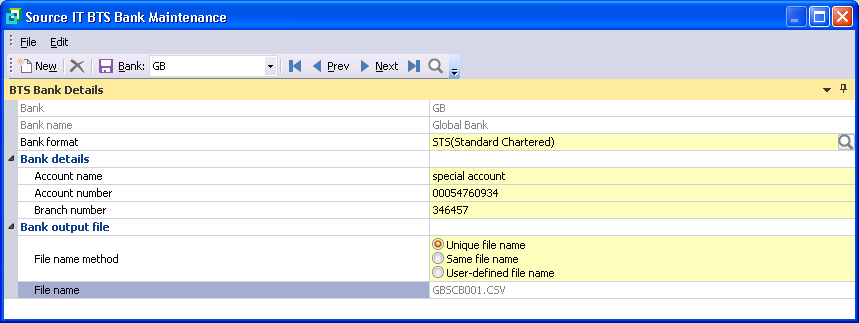
Figure 1
There are no extra parameters required for this bank format
This BTS Bank format is available for the following SYSPRO Nationalities:
- RSA (Republic of South Africa)
Was this helpful?00
Hits: 51 - nikki19-09-2016
iPAYMENTS (Standard Chartered)

Figure 1
There are no extra parameters required for this bank format
This BTS Bank format is available for the following SYSPRO Nationalities:
- RSA (Republic of South Africa)
There are extra details required when using this BTS bank format. When maintaining the Supplier and/or Cash Book beneficiary in SYSPRO, the following screen as per Figure 2 will be seen:
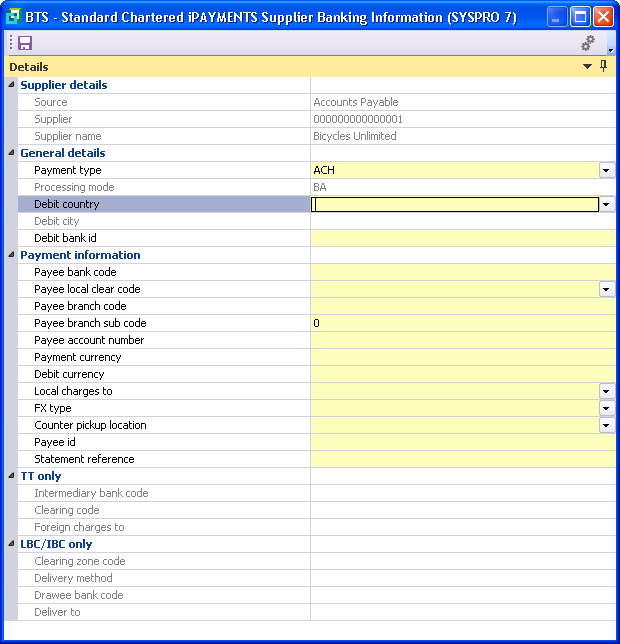
Figure 2
Payment type - This field must be selected from an available drop-down list (as per Figure 3) and is mandatory. The the payment type selected is not supported in your country, you will see the error as per Figure 4
Debit country - This field must be selected from an available drop-down list (as per Figure 5) and is mandatory
Debit bank ID - May not exceed 11 characters and is optional
Payee bank code - May not exceed 11 characters and is optional
Payee local clear code - May not exceed 17 characters and is optional
Payee branch code - May not exceed 5 characters and is optional
Payee branch sub code - May not exceed 2 character numerics and is optional. This field is not available for entry when using "RTGS" Payment type
Payee account number - May not exceed 34 characters and is optional
Payment currency - May not exceed 3 characters and is optional
Debit currency - May not exceed 3 characters and is optional
Local charges to - May not exceed 10 characters and is optional
FX type - This field must be selected from an available drop-down list (as per Figure 6) and is optional
Counter pickup location - May not exceed 3 characters and is optional. This field is not available for entry when using "RTGS" Payment type
Payee id - May not exceed 35 characters and is optional
Statement reference - May not exceed 70 characters and is optional
The following is only required if the Payment type is "TT" as per Figure 7
Intermediary bank code - May not exceed 11 characters and is optional
Clearing code - May not exceed 105 characters and is optional
Foreign charges to - This field must be selected from an available drop-down list (as per Figure 8) and is optional
The following is only required if the Payment type is "LBC" or "IBC" as per Figure 9
Clearing zone code - May not exceed 30 characters and is mandatory
Delivery method - This field must be selected from an available drop-down list (as per Figure 10) and is mandatory
Drawee bank code - May not exceed 11 characters and is mandatory
Delivery to - This field must be selected from an available drop-down list (as per Figure 11) and is mandatory

Figure 3
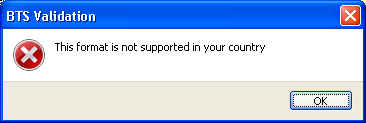
Figure 4

Figure 5

Figure 6

Figure 7

Figure 8

Figure 9

Figure 10

Figure 11
Was this helpful?00
Hits: 73 - nikki19-09-2016
SAB-iPAY (Standard Chartered)

Figure 1
There are no extra parameters required for this bank format
This BTS Bank format is available for the following SYSPRO Nationalities:
- RSA (Republic of South Africa)
There are extra details required when using this BTS bank format. When maintaining the Supplier and/or Cash Book beneficiary in SYSPRO, the following screen as per Figure 2 will be seen:

Figure 2
Payment type - This field must be selected from an available drop-down list (as per Figure 3) and is mandatory
Debit country - This field must be selected from an available drop-down list (as per Figure 4) and is mandatory
Payee account number - May not exceed 34 characters and is optional
Payee bank code - May not exceed 11 characters and is optional
Payee branch code - May not exceed 5 characters and is optional
Payment currency - This field must be selected from an available drop-down list (as per Figure 3) and is mandatory
Debit currency - This field must be selected from an available drop-down list (as per Figure 3) and is mandatory
Statement reference - May not exceed 70 characters and is optional
Payee branch sub code - May not exceed 2 character numerics and is optional. This field is only available for entry when using "ACH" Payment type
Payee local clear code - May not exceed 17 characters and is optional. This field is not available for entry when using "BT" Payment type
Local charges to - This field must be selected from an available drop-down list (as per Figure 5) and is optional. This field is not available for entry when using "BT" or "ACH" Payment types
FX type - This field must be selected from an available drop-down list (as per Figure 6) and is optional.This field is not available for entry when using "BT" or "ACH" Payment types
The following is only required if the Payment type is "TT" as per Figure 7
Intermediary bank code - May not exceed 11 characters and is optional
Clearing code - May not exceed 105 characters and is optional
Foreign charges to - This field must be selected from an available drop-down list (as per Figure 5) and is optional

Figure 3
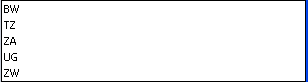
Figure 4
Figure 5
Figure 6

Figure 7
Was this helpful?00
Hits: 57 - nikki19-09-2016
ePAYMENTS (Standard Chartered)

Figure 1
There are no extra parameters required for this bank format
This BTS Bank format is available for the following SYSPRO Nationalities:
- RSA (Republic of South Africa)
Was this helpful?00
Hits: 44 - nikki19-09-2016
Straight2B (Standard Chartered)

Figure 1
There are no extra parameters required for this bank format
This BTS Bank format is available for the following SYSPRO Nationalities:
- RSA (Republic of South Africa)
There are extra details required when using this BTS bank format. When maintaining the Supplier and/or Cash Book beneficiary in SYSPRO, the following screen as per Figure 2 will be seen:

Figure 2
Branch code - May not exceed 15 characters and is mandatory
Account number - May not exceed 34 characters and is mandatory
Bank code - May not exceed 11 characters and is mandatory
Currency - May not exceed 3 characters and is mandatory. Selecting the browse button will show a list of available SYSPRO currencies
Payment details 1 - May not exceed 70 characters and is optional
Payment details 2 - May not exceed 70 characters and is optional
Email address - May not exceed 255 characters and is optional
Was this helpful?00
Hits: 54 - nikki19-09-2016
iFILE (HSBC)

Figure 1
Country code - Identify the country (nationality) the file is being extracted for. May either be "IN" (for India) or "ZA" (for RSA).
Institution code - Identify the institution. May either be "HBAP" or "HBEU".
Account currency - This the currency that must appear on the bank file must be entered here. It cannot exceed 3 characters and is mandatory. Selecting the browse button will show a list of BTS available currencies as per Figure 2.
Hexagon ABC ID - This is an 11 character field and is mandatory. This is used as the Customer ID.
HSBC net ID - This is an 18 character field and is mandatory. This is used as the HSBC ID.
Account number - This is a 35 character field and is mandatory. This is the customer account number.
File format - Will always be "IFILE"
File type - Will always be "CSV"
Authorization type - This is the authorization that needs to be supplied by the bank and can be: "P", "F", "V" or "S"
File version - Will always be 1.0
ADV required - Yes (if this check box is ticked)/No (if the check box is not ticked). This determines if the relevant records need to be extracted or not.
Figure 2
This BTS Bank format is available for the following SYSPRO Nationalities:
- RSA (Republic of South Africa)
There are extra details required when using this BTS bank format. When maintaining the Supplier and/or Cash Book beneficiary in SYSPRO, the following screen as per Figure 3 will be seen:

Figure 3
Instruction type - This field must be selected from an available drop-down list (as per Figure 4) and is mandatory
Beneficiary country code - May not exceed 2 characters and is mandatory. A browse facility has been made available should you wish to search SYSPRO for available currency codes
Payment currency - May not exceed 2 characters and is mandatory. A browse facility has been made available should you wish to search SYSPRO for available currency codes. This field is not available for entry is the Instruction type is "ACC" or "ICO".
Account number - May not exceed 11 character numerics and is mandatory only if the Instruction type is "ACH"
Branch number - This field must be selected from an available drop-down list (as per Figure 5) and is mandatory only if the Instruction type is "ACH"
Reference - May not exceed 34 characters and is mandatory only if the Instruction type is "ACH"
The following Email fields are only available for entry if the ADV required field has been selected in Figure 1
Email address 1 - May not exceed 70 characters and is mandatory
Email address 2 & 3 - May not exceed 70 characters and is optional
The following is only available for maintenance if the Instruction type is set to "PP", "RTGS", "IAT" or "NEFT" (as per Figure 6)
Account number - May not exceed 35 characters and is mandatory
Charge details - This field must be selected from an available drop-down list (as per Figure 7) and is mandatory (unless the Instruction type is set to "PP", then this field is optional)
Bank ID/SWIFT code - This field must be selected from an available drop-down list (as per Figure 8) and is optional
Bank ID/SWIFT address - May not exceed 34 characters and is optional (unless the Instruction type is set to "NEFT" or "RTGS" then this field is mandatory)
Bene bank name - May not exceed 35 characters and is mandatory. Only available when only when the Instruction type is set to "PP"
Bene bank address 1 - 3 - May not exceed 35 characters. Only Bene bank address 1 is mandatory and the others are optional. Only available when only when the Instruction type is set to "PP"
Reference - May not exceed 35 characters and is optional. Only available when only when the Instruction type is set to "PP"
Bene CHIPS UID - May not exceed 6 characters and is optional. Only available when only when the Instruction type is set to "PP"
The following is only available for maintenance if the Instruction type is set to "ACC", "ICO", "IDD" (as per Figure 9)
Institution code - This field must be selected from an available drop-down list and if entered, may only be "HBAP". This field is mandatory
Deduct charge flag - This field must be selected from an available drop-down list and if entered, may only be "B" or "C". This field is mandatory
Printing location - This field must be selected from an available drop-down list and if entered, may only be "Bangalore". This field is mandatory
Payable locations - May not exceed 100 characters and is optional, unless the Instruction type is set to "IDD" - in which case it is mandatory . A browse facility has been made available should you wish to search SYSPRO for available payable locations.
Deliver to - This field must be selected from an available drop-down list and if entered, may only be "S" or "B". This field is mandatory

Figure 4

Figure 5

Figure 6
Figure 7

Figure 8
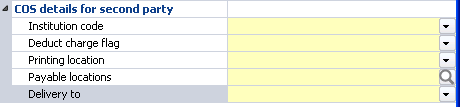
Figure 9
Was this helpful?00
Hits: 80 - nikki21-09-2016
KCB Quickpay (Kenya Commercial)

Figure 1
There are no extra parameters required for this bank format
This BTS Bank format is available for the following SYSPRO Nationalities:
- RSA (Republic of South Africa)
Was this helpful?00
Hits: 47 - nikki21-09-2016
Trade Payments CSV (CBA)
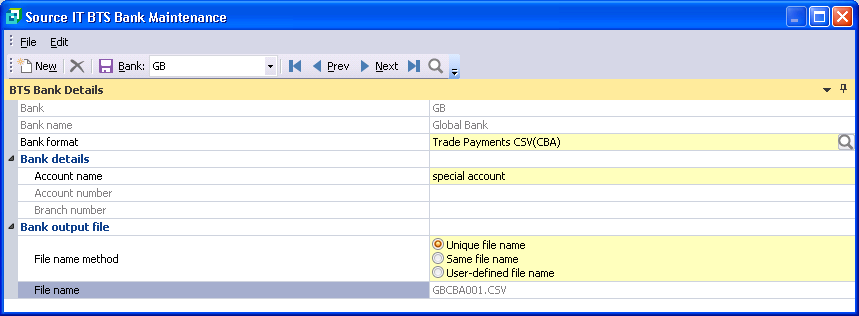
Figure 1
There are no extra parameters required for this bank format
This BTS Bank format is available for the following SYSPRO Nationalities:
- RSA (Republic of South Africa)
Was this helpful?00
Hits: 41 - nikki21-09-2016
BSI VDB (ABN Amro Bank)

Figure 1
There are no extra parameters required for this bank format
This BTS Bank format is available for the following SYSPRO Nationalities:
- RSA (Republic of South Africa)
There are extra details required when using this BTS bank format. When maintaining the Supplier and/or Cash Book beneficiary in SYSPRO, the following screen as per Figure 2 will be seen:

Figure 2
Transfer currency - May not exceed 3 characters and is mandatory
Intermediary bank - May not exceed 11 characters and is optional
Account number - May not exceed 34 characters and is mandatory
Bank sort code - May not exceed 17 characters and is optional
Account residency - This is a radio button and allows for either "Resident" or "Non-resident" options
Beneficiary name - May not exceed 35 characters and is optional
Address - May not exceed 35 characters and is optional
Postal/zip code - May not exceed 9 characters and is optional
City - May not exceed 35 characters and is optional
Country ISO code - May not exceed 2 characters and is optional
Bank SWIFT ID - May not exceed 35 characters and is optional
Bank name - May not exceed 35 characters and is optional
Bank city - May not exceed 35 characters and is optional
Bank country ISO code - May not exceed 2 characters and is optional
Was this helpful?00
Hits: 39 - nikki21-09-2016
FIHRST (Fihrst Management)
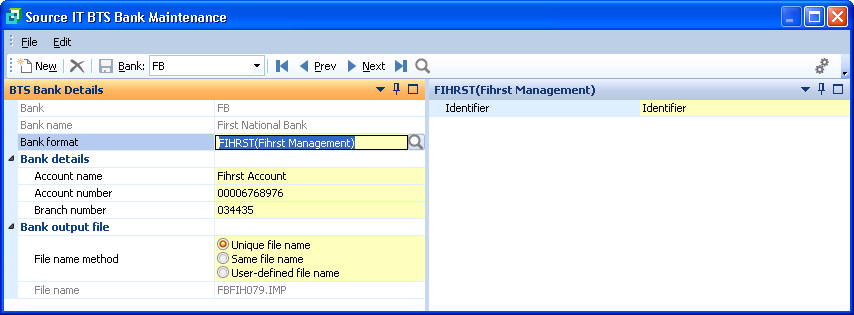
Figure 1
Identifier - This is mandatory and can contain a maximum of 10 characters
The e-mail address in the Supplier maintenance in SYSPRO needs to be entered as per the highlighted field in Figure 2
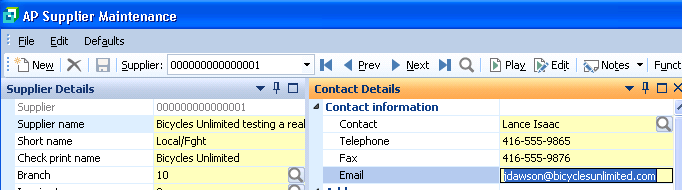
Figure 2
This BTS Bank format is available for the following SYSPRO Nationalities:
- RSA (Republic of South Africa)
Was this helpful?00
Hits: 53 - nikki21-09-2016
BCI (Banco Comercial)

Figure 1
There are no extra parameters required for this bank format
This BTS Bank format is available for the following SYSPRO Nationalities:
- RSA (Republic of South Africa)
There are extra details required when using this BTS bank format. When maintaining the Supplier and/or Cash Book beneficiary in SYSPRO, the following screen as per Figure 2 will be seen:

Figure 2
Conta(account number) - May not exceed 21 characters and is mandatory
Descritivo(reference) - May not exceed 20 characters and is optional
Was this helpful?00
Hits: 47 - nikki21-02-2017
NACHA (USA)
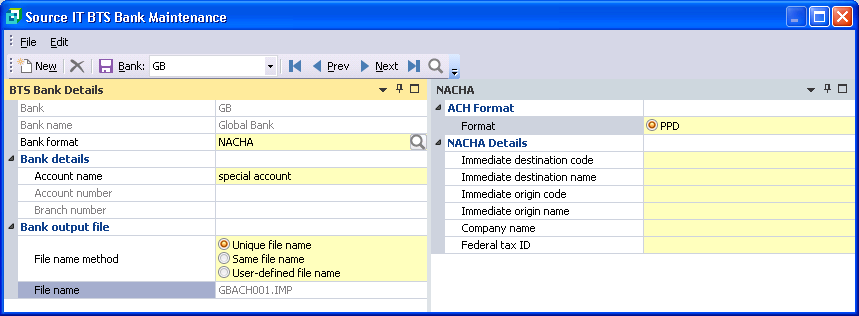
Figure 1
Format - This will always be PPD
Immediate destination code - This is a 10 character field and is mandatory.
Immediate destination name - This is a 23 character field and is mandatory.
Immediate origin code - This is a 10 character field and is mandatory.
Immediate origin name - This is a 23 character field and is mandatory.
Company name - This is a 16 character field and is mandatory. This is the abbreviated company name.
Federal tax ID - This is a 10 character field and is mandatory.
Was this helpful?00
Hits: 51 - admin11-03-2019
BOA (Bank of Africa)
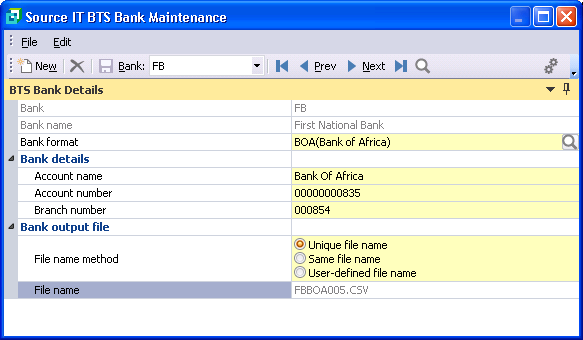
Figure 1
There are no extra parameters required for this format
This BTS Bank format is available for the following SYSPRO Nationalities:
- RSA (Republic of South Africa)
There are extra details required when using this BTS bank format. When maintaining the Supplier and/or Cash Book beneficiary in SYSPRO, the following screen as per Figure 2 will be seen:
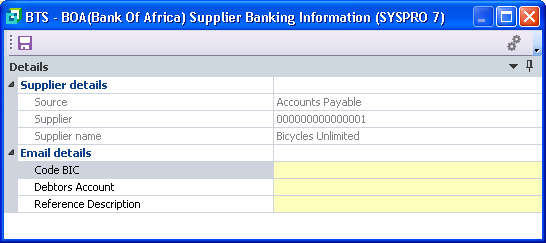
Figure 2
Code BIC - This field is mandatory and must be entered. It may contain a maximum of 24 characters.
Debtors Account - This field is mandatory and must be entered. It may contain a maximum of 24 characters.
Reference Description - This field is mandatory and must be entered. It may contain a maximum of 70 characters and may not contain "special" characters. Valid characters are spaces, A - Z (both upper and lower case) as well as 0 - 9. Any other character be seen as an error and the message as per Figure 3 will be seen.

Figure 3
Was this helpful?00
Hits: 38 - admin20-01-2020
SWIFT (Standard Chartered)

Figure 1
User defined customer reference - This decides what will appear on the Customer statement reference on the file that is sent to the bank: "Supplier name", "EFT number/Supplier code" or "EFT number/Supplier name".
XML dashboard path - This is the physical path where all the "feedback" return files from the bank will reside. This path needs to be accessible from SYSPRO itself and must have the correct permissions. The BTS Dashboard program (found on the new SYSPRO 7 BTS menu in SYSPRO under Transaction Processing as per Figure 2)
File name prefix - This is a maximum of 6 characters and is mandatory. This is the 1st 6 characters of the physical file name extracted by this bank format
Group header ID - This is a maximum of 20 characters and is mandatory. This is the tag to identify the company profile
BIC number - This is a maximum of 11 characters and is mandatory. This is bank BIC code for the company
Large account number - This is a maximum of 16 characters and is mandatory. BTS bank account number only stores 11 characters. As SWIFT banks require a larger account number, this field is used instead
Payment approval - If this switch is ticked, this prevents the BTS from extracting the physical XML payment file until the EFT batch is approved by authorised users - as per Figure 2
Number of level 1 authorisers - If the Payment approval is ticked, the user may enter how many level 1 authorisers are required. This is drop down that allows between 0 and 9
Number of level 2 authorisers - If the Payment approval is ticked, the user may enter how many level 2 authorisers are required. This is drop down that allows between 0 and 9
Sub-level authority allowed - If the Payment approval is ticked, the user may tick this entry allowing level 2 authorisers to function as level 1 authorisers.
Bank address line 1 - This field is optional and may contain 40 characters of the bank address line 1
Bank address line 2 - This field is optional and may contain 40 characters of the bank address line 2
Bank address line 3 - This field is optional and may contain 40 characters of the bank address line 3
Bank address line 4 - This field is optional and may contain 40 characters of the bank address line 4Country
This option will include the vendor code in the “InstrId” tag along with the EFT number
Maputo Instrid – optionally include the vendor code in the “InstrId” tag along with the EFT number.
This process will also remove leading zero’s from the beginning of the EFT number itself.
An example would be as follows: “84-BYTMZM001” where “BYTMZM001” would represent the vendor code and “84” the EFT batch number without the leading zerosMulesoft Web Service
This set of parameters caters for the automatic pushing of the BTS payment XML files into the Mulesoft API solution.
This process makes use of the BTS SourceIT_ServiceIntegration.dll
Flowid – Inclusion of this Flowid will serve to activate this service and the validation of the rest of the associated parameters.
Path – Location that the XML files will be pushed by the SourceIT_ServiceIntegration.dll process
Port – Port number. If the port number is included in the "Path" parameter, then do not enter the port number.
Username – User ID for login
Password – Login passwordMulesoft WCF Service
This set of parameters is passed to a WCF service installed separately which handles the receiving of the return XML files as sent by the Mulesoft API solution.
BTS will automatically import these files into the BTS SWIFT dashboard.
Host – Local host setup
Port number – Local port number
Username – User ID for login
Password – Login password
Active – the WCF Service will check this parameter each time the service or the server is restarted and it will only start if this parameter is tickedFigure 2
If your BTS menu does not like the menu above (with this Transaction Processing menu options), please follow the instructions on our website for the BTS Installation - Initialise the BTS system (File --> Run SITINI and enter the 3 options. You will be asked if you wish to remove each in SYSPRO. Select No and the BTS installed products will be amended. Then you should see the Transaction Processing option under the BTS menu. Without these 2 functions, the SWIFT Dashboard and Payment Approval processes cannot be controlled on site)
This BTS Bank format is available for all African Nationalities:
- RSA (Republic of South Africa)
- BWP (Botswana)
- ZAM (Zambia)
- UG (Uganda)
- KEN (Kenya)
- GH (Ghana)
- MZ (Mozambique)
- TZ (Tanzania)
There are extra details required when using this BTS bank format. When maintaining the Supplier and/or Cash Book beneficiary in SYSPRO, the following screen as per Figure 3 will be seen:

Figure 3
Payment type - May be selected from the available drop down list as per Figure 4a and 4b
BIC number - This is a maximum of 11 characters and is mandatory. This is the BIC code for the Supplier
Country code - This is a maximum of 2 character country code and is mandatory. There is no validation
Reference - This is a maximum of 35 characters and is mandatory. This is a free-format supplier reference
Additional reporting - This is a maximum of 140 characters and is optional. Selecting the browse button will show a list of available currencies as per Figure 2
Account number - This is a maximum of 35 characters, is free-format and is optional.
Payment reason - This is a maximum of 35 characters, is free-format and is optional.
Sup currency - This is a maximum of 3 characters and is optional. This gets used in the payment extract file as the Supplier currency code
Additional remit info 1 - This is a maximum of 35 characters, is free-format and is optional
Additional remit info 2 - This is a maximum of 35 characters, is free-format and is optional
Additional remit info 3 - This is a maximum of 35 characters, is free-format and is optional
Additional remit info 4 - This is a maximum of 35 characters, is free-format and is optional
Bank id - This is a maximum of 3 characters, is free-format and is optional
Branch id - This is a maximum of 3 characters, is free-format and is optional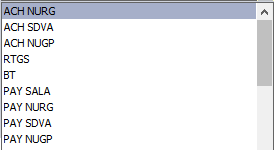
Figure 4a

Figure 4b
If the Payment approval switch has been set in the BTS control for SWIFT, when the BTS extract is run, the extract file will not be created and the user will see the screen as per figure 5
Figure 5
In order to release these payments, the BTS Payment Approval on the BTS menu can be run. This program will look as per figure 6

Figure 6
Selecting the Payment Approval button on the screen in figure 6 will release the selected batch and the BTS XML file will be created. The following message as per figure 7 will be seen that shows the user what the file name being extracted is
Figure 7
Selecting the Check Authorisation button on the screen in figure 7 will show what authorisation has already been done against this batch. Refer to the Check Authorisation tab under BTS Process
Once payment has been extracted and sent to the bank in question, the bank will supply in return "feedback" files with details as to their processing of the batches. For more information regarding this step, refer to the BTS Dashboard tab under BTS Process
Was this helpful?00
Hits: 37 - admin20-01-2020
SWIFT (Deutsche Bank)

Figure 1
Account number - This may not exceed 10 numbers
User defined customer reference - This decides what will appear on the Customer statement reference on the file that is sent to the bank: "Supplier name", "EFT number/Supplier code" or "EFT number/Supplier name".
XML dashboard path - This is the physical path where all the "feedback" return files from the bank will reside. This path needs to be accessible from SYSPRO itself and must have the correct permissions. The BTS Dashboard program (found on the new SYSPRO 7 BTS menu in SYSPRO under Transaction Processing as per Figure 2)
File name prefix - This is a maximum of 6 characters and is mandatory. This is the 1st 6 characters of the physical file name extracted by this bank format
Group header ID - This is a maximum of 20 characters and is mandatory. This is the tag to identify the company profile
BIC number - This is a maximum of 11 characters and is mandatory. This is bank BIC code for the company
Large account number - This is a maximum of 16 characters and is mandatory. BTS bank account number only stores 11 characters. As SWIFT banks require a larger account number, this field is used instead
Payment approval - If this switch is ticked, this prevents the BTS from extracting the physical XML payment file until the EFT batch is approved by authorised users - as per Figure 2
Number of level 1 authorisers - If the Payment approval is ticked, the user may enter how many level 1 authorisers are required. This is drop down that allows between 0 and 9
Number of level 2 authorisers - If the Payment approval is ticked, the user may enter how many level 2 authorisers are required. This is drop down that allows between 0 and 9
Sub-level authority allowed - If the Payment approval is ticked, the user may tick this entry allowing level 2 authorisers to function as level 1 authorisers.
Bank address line 1 - This field is optional and may contain 40 characters of the bank address line 1
Bank address line 2 - This field is optional and may contain 40 characters of the bank address line 2
Bank address line 3 - This field is optional and may contain 40 characters of the bank address line 3
Bank address line 4 - This field is optional and may contain 40 characters of the bank address line 4Country NOT USED
This option will include the vendor code in the “InstrId” tag along with the EFT number
Maputo Instrid – optionally include the vendor code in the “InstrId” tag along with the EFT number.
This process will also remove leading zero’s from the beginning of the EFT number itself.
An example would be as follows: “84-BYTMZM001” where “BYTMZM001” would represent the vendor code and “84” the EFT batch number without the leading zerosMulesoft Web Service NOT USED – Leave parameters empty
This set of parameters caters for the automatic pushing of the BTS payment XML files into the Mulesoft API solution.
This process makes use of the BTS SourceIT_ServiceIntegration.dll
Flowid – Inclusion of this Flowid will serve to activate this service and the validation of the rest of the associated parameters.
Path – Location that the XML files will be pushed by the SourceIT_ServiceIntegration.dll process
Port – Port number
Username – User ID for login
Password – Login passwordMulesoft WCF Service NOT USED – Leave parameters empty
This set of parameters is passed to a WCF service installed separately which handles the receiving of the return XML files as sent by the Mulesoft API solution.
BTS will automatically import these files into the BTS SWIFT dashboard.
Host – Local host setup
Port number – Local port number
Username – User ID for login
Password – Login password
Active – the WCF Service will check this parameter each time the service or the server is restarted and it will only start if this parameter is tickedFigure 2
If your BTS menu does not like the menu above (with this Transaction Processing menu options), please follow the instructions on our website for the BTS Installation - Initialise the BTS system (File --> Run SITINI and enter the 3 options. You will be asked if you wish to remove each in SYSPRO. Select No and the BTS installed products will be amended. Then you should see the Transaction Processing option under the BTS menu. Without these 2 functions, the SWIFT Dashboard and Payment Approval processes cannot be controlled on site)
This BTS Bank format is available for all African Nationalities:
- RSA (Republic of South Africa)
- BWP (Botswana)
- ZAM (Zambia)
- UG (Uganda)
- KEN (Kenya)
- GH (Ghana)
- MZ (Mozambique)
- TZ (Tanzania)
There are extra details required when using this BTS bank format. When maintaining the Supplier and/or Cash Book beneficiary in SYSPRO, the following screen as per Figure 3 will be seen:

Figure 3
Payment type - May be selected from the available drop down list as per Figure 4
BIC number - This is a maximum of 11 characters and is mandatory. This is the BIC code for the Supplier
Country code - This is a maximum of 2 character country code and is mandatory. There is no validation
Reference - This is a maximum of 35 characters and is mandatory. This is a free-format supplier reference
Additional reporting - This is a maximum of 140 characters and is optional. Selecting the browse button will show a list of available currencies as per Figure 2
Account number - This is a maximum of 35 characters, is free-format and is optional.
Payment reason - This is a maximum of 35 characters, is free-format and is optional.
Sup currency - This is a maximum of 3 characters and is optional. This gets used in the payment extract file as the Supplier currency code
Additional remit info 1 - This is a maximum of 35 characters, is free-format and is optional
Additional remit info 2 - This is a maximum of 35 characters, is free-format and is optional
Additional remit info 3 - This is a maximum of 35 characters, is free-format and is optional
Additional remit info 4 - This is a maximum of 35 characters, is free-format and is optional
Bank id - This is a maximum of 3 characters, is free-format and is optional
Branch id - This is a maximum of 3 characters, is free-format and is optional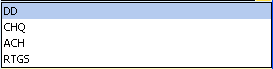
Figure 4
If the Payment approval switch has been set in the BTS control for SWIFT, when the BTS extract is run, the extract file will not be created and the user will see the screen as per figure 5
Figure 5
In order to release these payments, the BTS Payment Approval on the BTS menu can be run. This program will look as per figure 6

Figure 6
Selecting the Payment Approval button on the screen in figure 6 will release the selected batch and the BTS XML file will be created. The following message as per figure 7 will be seen that shows the user what the file name being extracted is
Figure 7
Selecting the Check Authorisation button on the screen in figure 7 will show what authorisation has already been done against this batch. Refer to the Check Authorisation tab under BTS Process
Once payment has been extracted and sent to the bank in question, the bank will supply in return "feedback" files with details as to their processing of the batches. For more information regarding this step, refer to the BTS Dashboard tab under BTS Process
Was this helpful?00
Hits: 33 - admin20-01-2020
Barclays.net UK (Barclays)
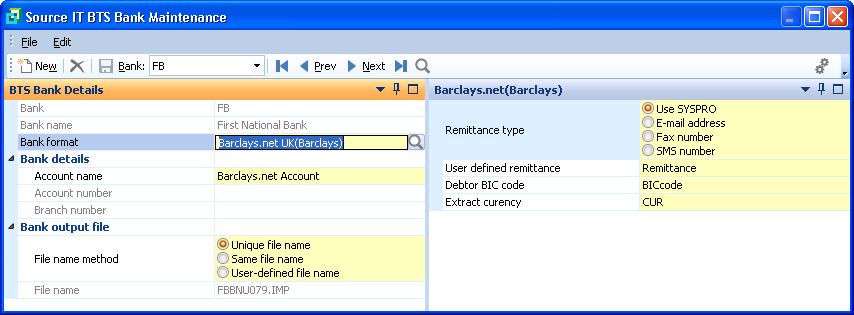
Figure 1
Remittance type - This determines what must be extracted as the remittance. Options are: "Use SYSPRO" (which will use the information as entered and selected in SYSPRO), "E-mail address", "Fax number" or "SMS number" . If anything other than "Use SYSPRO" is selected, the user will need to enter the User defined remittance below
User defined remittance - This field is only applicable if the previous Remittance type field has not been set to "Use SYSPRO". The rules behind this entered field is:
- "E-mail address" - 100 characters for e-mail address to be used as the remittance. This is not validated
- Fax/SMS number - Must start with '+' and be followed by at least 11 numbers that do not start with zero. A valid example is +27117814000. If the Fax or SMS number is invalid, the user will see the message as per Figure 2
Figure 2
Debtor BIC code - This caters for 8 characters and is used in the extracted payment file
Extract currency - This caters for 3 characters and is used in the extracted payment file
There are extra details required when using this BTS bank format. When maintaining the Supplier and/or Cash Book beneficiary in SYSPRO, the following screen as per Figure 3 will be seen:

Figure 3
BIC code - This field is mandatory and has a maximum size of 8 characters
Account number - This field is mandatory and has a maximum size of 34 characters
Charging instructions - Three options are available - one must be selected
Payment reference - This field is mandatory and has a maximum size of 25 characters
Beneficiary name - This field is optional and has a maximum size of 34 characters
This BTS Bank format is available for the following SYSPRO Nationalities:
- RSA (Republic of South Africa)
- UK (United Kingdom)
Was this helpful?00
Hits: 27 - admin21-01-2020
I&M (I&M Bank)

Figure 1
There are no extra parameters required for this bank format
This BTS Bank format is available for the following SYSPRO Nationalities:
- KEN (Kenya)
There are extra details required when using this BTS bank format. When maintaining the Supplier and/or Cash Book beneficiary in SYSPRO, the following screen as per Figure 2 will be seen:

Figure 2
Reference number - This field is mandatory and may contain a maximum of 10 characters
Payment details - This field is mandatory and may contain a maximum of 80 characters
Bank name - This field is mandatory and may contain a maximum of 50 characters
Bank code - This field is mandatory and may contain a maximum of 6 characters
Branch name - This field is mandatory and may contain a maximum of 50 characters
Branch code - This field is mandatory and may contain a maximum of 6 characters
Account number - This field is mandatory and may contain a maximum of 20 characters
Was this helpful?00
Hits: 21 - admin21-01-2020
Local PayBulk (Barclays)

Figure 1
Bank code - This is a 3 character numeric field and may not be zero.
Branch code - This is a 3 character numeric field and may not be zero.
Exclude EFT number from bank file - Yes (if this check box is ticked)/No (if the check box is not ticked).
Supplier branch from EFT-USER1 field - Yes (if this check box is ticked) will extract the Branch from EFT-USER-DEFINE1 field/No (if the check box is not ticked) will extract the Supplier Branch.
BTC variations - This has a drop down selection that is available and would look like Figure 2
Figure 2
This BTS Bank format is available for the following SYSPRO Nationalities:
- RSA (Republic of South Africa)
There are extra details required when using this BTS bank format. When maintaining the Supplier and/or Cash Book beneficiary in SYSPRO, the following screen as per Figure 3 will be seen:
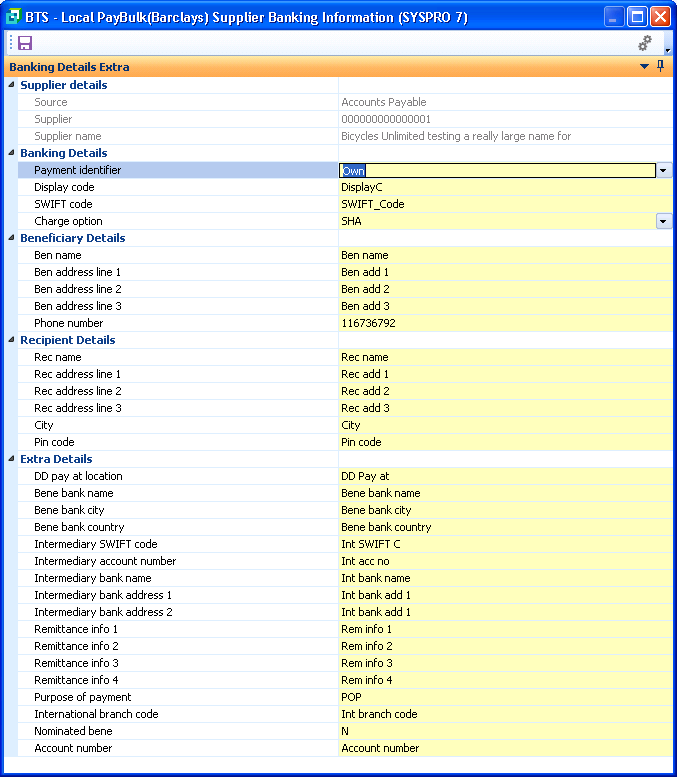
Figure 3
Payment identifier - May be selected from the available drop down list as per Figure 4 (from now on the abbreviation of the value for the field will be used)
Display code - This is a maximum of 8 characters and is mandatory if Payment identifier is OW or IN
SWIFT code - This is a maximum of 11 characters and is mandatory if Payment identifier is SW
Charge code - May be selected from the available drop down list as per Figure 5. This may not be N/A or spaces if Payment identifier is SW
Ben name - This is a maximum of 35 characters and is optional
Ben address line 1 - This is a maximum of 100 characters and is mandatory if Payment identifier is DD
Ben address line 2 - This is a maximum of 100 characters and is mandatory if Payment identifier is DD
Ben address line 3 - This is a maximum of 100 characters and is mandatory if Payment identifier is DD
Ben phone number - This is a maximum of 11 numbers and is mandatory if Payment identifier is DD
Rec name - This is a maximum of 35 characters and is optional
Rec address line 1 - This is a maximum of 35 characters and is mandatory if Payment identifier is DD
Rec address line 2 - This is a maximum of 35 characters and is mandatory if Payment identifier is DD
Rec address line 3 - This is a maximum of 35 characters and is mandatory if Payment identifier is DD
City - This is a maximum of 25 characters and is mandatory if Payment identifier is DD
Pin code - This is a maximum of 8 characters and is mandatory if Payment identifier is DD
DD pay at location - This is a maximum of 35 characters and is mandatory if Payment identifier is DD
Bene bank name - This is a maximum of 100 characters and is mandatory if Payment identifier is LO or SW
Bene bank city - This is a maximum of 100 characters and is optional
Bene bank country - This is a maximum of 100 characters and is optional
Intermediary SWIFT code - This is a maximum of 11 characters and is optional
Intermediary account number - This is a maximum of 34 characters and is optional
Intermediary bank name - This is a maximum of 35 characters and is optional
Intermediary bank address 1 - This is a maximum of 35 characters and is optional
Intermediary bank address 2 - This is a maximum of 35 characters and is optional
Remittance info 1 - This is a maximum of 35 characters and is optional
Remittance info 2 - This is a maximum of 35 characters and is optional
Remittance info 3 - This is a maximum of 35 characters and is optional
Remittance info 4 - This is a maximum of 35 characters and is optional
Purpose of payment - This is a maximum of 50 characters and is mandatory if Payment identifier is SW
International branch code - This is a maximum of 50 characters and is mandatory if Payment identifier is SW
Nominated bene - This is a maximum of 1 character and is optional
Account number - This is a maximum of 32 characters and is mandatory if Payment identifier is LO

Figure 4
Abbreviations for Payment identifier
Domestic Draft = DD
International = SW
Own = OW
Internal = IN
Local = LO
Figure 5
Was this helpful?00
Hits: 25 - admin22-01-2021
SWIFT (Barclays Bank)

Figure 1
Account number - This may not exceed 10 numbers
User defined customer reference - This decides what will appear on the Customer statement reference on the file that is sent to the bank: "Supplier name", "EFT number/Supplier code" or "EFT number/Supplier name".
XML dashboard path - This is the physical path where all the "feedback" return files from the bank will reside. This path needs to be accessible from SYSPRO itself and must have the correct permissions. The BTS Dashboard program (found on the new SYSPRO 7 BTS menu in SYSPRO under Transaction Processing as per Figure 2)
File name prefix - This is a maximum of 6 characters and is mandatory. This is the 1st 6 characters of the physical file name extracted by this bank format
Group header ID - This is a maximum of 20 characters and is mandatory. This is the tag to identify the company profile
BIC number - This is a maximum of 11 characters and is mandatory. This is bank BIC code for the company
Large account number - This is a maximum of 16 characters and is mandatory. BTS bank account number only stores 11 characters. As SWIFT banks require a larger account number, this field is used instead
Payment approval - If this switch is ticked, this prevents the BTS from extracting the physical XML payment file until the EFT batch is approved by authorised users - as per Figure 2
Number of level 1 authorisers - If the Payment approval is ticked, the user may enter how many level 1 authorisers are required. This is drop down that allows between 0 and 9
Number of level 2 authorisers - If the Payment approval is ticked, the user may enter how many level 2 authorisers are required. This is drop down that allows between 0 and 9
Sub-level authority allowed - If the Payment approval is ticked, the user may tick this entry allowing level 2 authorisers to function as level 1 authorisers.
Bank address line 1 - This field is optional and may contain 40 characters of the bank address line 1
Bank address line 2 - This field is optional and may contain 40 characters of the bank address line 2
Bank address line 3 - This field is optional and may contain 40 characters of the bank address line 3
Bank address line 4 - This field is optional and may contain 40 characters of the bank address line 4Country NOT USED
This option will include the vendor code in the “InstrId” tag along with the EFT number
Maputo Instrid – optionally include the vendor code in the “InstrId” tag along with the EFT number.
This process will also remove leading zero’s from the beginning of the EFT number itself.
An example would be as follows: “84-BYTMZM001” where “BYTMZM001” would represent the vendor code and “84” the EFT batch number without the leading zerosMulesoft Web Service NOT USED – Leave parameters empty
This set of parameters caters for the automatic pushing of the BTS payment XML files into the Mulesoft API solution.
This process makes use of the BTS SourceIT_ServiceIntegration.dll
Flowid – Inclusion of this Flowid will serve to activate this service and the validation of the rest of the associated parameters.
Path – Location that the XML files will be pushed by the SourceIT_ServiceIntegration.dll process
Port – Port number
Username – User ID for login
Password – Login passwordMulesoft WCF Service NOT USED – Leave parameters empty
This set of parameters is passed to a WCF service installed separately which handles the receiving of the return XML files as sent by the Mulesoft API solution.
BTS will automatically import these files into the BTS SWIFT dashboard.
Host – Local host setup
Port number – Local port number
Username – User ID for login
Password – Login password
Active – the WCF Service will check this parameter each time the service or the server is restarted and it will only start if this parameter is tickedFigure 2
If your BTS menu does not like the menu above (with this Transaction Processing menu options), please follow the instructions on our website for the BTS Installation - Initialise the BTS system (File --> Run SITINI and enter the 3 options. You will be asked if you wish to remove each in SYSPRO. Select No and the BTS installed products will be amended. Then you should see the Transaction Processing option under the BTS menu. Without these 2 functions, the SWIFT Dashboard and Payment Approval processes cannot be controlled on site)
This BTS Bank format is available for all African Nationalities:
- RSA (Republic of South Africa)
- BWP (Botswana)
- ZAM (Zambia)
- UG (Uganda)
- KEN (Kenya)
- GH (Ghana)
- MZ (Mozambique)
- TZ (Tanzania)
There are extra details required when using this BTS bank format. When maintaining the Supplier and/or Cash Book beneficiary in SYSPRO, the following screen as per Figure 3 will be seen:

Figure 3
Payment type - May be selected from the available drop down list as per Figure 4
BIC number - This is a maximum of 11 characters and is mandatory. This is the BIC code for the Supplier
Country code - This is a maximum of 2 character country code and is mandatory. There is no validation
Reference - This is a maximum of 35 characters and is mandatory. This is a free-format supplier reference
Additional reporting - This is a maximum of 140 characters and is optional. Selecting the browse button will show a list of available currencies as per Figure 2
Account number - This is a maximum of 35 characters, is free-format and is optional.
Payment reason - This is a maximum of 35 characters, is free-format and is optional.
Sup currency - This is a maximum of 3 characters and is optional. This gets used in the payment extract file as the Supplier currency code
Additional remit info 1 - This is a maximum of 35 characters, is free-format and is optional
Additional remit info 2 - This is a maximum of 35 characters, is free-format and is optional
Additional remit info 3 - This is a maximum of 35 characters, is free-format and is optional
Additional remit info 4 - This is a maximum of 35 characters, is free-format and is optional
Bank id - This is a maximum of 3 characters, is free-format and is optional
Branch id - This is a maximum of 3 characters, is free-format and is optionalFigure 4
If the Payment approval switch has been set in the BTS control for SWIFT, when the BTS extract is run, the extract file will not be created and the user will see the screen as per figure 5
Figure 5
In order to release these payments, the BTS Payment Approval on the BTS menu can be run. This program will look as per figure 6
Figure 6
Selecting the Payment Approval button on the screen in figure 6 will release the selected batch and the BTS XML file will be created. The following message as per figure 7 will be seen that shows the user what the file name being extracted is
Figure 7
Selecting the Check Authorisation button on the screen in figure 7 will show what authorisation has already been done against this batch. Refer to the Check Authorisation tab under BTS Process
Once payment has been extracted and sent to the bank in question, the bank will supply in return "feedback" files with details as to their processing of the batches. For more information regarding this step, refer to the BTS Dashboard tab under BTS Process
Was this helpful?00
Hits: 23
Bank Reconciliation System Documentation 
-
1.BRS Installation
- nikki18-10-2016
The BRS installation files are specific for each version of SYSPRO and are available for download from the Source IT website: http://www.source-it.co.za/product-category/software/brs/
You will be required to login using your once-off registered user account to perform the download.
Simply add the required download file to the "cart" and follow the "checkout" process to complete the order.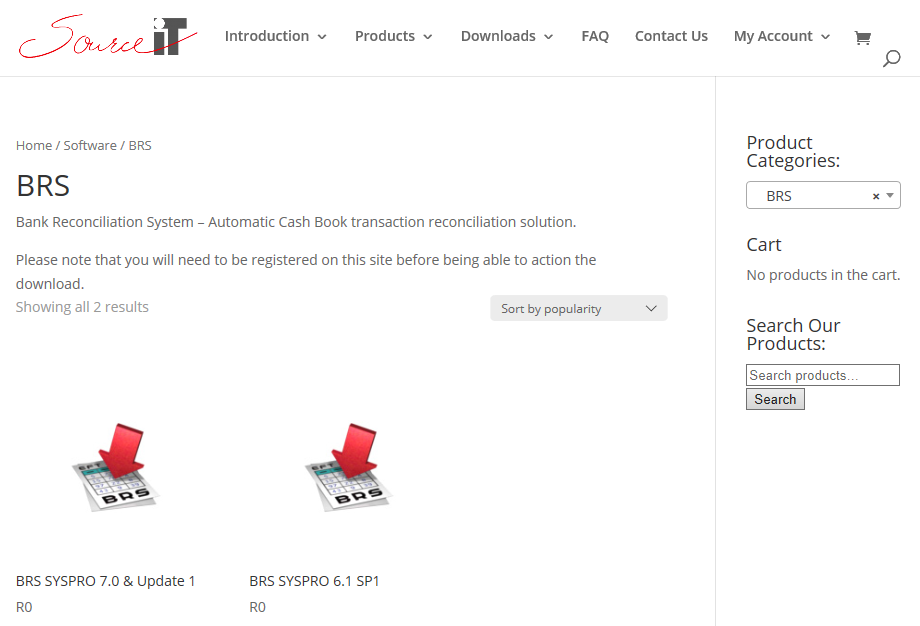
An email will be sent to your email address containing hyperlinks that will facilitate the download.
Alternatively, these "orders" with the hyperlinks will also be available on "My Account" page once you are logged in.
Was this helpful?00
Hits: 211 - nikki18-10-2016
Load Programs onto SYSPRO Server
To install the BRS product, follow the same process as per a SYSPRO port upgrade.
Simply unzip the downloaded file place the executable in the SYSPRO base upgrade directory on the Server.
Once that is done, logon on to SYSPRO as an administrator and the following message will be displayed as per Figure 1.1.1Figure 1.1.1
Yes – a screen as per Figure 1.1.2 will be displayed.
No – the installation will abort.
Figure 1.1.2
This screen will list all the BRS program files and will display the SYSPRO folder on the server into which they will be placed.
Select the “Start Upgrade” button and the message as per Figure 1.1.3 will be displayed.
Figure 1.1.3
Yes – the associated BRS program files will be loaded into their relevant SYSPRO folders on the SYSPRO server.
No – the installation will abort.Once the installation has completed successfully, a message as per Figure 1.1.4 will be displayed and it will automatically log you out of SYSPRO.
Figure 1.1.4
Was this helpful?00
Hits: 174 - nikki18-10-2016
Initialise the BRS System
The BRS programs now reside in the relevant SYSPRO directories and need to be initialised.
This program needs to be run straight after the BRS programs have been installed. It will set up the following:- BRS menu in SYSPRO
- BRS programs security options in SYSPRO
- BRS file re-indexing options in SYSPRO
To run the initialisation process the following needs to be done:
- Login into SYSPRO as an Administrator
- From the SYSPRO menu, select File / Run and a screen as per Figure 1.2.1 will be displayed.
Figure 1.2.1
Next to ‘Program to run:’ type in SITINI and press the “OK” button
A screen as per Figure 1.2.2 will be displayed.Figure 1.2.2
The following options need to be ticked for BTS to be initialised successfully:
- Create or remove menu
- Create or remove security access
- Create or remove re-indexing of files
If any of the menu, security access or re-indexing of files already exist in the relevant files, this process will remove them.
The Source IT initialisation process will always ascertain whether a custom programs directory has been set up and will use an existing one. If one has not been set up and the System administrator does not wish to manually create one, this program will automatically create one and update the relevant fields in SYSPRO. This directory will be created as a sub-directory within the main SYSPRO directory on the server and will be called ‘cusprog’. (See Figure 1.2.3)
Figure 1.2.3
Create or remove menu - this option will setup the BRS menu in SYSPRO as per Figure 1.2.4.
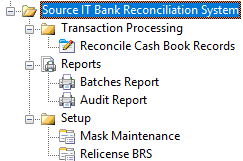
Figure 1.2.4
If the BRS menu already exists, a warning message will be displayed to the user as per Figure 1.2.5.
Figure 1.2.5
Create or remove security access - this option will setup the BRS programs into the SYSPRO security access menu. To deny/allow access to the various BRS programs the following steps need to be taken:
From the SYSPRO menu select “Setup” > “Groups…” then select a group that will be using the BRS system and select “Edit” and “Change…” and a screen as per Figure 1.2.6 will be displayed.

Figure 1.2.6
On the "Security Access" window, locate the "BRS Conversion System" module, tick the "Access Allowed" tickbox to give permissions to this Group.
Create or remove re-indexing files - this option will add the BRS data files to the SYSPRO Data Dictionary so that they may be re-indexed in the same manner as the SYSPRO ISAM data files. Please note that if you are running SQL, all BRS files will still be created as C-ISAM and will reside in the SYSPRO data directory.
If the BRS programs already exist in the SYSPRO security access files, a
warning message will be displayed to the user as per Figure 1.2.7Figure 1.2.7
To re-index the BRS files the following needs to be done:
From the SYSPRO menu, select “File” > “Re-index data files” and a list of all SYSPRO data files will be displayed. Go to the end of the list and the BRS files should be listed as per Figure 1.2.8
Figure 1.2.8
If the BRS files already exist in the SYSPRO data dictionary, a warning message will be displayed to the user as per Figure 1.2.9
Figure 1.2.9
Once the Source IT initialisation program has successfully completed, the following message will be displayed as per Figure 1.2.10
Figure 1.2.10
OK – will automatically log the user out of the SYSPRO session.
NOTE:
When running SITINI, either to create or remove options from SYSPRO, please ensure that the correct version of SITPRG, SITMEN and SITFIL are sitting in SYSPRO’s programs directory. There are several Source IT packages using a generic installation, one overwrites the other.Was this helpful?00
Hits: 200 - nikki18-10-2016
Licensing Process
If the user wishes to license BRS or re-license BRS, the program is found under the "Source IT Bank Reconcilliation System" menu as per Figure 2.4.5

Figure 2.4.5
If it’s the first time BRS is being run, Figure 2.4.5.2 will be displayed.
Figure 2.4.5.2
Contact your SYSPRO distributor or Source IT to obtain license codes.
To contact Source IT, you may email your request to cotact us via the Source IT Contact page or alternatively phone +27 11 781 4000.By clicking on OK, Figure 2.4.5.3 will be displayed.

Figure 2.4.5.3
Expiry date – enter the license expiry date as. To ensure correct date format, make use of the date browser to select the expiry date.
New Code – enter the license code as issued by the Source IT offices.
Save – will validate the entered values and verify if the license code is valid for the expiry date based on specifics pertaining to the SYSPRO registered company currently logged into. If deemed valid, the information will be stored as entered.
Close – will exit the program without validating the information on the screen. If the “Ignore warnings” tickbox status was modified, the new setting will be applied to the license validation process in the future.The license process is written to provide a warning message each time it is run in the expiry month indicating the number of days until the license expires (see figure 2.4.5.4).
Figure 2.4.5.4
The following information needs to be relayed to the relevant person who will be obtaining your license codes with the exact spelling and case (upper/lower) as per the example in figure 1.3
- Company
- System
- SYSPRO users
- Platform (ISAM)
- SYSPRO version (7.0)
Ensure that both the “Ignore warnings” and “Evaluation License” tickboxes have been UNTICKED.
The relevant “Expiry date” and “New Code” values must be entered and the “Save” button selected.The BRS User Manual will explain the detailed functioning of the various BRS processes.
Was this helpful?00
Hits: 98 - admin28-11-2018
If you have been running BRS since before December 2018 and you have subsequently downloaded the current BRS, you will notice that the product has evolved somewhat.
If your previously unreconciled bank statement transactions are not showing in the new BRS solution, there is a need to manually run an import utility.
Please contact the Source IT offices or email query@source-it.co.za and we will revert back to you with the appropriate solution.
Was this helpful?00
Hits: 71 - nikki18-10-2016
1 System Description
The Bank Reconciliation System (BRS) is an emulation of the SYSPRO Automatic Bank Reconciliation utility which is found within the Cash Book Menu. BRS translates the electronic statement from the associated financial institution and then matches the transactions on the electronic statement against the SYSPRO Cash Book transactions. When a correct match is determined, the relevant SYSPRO Cash Book transaction is flagged as reconciled. Un-reconciled bank statement transactions are stored by the BRS module for future matching attempts. All transactions, whether reconciled or not are represented on a
report.2 System Overview
The automatic BRS module allows for the user to select the definition of the input electronic statement file from the financial institution allowing the BRS module to correctly translate the statement. This is a selection ONLY option and the associated list contains the different bank file types that the user must select. It is important for the user to know which bank file they are using (i.e. it is not sufficient to know which bank you use, you must know whether the file is
in Ascii or Delimited format etc.)Once the user has selected the file definition, a program that is linked to this file definition is automatically used for the translation. This program takes the electronic statement file from the bank and converts it into a standard layout to facilitate the reconciliation of the transactions.
Make sure that the file received from the bank is known to you before you start this process. There are also multiple electronic statement formats from some banks, so be sure to know what the layout is of the file you are going to
process.
If you chose the incorrect bank format for the file you want to reconcile, the reconciliation process will not be successful and will produce a report indicating the errors encountered.
The reason for this functionality is purely because the different banks use completely different layouts for their bank statements. The objective of this solution is to take the different layouts from the different banks and convert the records into the layout that the automatic Bank Reconciliation System program requires.The user may import a file residing on either the Client or the Server machine. All the results from the reconciliation attempt using the statement transactions are represented on an associated report:
- Statement rejections
- Reconciled Cash Book
- Un-reconciled Cash Book
All un-reconciled transactions are written into the BRS module allowing for future attempts to reconcile the transactions against the SYSPRO Cash Book transactions. This is relevant when the SYSPRO Cash Book transactions are only
generated subsequent to importing those same transactions from the statement file.3 System Evolution and the Future
The latest version of the automatic BRS module marks the move away from the standard SYSPRO Automatic Bank Reconciliation in that all the required settings are contained within the BRS module.
There have also been some license changes so depending on which version is being run and which version is being upgraded to, there may be a request to get the updated license codes from the Source IT offices.
Originally and based on the core SYSPRO solution, the BRS module would not retain the transactions from the bank statement that were not reconciled during a statement import whereas the current solution will perform this function.
The next versions of BRS are looking to incorporate the following enhancements and functionality:
- User interface will be redesigned to completely emulate the current
SYSPRO interface. - Provision will be made for the user to manually link transactions from both
the bank statement and SYSPRO Cash Book to allow simplistic
reconciliation of transactions that have not been matched due to factors
such as duplicate values. - Generation of SYSPRO Cash Book transactions in SYSPRO based on the
electronic bank statement transactions. In this case, the SYSPRO Cash
Book Transaction has not yet been captured when the associated bank
transaction is encountered and the user may initiate the creation of the
SYSPRO transactions from the BRS module.
Was this helpful?00
Hits: 59 - nikki24-10-2016
Once BRS has been installed and the Source IT initialisation program has been run, the following menu in Figure 3.1.1 should have been added to the SYSPRO menu.

Figure 3.1.1
Was this helpful?00
Hits: 52 - nikki24-10-2016
Once the user selects the Reconcile Cash Book Records option, a screen as per figure 2.2.1.1 will be displayed.
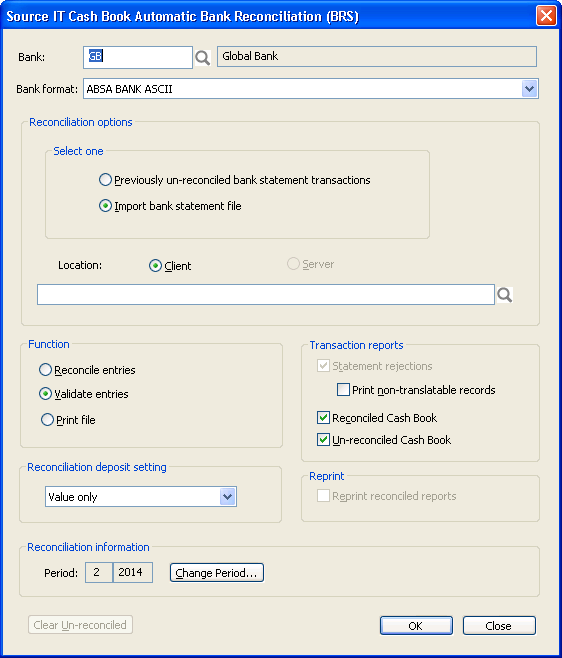
Figure 2.2.1.1
Bank – enter the associated SYSPRO bank code that the transactions are to be reconciled against. The standard SYSPRO Bank browse is catered for.
Bank format – this dropdown will list the available statement formats for the existing financial institutions (see figure 2.2.1.2). Select the correct format from the list.
Reconciliation options:
- Previously un-reconciled bank statement transactions – selecting this option will process any previously imported transactions that were not reconciled.
- Import bank statement file – selecting this option will process the statement import file as specified in the “Location” entry.
Location – if SYSPRO is being run as stand-alone, the “Client” will be the only option available and the “Server” option will be disabled. If SYSPRO is being run as Client/Server, the user may select either the “Client” or the “Server” option depending on the location of the file
Function:
- Reconcile entries – selecting this option UPDATES the un-reconciled SYSPRO Cash Book records matched on the bank statement or previously non-reconciled transactions by flagging them as reconciled. This will report on the Bank statement rejections (not optional) and any/both of the 2 other available reports the user selects.
- Validate entries – selecting this option will report on the Bank statement or previously non-reconciled transaction rejections (not optional) and any/both of the 2 other available reports the user selects. This function does NOT update the SYSPRO Cash Book records, but will report as if the reconciliation has been processed.
All the reports run from this function will have the words “VALIDATION ONLY” in the report headings
The focus will return to the screen in Figure 2.2.1.1 after the reports have
completed - Print file – This option is only available if importing new transactions. Selecting this option prints out the records on the bank statement or previously non-reconciled transactions without validating them against the SYSPRO Cash Book records. The report will show all the records on the bank statement with INVALID records shown with all X’s. There will be a number at the beginning of each line denoting the record line number of the bank statement file.
The focus will return to the screen in Figure 2.2.1.1 after the report has completed
Transaction Reports:
- Statement rejections – This report will not be printed if the “Print file” function is selected and is only optional when you are reprinting. Otherwise, this report will always be produced. This report will behave similar to the “Print file” function, but will only show the records of the bank statement that were NOT matched to the Cash Book records as well as a reason they were not matched.
- Print non-traslatable recs – All records on the Bank statement that have been rejected will appear on the report if you have this option ticked. The valid layout records that have been rejected will have an “R” in the Type. The blank or miscellaneous layout records will have an “X” in the Type as well as XXX in all the fields as they are non-translatable.
- Reconciled Cash Book – This report shows the Cash Book records reconciled against the electronic bank statement file. The number at the beginning of each line represents the physical bank statement record that has been reconciled.
- Un-reconciled Cash Book – This report shows the records that remain un-reconciled in the Cash Book after the reconciliation process.
Unselect the Reconciled and/or Un-reconciled Cash Book reports if you do not wish to print them. You will however be able to reprint these reports subsequent to the execution of the “Reconcile entries” process for the specific statement file processed.
All 3 reports will show totals of records read and valid records, as well as the full path name of the Bank statement file and whether it was found on the Client or Server.
Reconciliation deposit setting – this setting will be used as the matching rules associated to how the transactions on the statement are reconciled against the Cash Book transactions.
- Value only – select this to reconcile transactions automatically only if the entry at the value field in the statement import file matches the entry at the value field in the Cash Book transaction file.
- Value, date and reference – select this to reconcile transactions automatically only if the entries at the value, date and reference fields in the statement import file match the entries at the value, date and reference fields in the Cash Book transaction file.
- Value and date – select this to reconcile transactions automatically only if the entries at the value and date fields of the statement import file match the entries at the value and date fields of the Cash Book transaction file.
NOTE: Withdrawal transactions are primarily matched by value and the cheque number on the bank statement which will be compared against the associated SYSPRO Cash Book value and cheque number.
Reprint reconciled reports – this tick box will be available for selection if the bank details selected have been previously run though the “Reconcile entries” function.
Change period... – this button will bring up a window as per figure 2.2.1.3 which will allow for the posting period to be changed to current SYSPRO period or prior periods one or two. This SYSPRO period is posted against the Cash Book
transactions when they are flagged as reconciled.Clear un-reconciled – this button will clear all previously un-reconciled bank statement transactions from the Bank Reconciliation System for the specified Bank and Bank format.
OK – selecting this button will process your selected function and run your selected reports.
Close – selecting this button will close the screen, without processing anything on the screen.

Figure 2.2.1.2
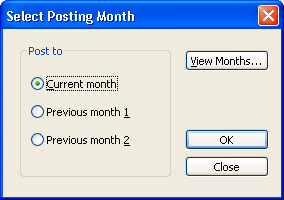
Figure 2.2.1.3
Was this helpful?00
Hits: 86